So I was wandering through Tumblr (as I do at least once a day, occasionally leaving evidence that I’ve been there) and ran across someone’s rather plaintive message to Neil Gaiman:
Why did you stop making bagels?
What did the bagels ever do to you?
XD
Neil came back in the linked thread with a perfectly sound explanation (he went to New Zealand and left his sourdough starter behind) and went on to reload his recipe, along with a brief discussion of his method for a lovely solid rye sourdough bagel. And there was much rejoicing.
That said… after the last couple of years, some of us could be forgiven for being, frankly, up to here with sourdough. Peter and I have been routinely baking our bread at home bi- or tri-weekly since 2010 or thereabouts (using this recipe) and I’m happy to say that the lockdown-associated bread shortages of the early pandemic weren’t something that affected us particularly… except that sometimes yeast was harder to find for a little while. And when people heard about that, the first thing they usually said, in great excitement, was “But have you heard about sourdough?!” After a while this got kind of old. I’m glad that phase seems to have passed.
That said: Neil’s opinions have for a long while struck me as worth listening to, so it seemed like this recipe was something I should look into… since as a relocated New Yorker I’ve long had a bit of a thing for rye baking in general, and a good Jewish rye loaf in particular. So, dark rye bagels? Absolutely. Time to get busy.
The only problem at my end (since this recipe only came up on my Tumblr dash last week) was that there hadn’t been time to generate a sourdough of any great vintage… and I didn’t feel like waiting around. There was cream cheese in the fridge getting lonely.
So I cheated, and adapted Neil’s recipe to move a little faster for the initially-sourdough-starterless. This take isn’t going to perfectly duplicate Neil’s take, but it’s close enough to it to be considered (at the very least) an affectionate fanfic version.
The ingredients are essentially the same as those in Neil’s notes, but with a little spoofing in the initial stage. Here’s how his original take opens:
- 100 ml starter
- 200 grams rye flour
- 220 ml water
- Mix well, cover with cling film, leave overnight.
The only problem here comes if you don’t have any starter (which I didn’t). So I made a simple pre-ferment along the lines of a levain or sponge. A true levain would itself be made of a little sourdough, but it’s possible to fake it if you’re in a rush or temporarily bereft of true sourdough starter. ]
The levain consisted of:
- 100g of flour (either all rye, or half rye, half white [wheat] flour)
- 100 ml of water
- 1 12-g package of instant dry yeast
- 1 teaspoon sugar
I mixed the yeast and the flour together in a jar, added the water, and beat it all together: then put the jar’s lid loosely on it and put it in a warm spot (in this case, near the radiator by my desk in the living room) to allow the yeast time to wake up and get active. If I’d been more patient I’d have left it for four to six hours, but in this case the yeast got very active very quickly, and it seemed to me as if two hours would be enough. Your yeast’s level of activity may differ, of course (especially if you’ve had it around for a little while). But generally speaking the sugar will kick the yeast into action without too much trouble.
When the mixture has bubbled up at least enthusiastically enough for what’s in the jar to double, and you’ve got all your other ingredients together, stir the starter down. Mix into it:
- 1 tablespoon of maple syrup (or honey or agave syrup or molasses…), mixed into 2 tablespoons of water
(If like me you’re someone who has trouble with fruit syrups, the molasses will work well with this. Or you might want to use bakers’ malt syrup instead.)
Then combine the dry ingredients in a large bowl:
- 50g buckwheat flour
- 50g barley flour
- 300g rye flour
- 1 tsp sea salt
- 1/2 package instant dry yeast
When these are well combined, dump all the liquid ingredients into the dry ingredients and mix together very well. You should get a very stiff dough; toward the end of the process you may find it easier to mix it with your hands than with a spoon. (If for some reason it feels too sloppy, add a little more rye flour, a tablespoon or so at a time, until it firms up.) Here’s more or less what it’ll look like.
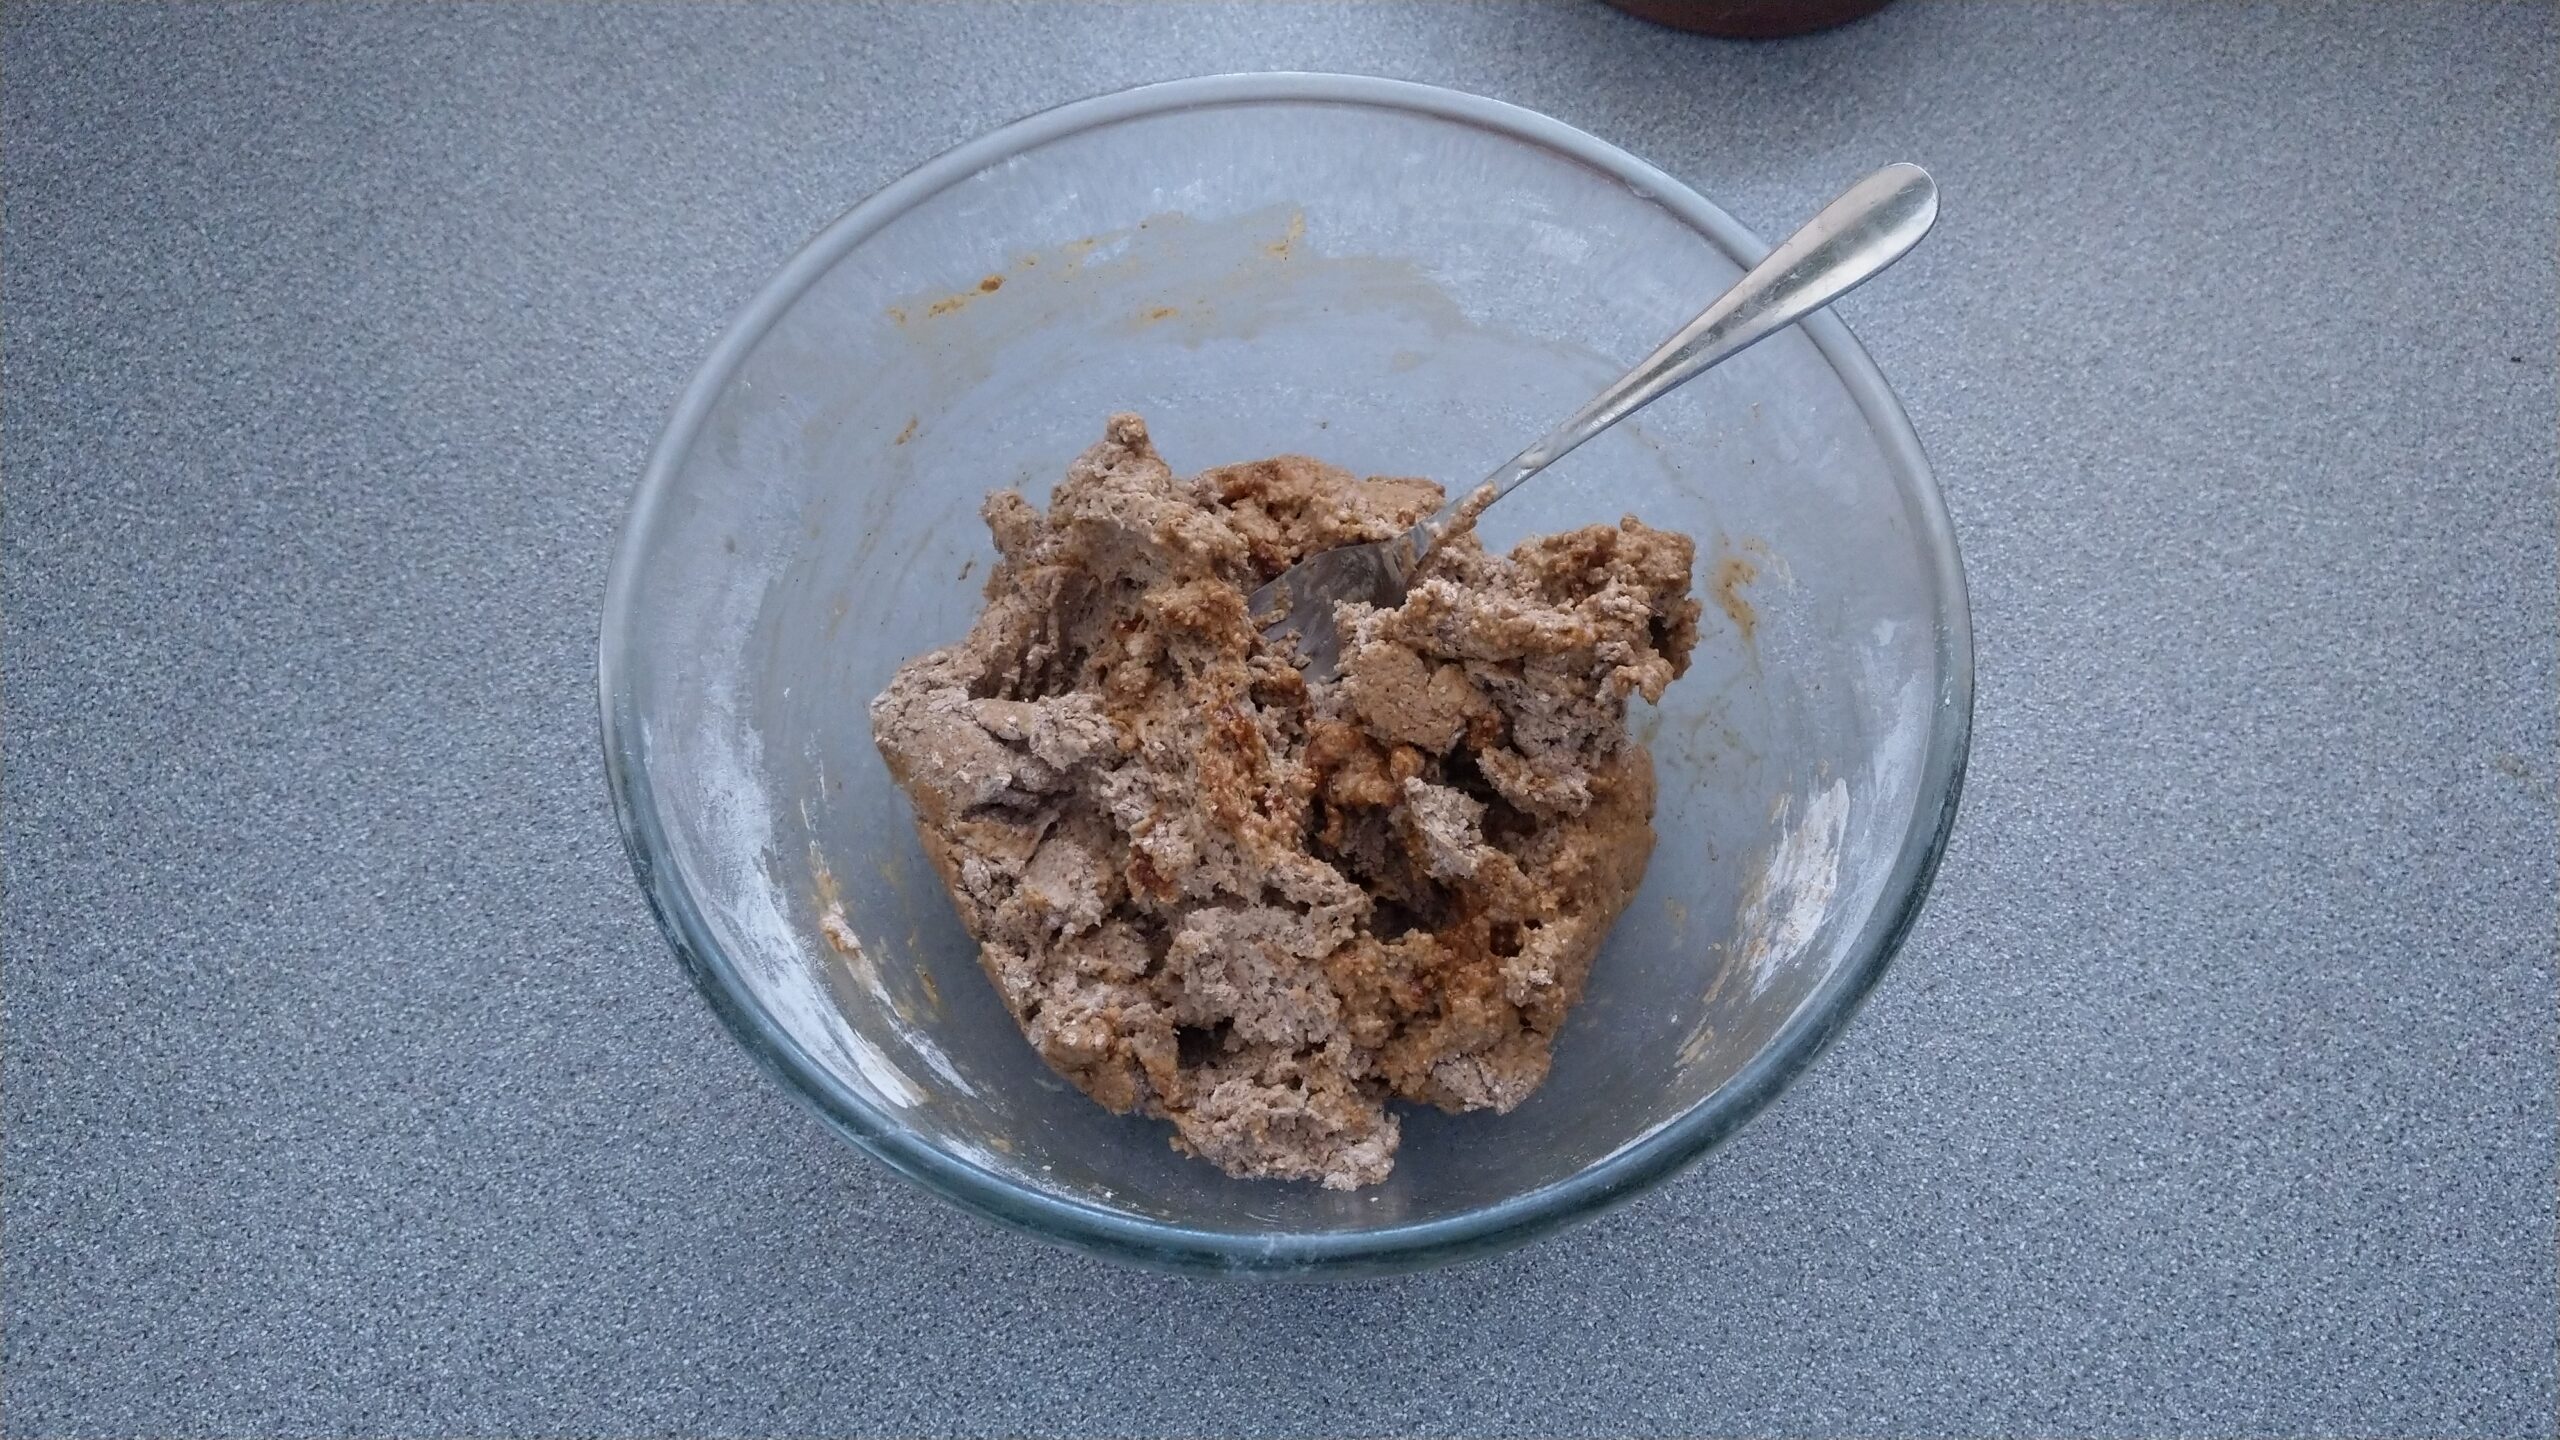
When you’ve finished the mixing, cover the bowl with plastic wrap / clingfilm or a shower cap and leave in a warm place for at least a couple of hours. Don’t expect this dough to double up the way a bread dough will—there’s nowhere near enough gluten in it for that. It’ll swell a bit, and if you’ve left fingerprints in it, they’ll start to flatten out, but that’s about it.
When the rising time is done, find a big pot (a wide one is best so as not to crowd the bagels; they need room to cruise around while they’re boiling. I used our biggest Le Creuset-ish casserole). Fill the pot with water and put it on to boil. You want a gentle boil for this at first, just up from the simmer. Add another tablespoon of your preferred syrup to it when it comes up to the boil. …Also: prepare a medium-sized baking tray by lining it with baking parchment and sprinkling it with flour or semolina.
Now preheat your oven to 220C / 450F (for a regular oven (or 200C / 400F for a fan oven), and position a rack in the middle of it.
Fill a small water bowl to wet your hands in (and maybe have some paper towels ready too, because this business can get fairly sticky). Wet your hands and pull out a lump of dough about the size of a baseball or cricket ball. Roll it between your hands without compressing it too much: then flatten it gently between your hands into a thick-hamburger-ish shape. With two or three fingers, push a hole through the middle of it, and then smooth the outsides of the nascent bagel and the inside of the hole. (There’s just no way to write about this without incurring a certain level of innuendo, is there…)
Keep wetting your hands as you prepare four of these. (Neil’s point about this being like working with modeling clay is well taken. But really sticky modeling clay…) When the water’s boiling gently, slide the proto-bagels in one at a time. They’ll immediately sink, and after thirty seconds or a minute or so they should start rising gently to the surface.
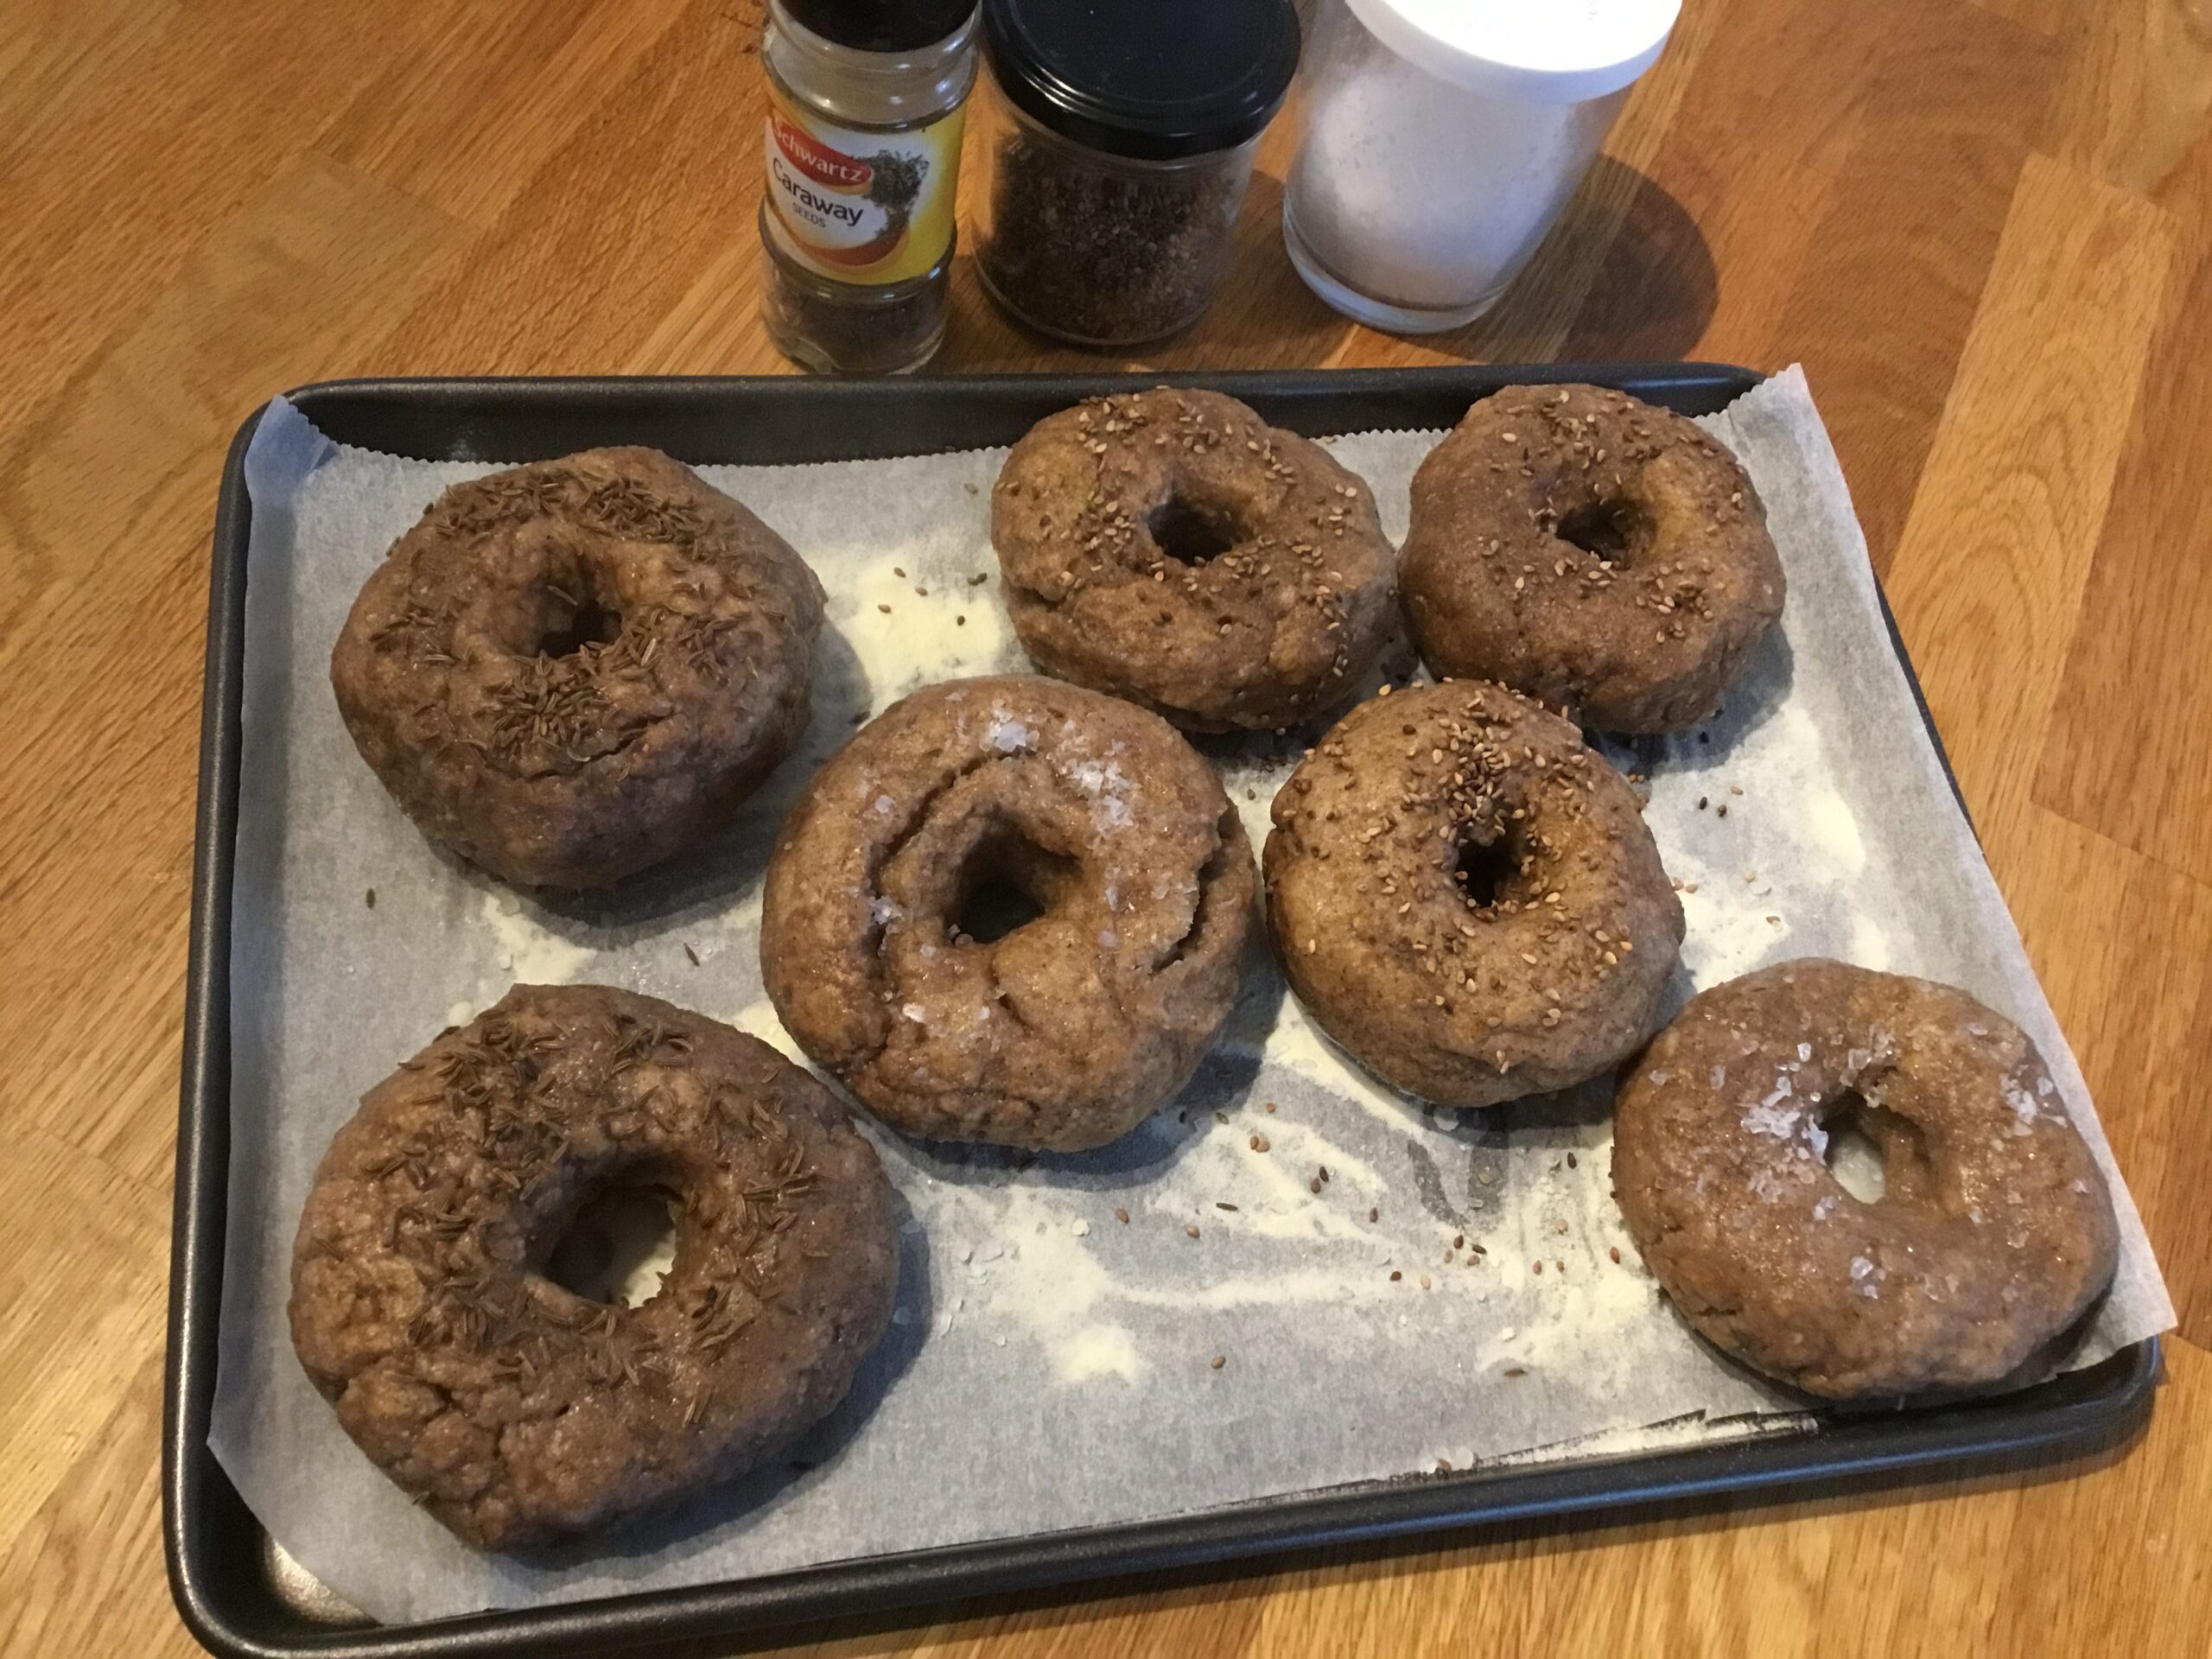
Let them have a couple of minutes on their first side while you prepare the remaining bagels. (We got seven out of our batch of dough.) At the end of the first two minutes they’ll have begun puffing up. Nudge the bagels over onto their other sides and start the timer for another two minutes.
When the boiling time for the first batch of bagels is done, use a slotted spoon to fish them out of the water, drain them well, and put them on the baking tray. Add the remaining bagels to the water and repeat the above process.
When all the bagels are on the tray, you might like to sprinkle them with some favorite seed or other seasoning. (I used caraway, toasted sesame seeds and Maldon salt on ours.) Then put them in the oven and give them 15 minutes on one side. Pull them out, use tongs or a spatula to turn them, and put them back in to bake for bake for another 5-7 minutes, or until they’re brown enough to suit you.
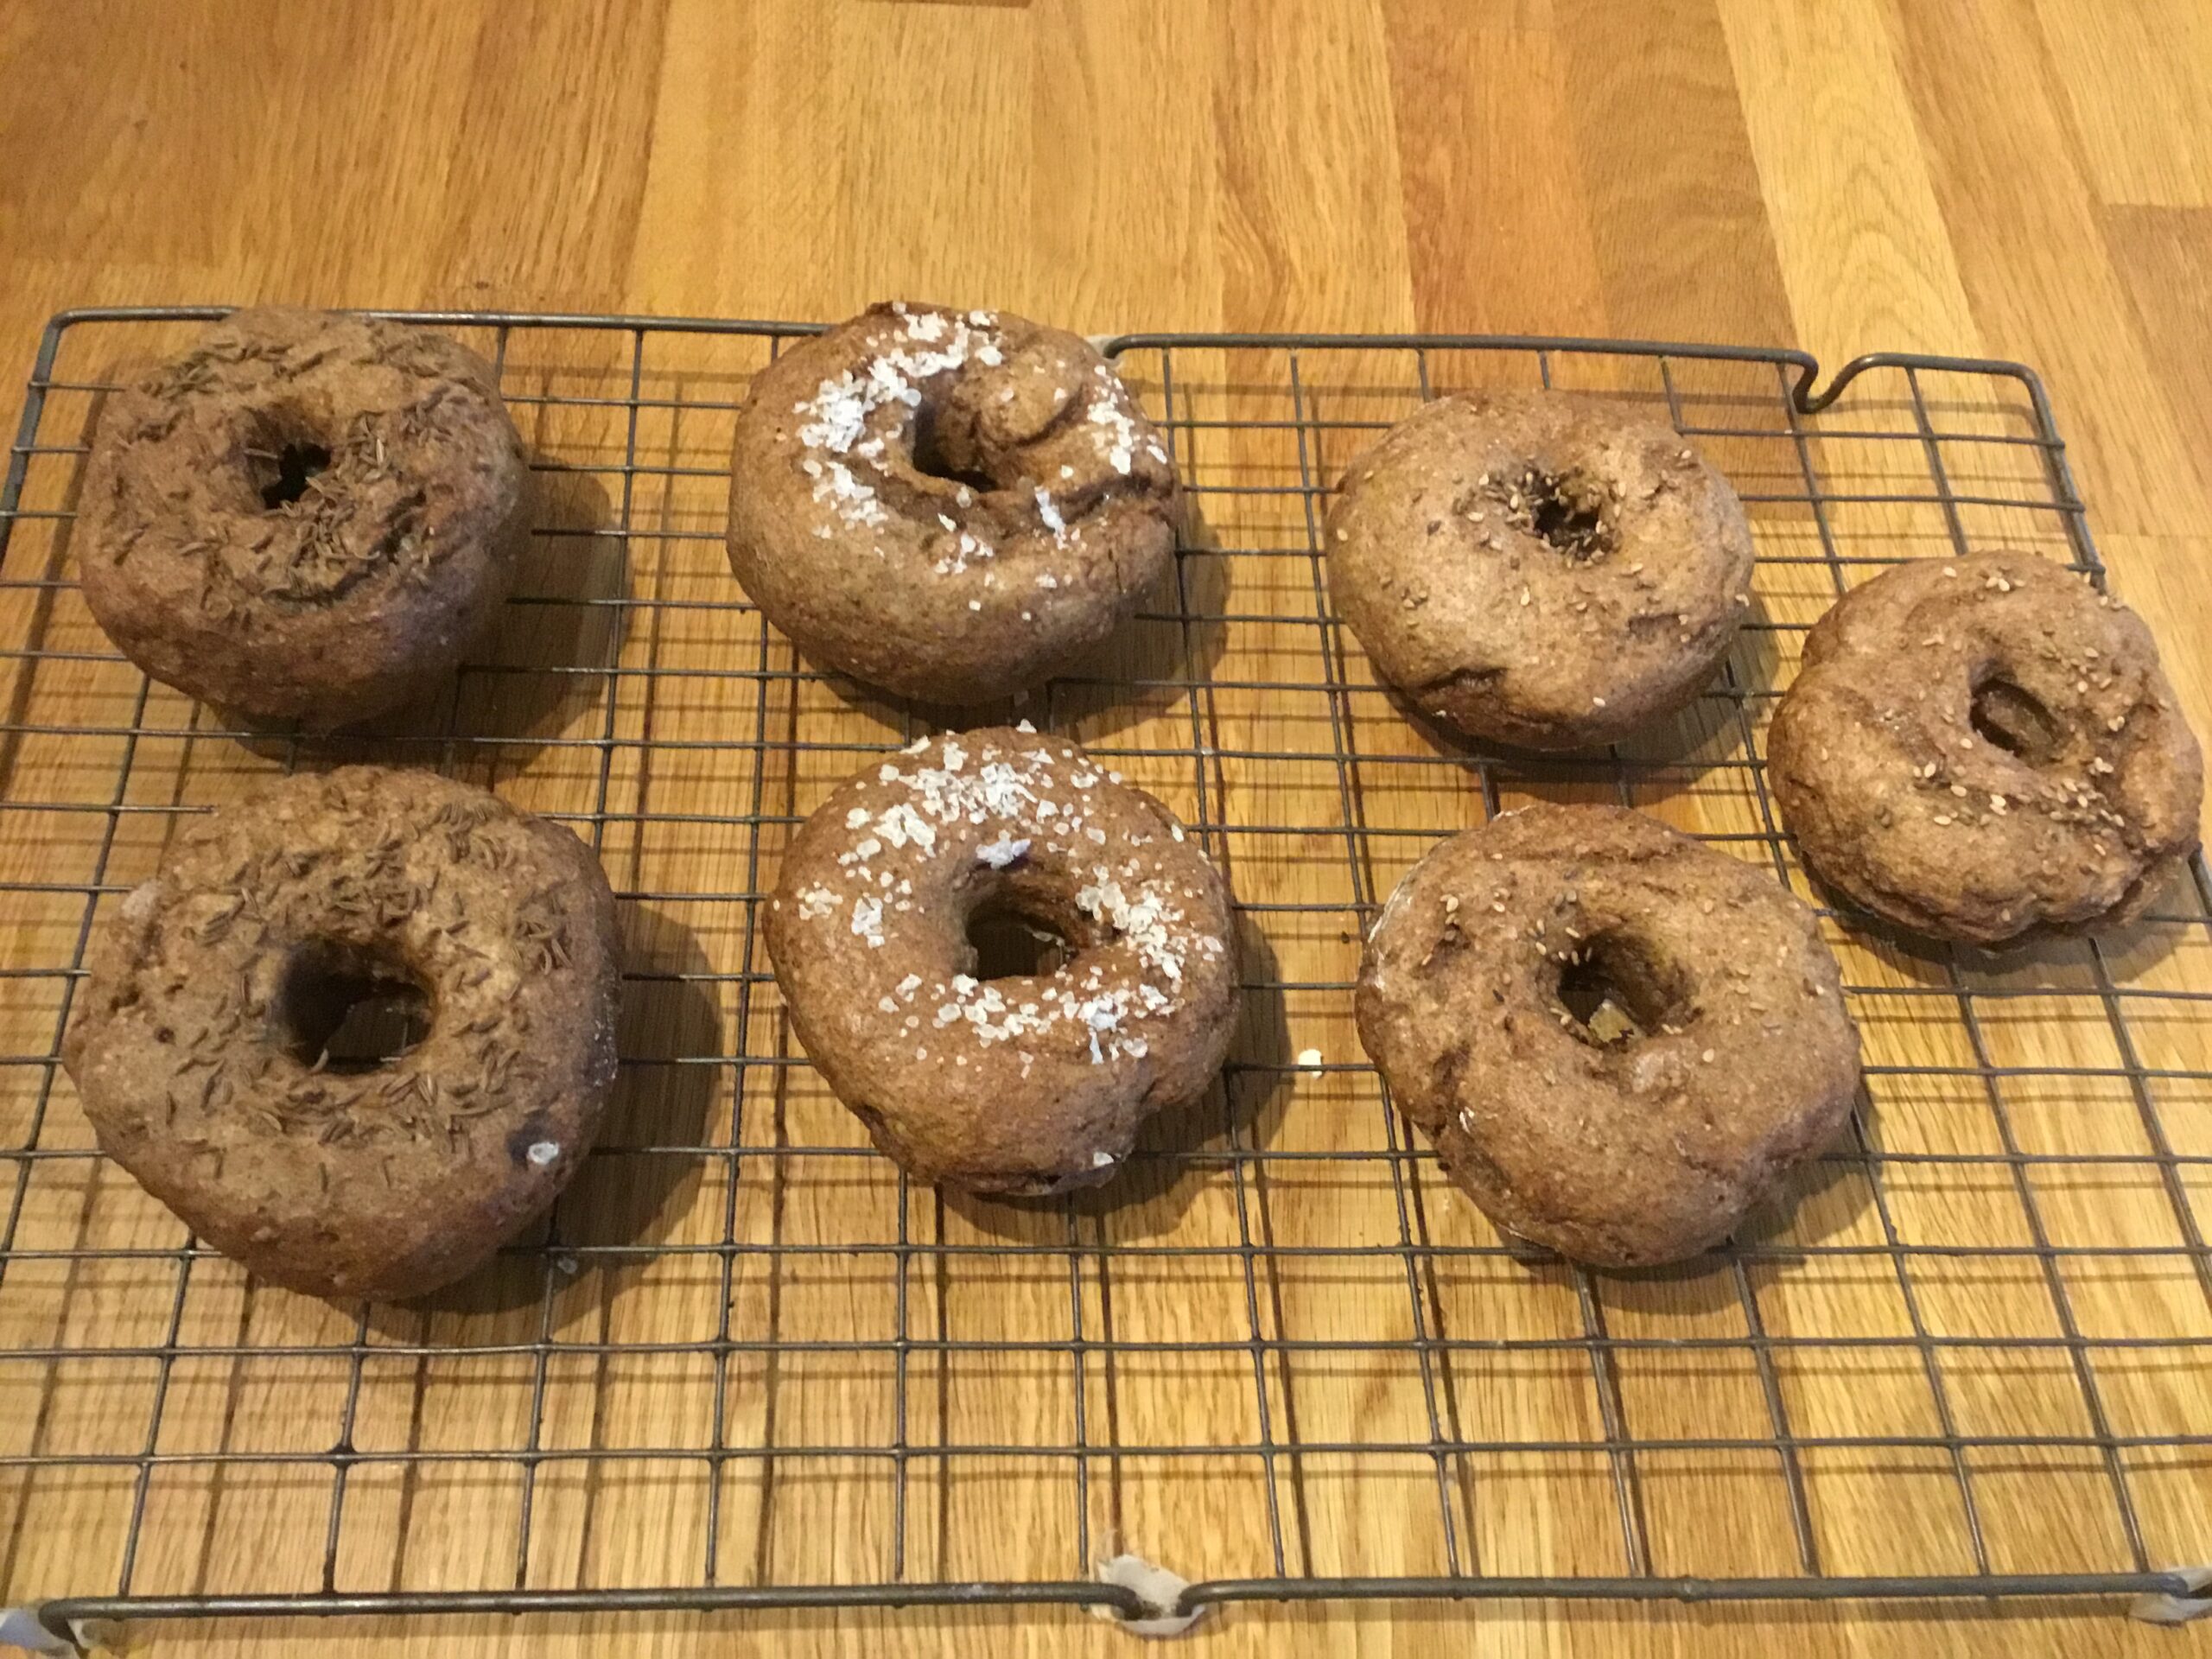
 Remove them to a rack and let them cool thoroughly.
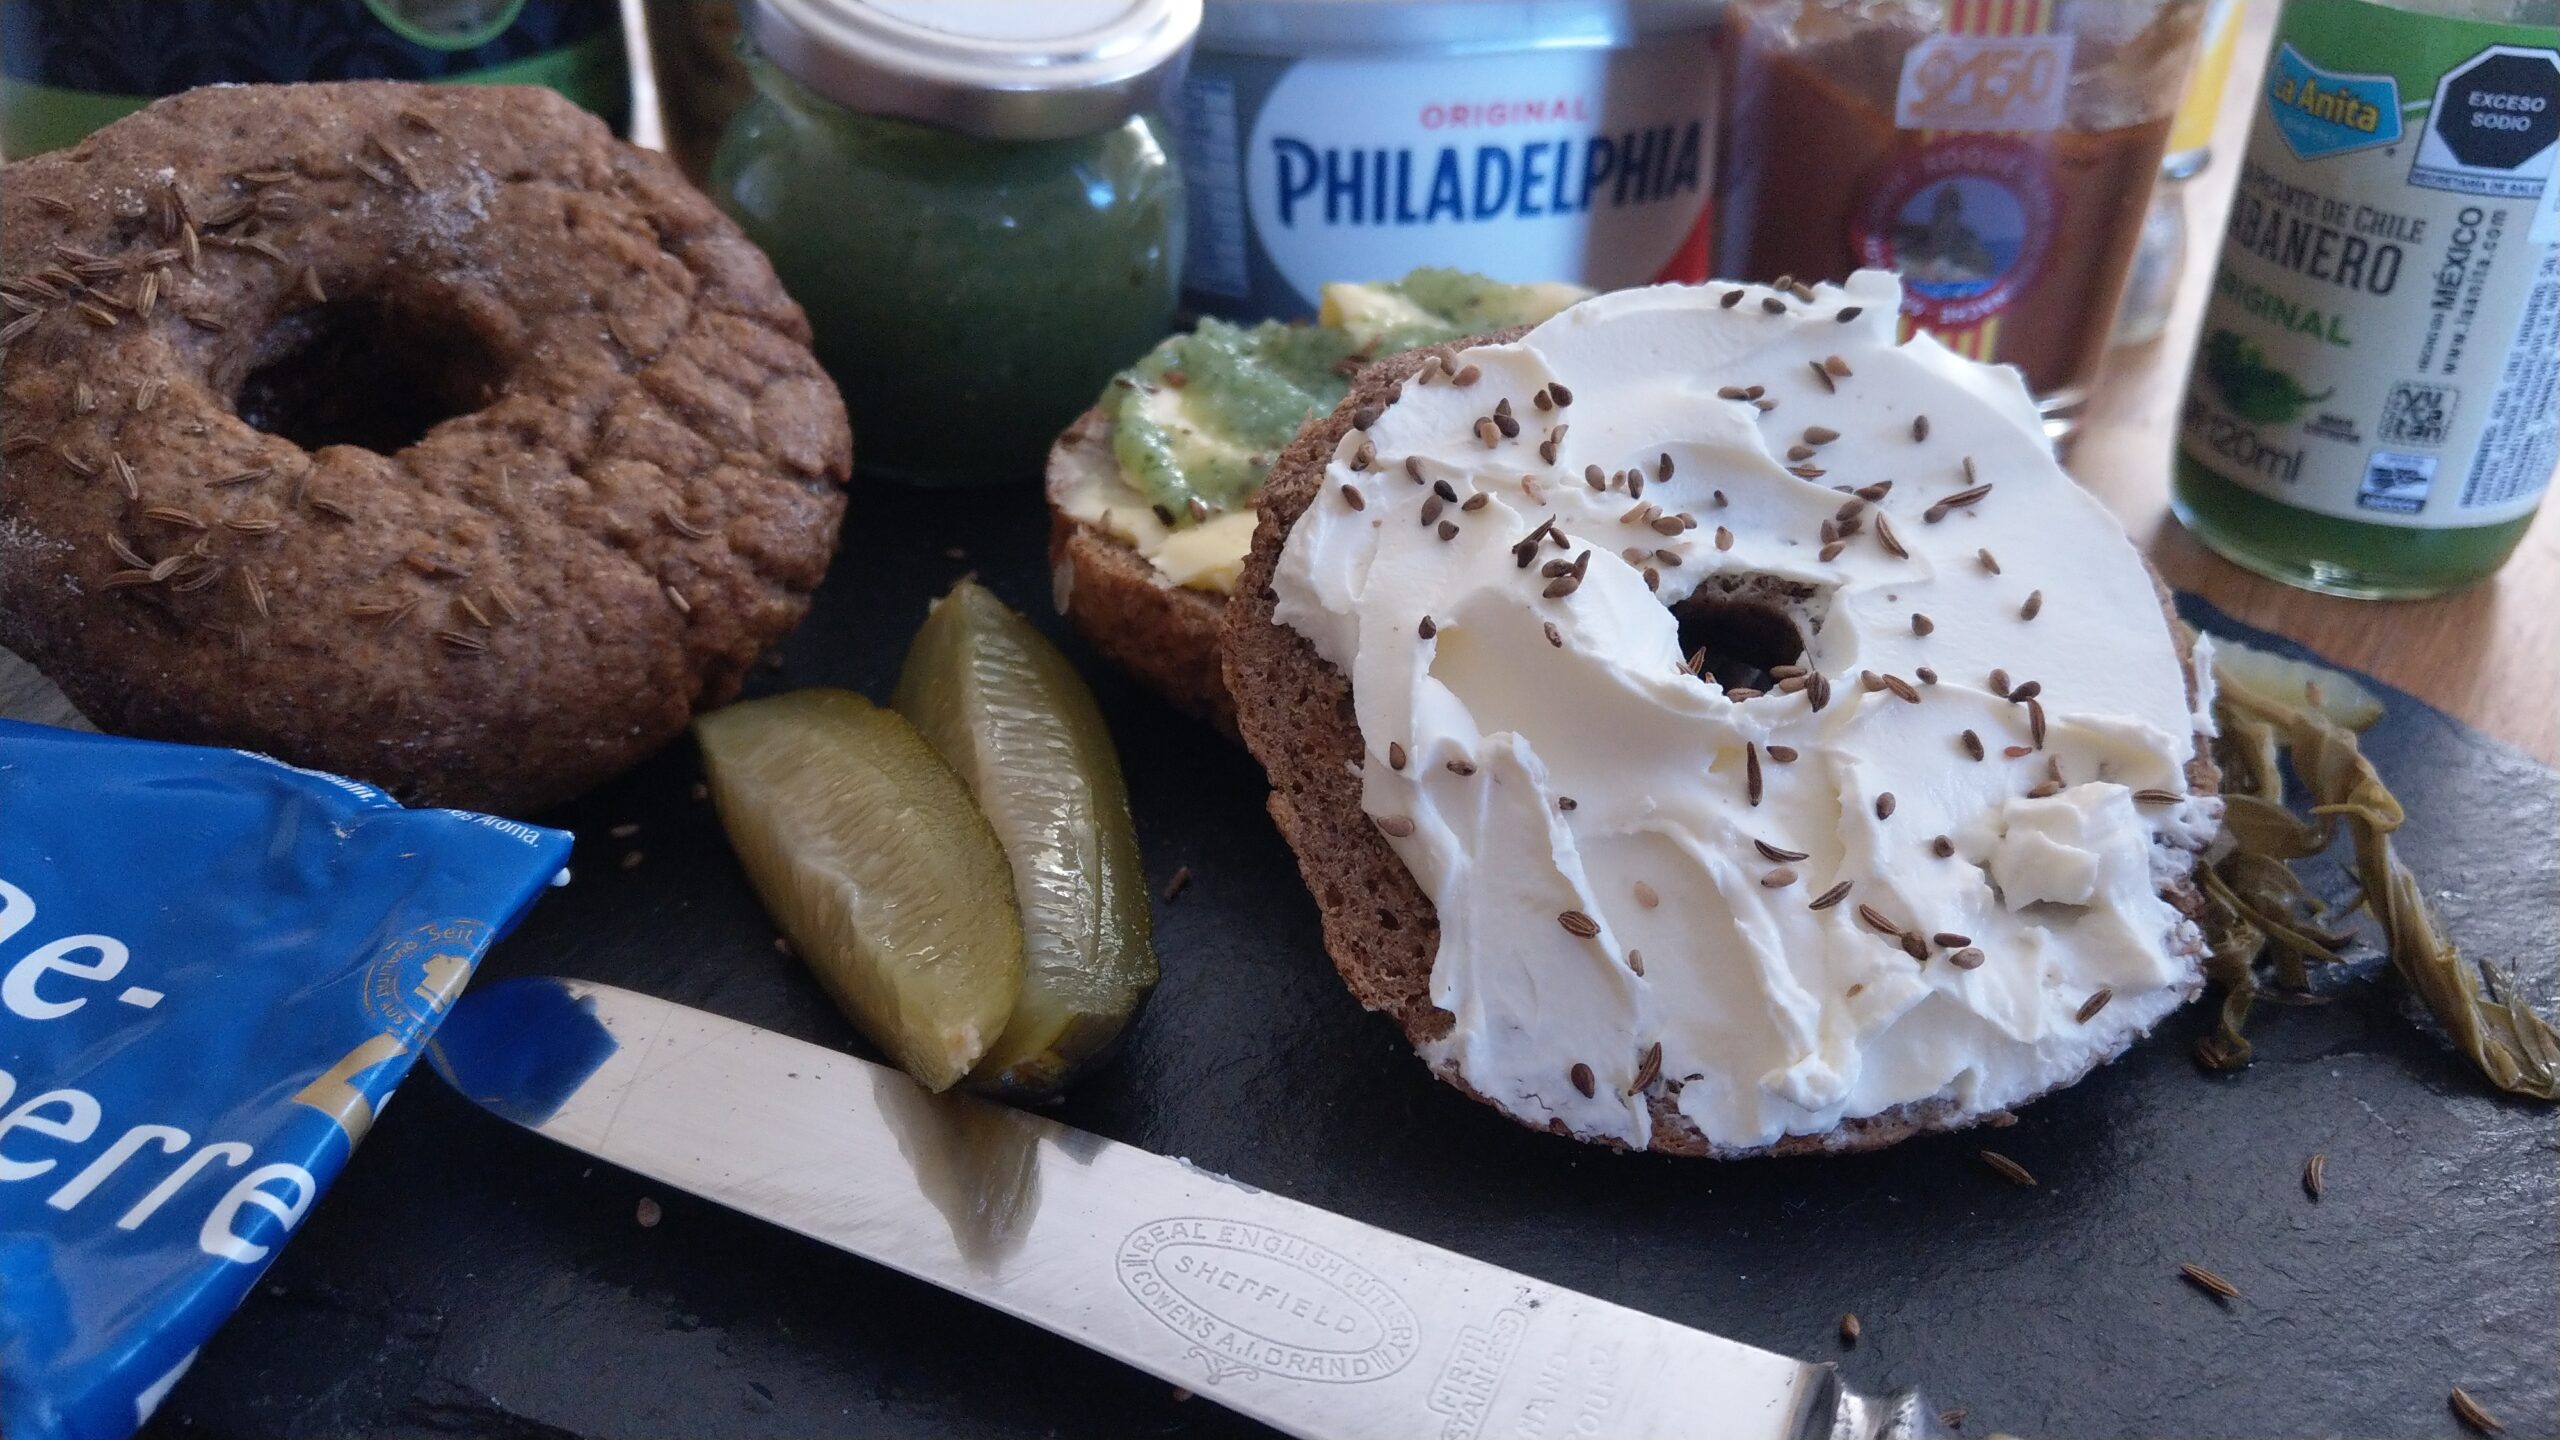
These have a lovely dark, nutty flavor that really goes well with savory things—fish (plain or smoked), meats, cheeses, and meat spreads or patés. (Our spread up top has fairly simple things — cream cheese on that front half, butter and paté of French cornichon pickles on the back. The cream cheese was really good.)
…Enjoy!