Just storing this link (and recipe) here so I won’t lose track of them.
Do visit The Greedy Frog’s page on the subject and read the (correctly) cranky rant about how cheese does not belong in this.
It’s looking like the Owl Springs Partnership site needs a reaming out (asst’d technical issues) so I’m relocating some stuff for safety’s sake.
Our Parmesan biscuit recipes have been there: posting them here for the interested. (This way if the URLs change over there, I can always just instruct the site to redirect them here.)
We’ve been using the standard garden-variety North American style of home bread-baking pan for a long time, but there comes a moment when you realize suddenly that you’ve been using the wrong tool to produce the effect you want, and you start looking around for something that’ll do the job better.
In particular, though high-risen loaves with domed tops are undeniably lovely, Peter and I found that about half the time the loaves we made in the standard bread pan were showing a preference (once they’d risen to the pan’s top) for, during the further rise, expanding sideways rather than upwards. With more highly hydrated doughs, this definitely turns into a problem. The loaf-in-process sags over the sides of the pan while it’s baking, and afterwards you wind up having to chop the sides off it so that slices will fit into the slots in the toaster… altogether a most unseemly business. So we started looking for taller-sided baking pans that would give the rising dough more support in the upwards direction.
The first thing we tried was a lidded baking pan/baking tin from a US maker now long associated with this type of bread pan: a “Pullman pan”, so called because it was the type of bread pan used in the kitchens of Pullman train cars. (The style turns out to be far older than its use on the railway, though. European bakers were producing so-called pain de mie, “bread made for its crumb” [rather than its crust], for at least two centuries previous. This was the preferred bread for premium sandwiches, canapes, croutons, and toast.)
At any rate, the pan we got from the US company was well made, heavy, and baked a good loaf. But it was both bigger than we needed—loaves made with it wound up needing to be cut in half to fit in our bread box—and also a bit fractious: sometimes difficult to shut, and also often difficult to open. This got frustrating. After a while we passed the USA pan to friends at a local pub/B&B, and went back to the “regular” loaf pans for the time being.
Recently, though, one or the other of us spotted the items below on Amazon. They’re available from numerous different retailers, leading me to believe that they’re being manufactured by one or two companies in China under different badges or marques for different retailers.
This style of pan is available in various sizes and materials, so we decided to get a couple of the smaller ones—essentially one-pound loaf pans—and see how they worked. They come in both steel and aluminum versions.
...So we sent for them, and along they came. We’ve been testing them for some days now, and briefly: they’re terrific.
As regards materials: the aluminum pan weighs 405g: the steel one weighs 624g. It’s going to take more testing, over more time, to determine which of them does a better crust on the bread (though again, since these are pain de mie pans, the crust isn’t really meant to be the main act).
These pans are both rated for a 450g loaf….though, again, it’s going to take some testing to see how much leeway there is in this rating. Some of the recipes we use produce denser loaves than the house recipe for Just Plain Old White Bread. That, though, is the recipe we’re using at the moment for testing purposes.
The thing to warn you about in advance, if you get these, is that right out of the box, the non-stick coating on these is SERIOUS BUSINESS. The pans will Zamboni around with alarming slidiness on any kitchen surface where you place them. You don’t dare pick them up without having a firm grip on both the pan and the lid, as (given the slightest opportunity) the lid will slide right off the pan and head for points unknown.
But frankly, as a baker who’s dealt in her time with more than enough annoyingly sticky pans that should have been nonsticky, this is kind of a refreshing change. I’m going to be interested to see how long this phase lasts and how durable the nonstick coating is.
The important thing, though, is how readily freshly baked bread comes out of these. And the answer is: very readily. Tip them over and the new-baked loaf just kind of falls out. Though the docs suggest that the pans should be greased (indeed, buttered…), it’s looking like there’s no need for that at all. It might prove necessary to grease them when you’re baking things that have a lot of sugar involved in them. I’m thinking about testing the household seed cake recipe in one of these shortly to see how it behaves.
Anyway, here are some pictures, so you can see how these compare, size-wise, to the normal-size bread pan: and how a loaf baked yesterday with the lid off looks. …A note about those three little holes you can see at the bottoms of the pans: those are apparently for air circulation. I have yet to see whether there’s a problem with doing a very wet batter bread in one of these, but I’ll test that soon and add notes on it here.
For those who might be interested in getting their hands on one of these: hope this helps!
(Above: the pans themselves, with the little spiracle-like air holes visible…)
Above: one of the pans compared to a typical non-lidded loaf pan.
And below: the result when we sliced open the latest non-lidded bake...
(PS—disclosure: we’re members of the Amazon Associates plan, so if you use one of the lnks above to buy one of these, we get a wee tiny commission. …But you probably knew that. Just saying…)
Because when composers start talking about cooking, it’s smart to listen. 🙂
This bake unfolded on the Twitter thread here:
https://bit.ly/DavidGArnoldsCake
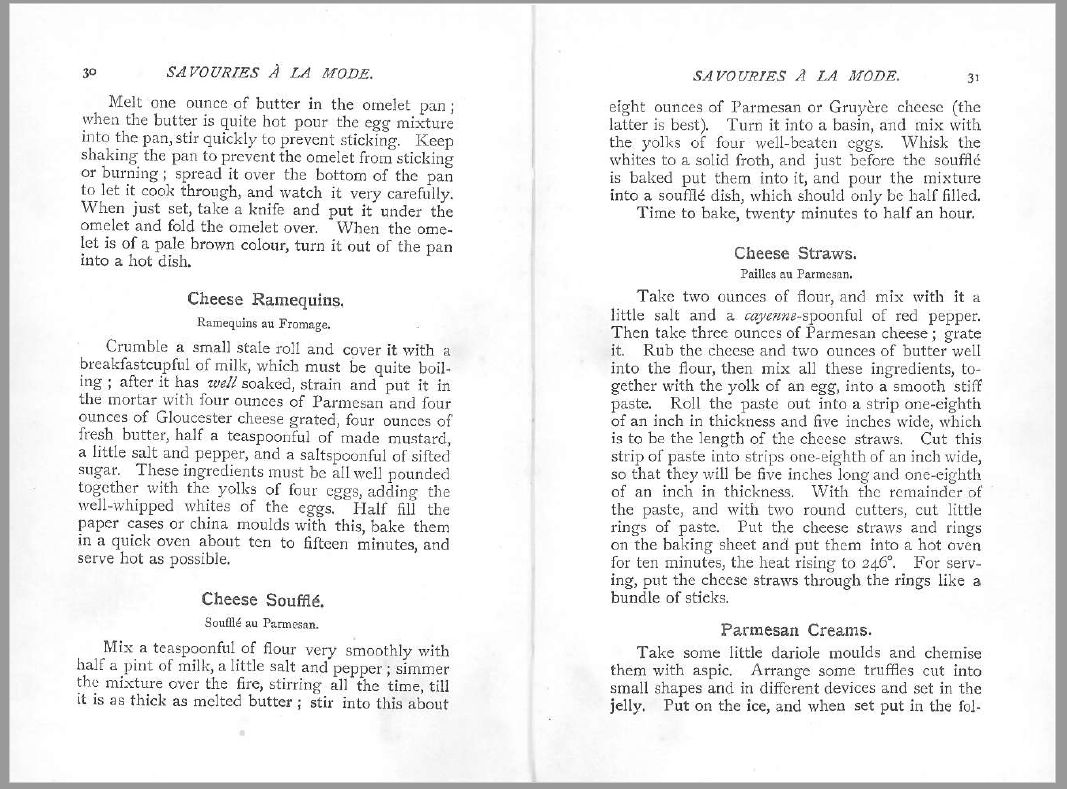
1/2 Equal weight of eggs butter sugar flour . Melt butter and sugar together , whisk in the beaten eggs , whisk in flour once eggs incorporated, pour into greased baking tin . Bake for around 40 minutes 180-200 degrees . Blend Juice of two lemons and icing sugar into a syrup.
When cake has cooled , use cocktail stick to make loads of deep perforations on top of cake , pour over thick lemon syrup so it soaks into the holes but also covers cake with thin layer . It’ll cool to a lemony sugary crust . Eat whole thing in one go
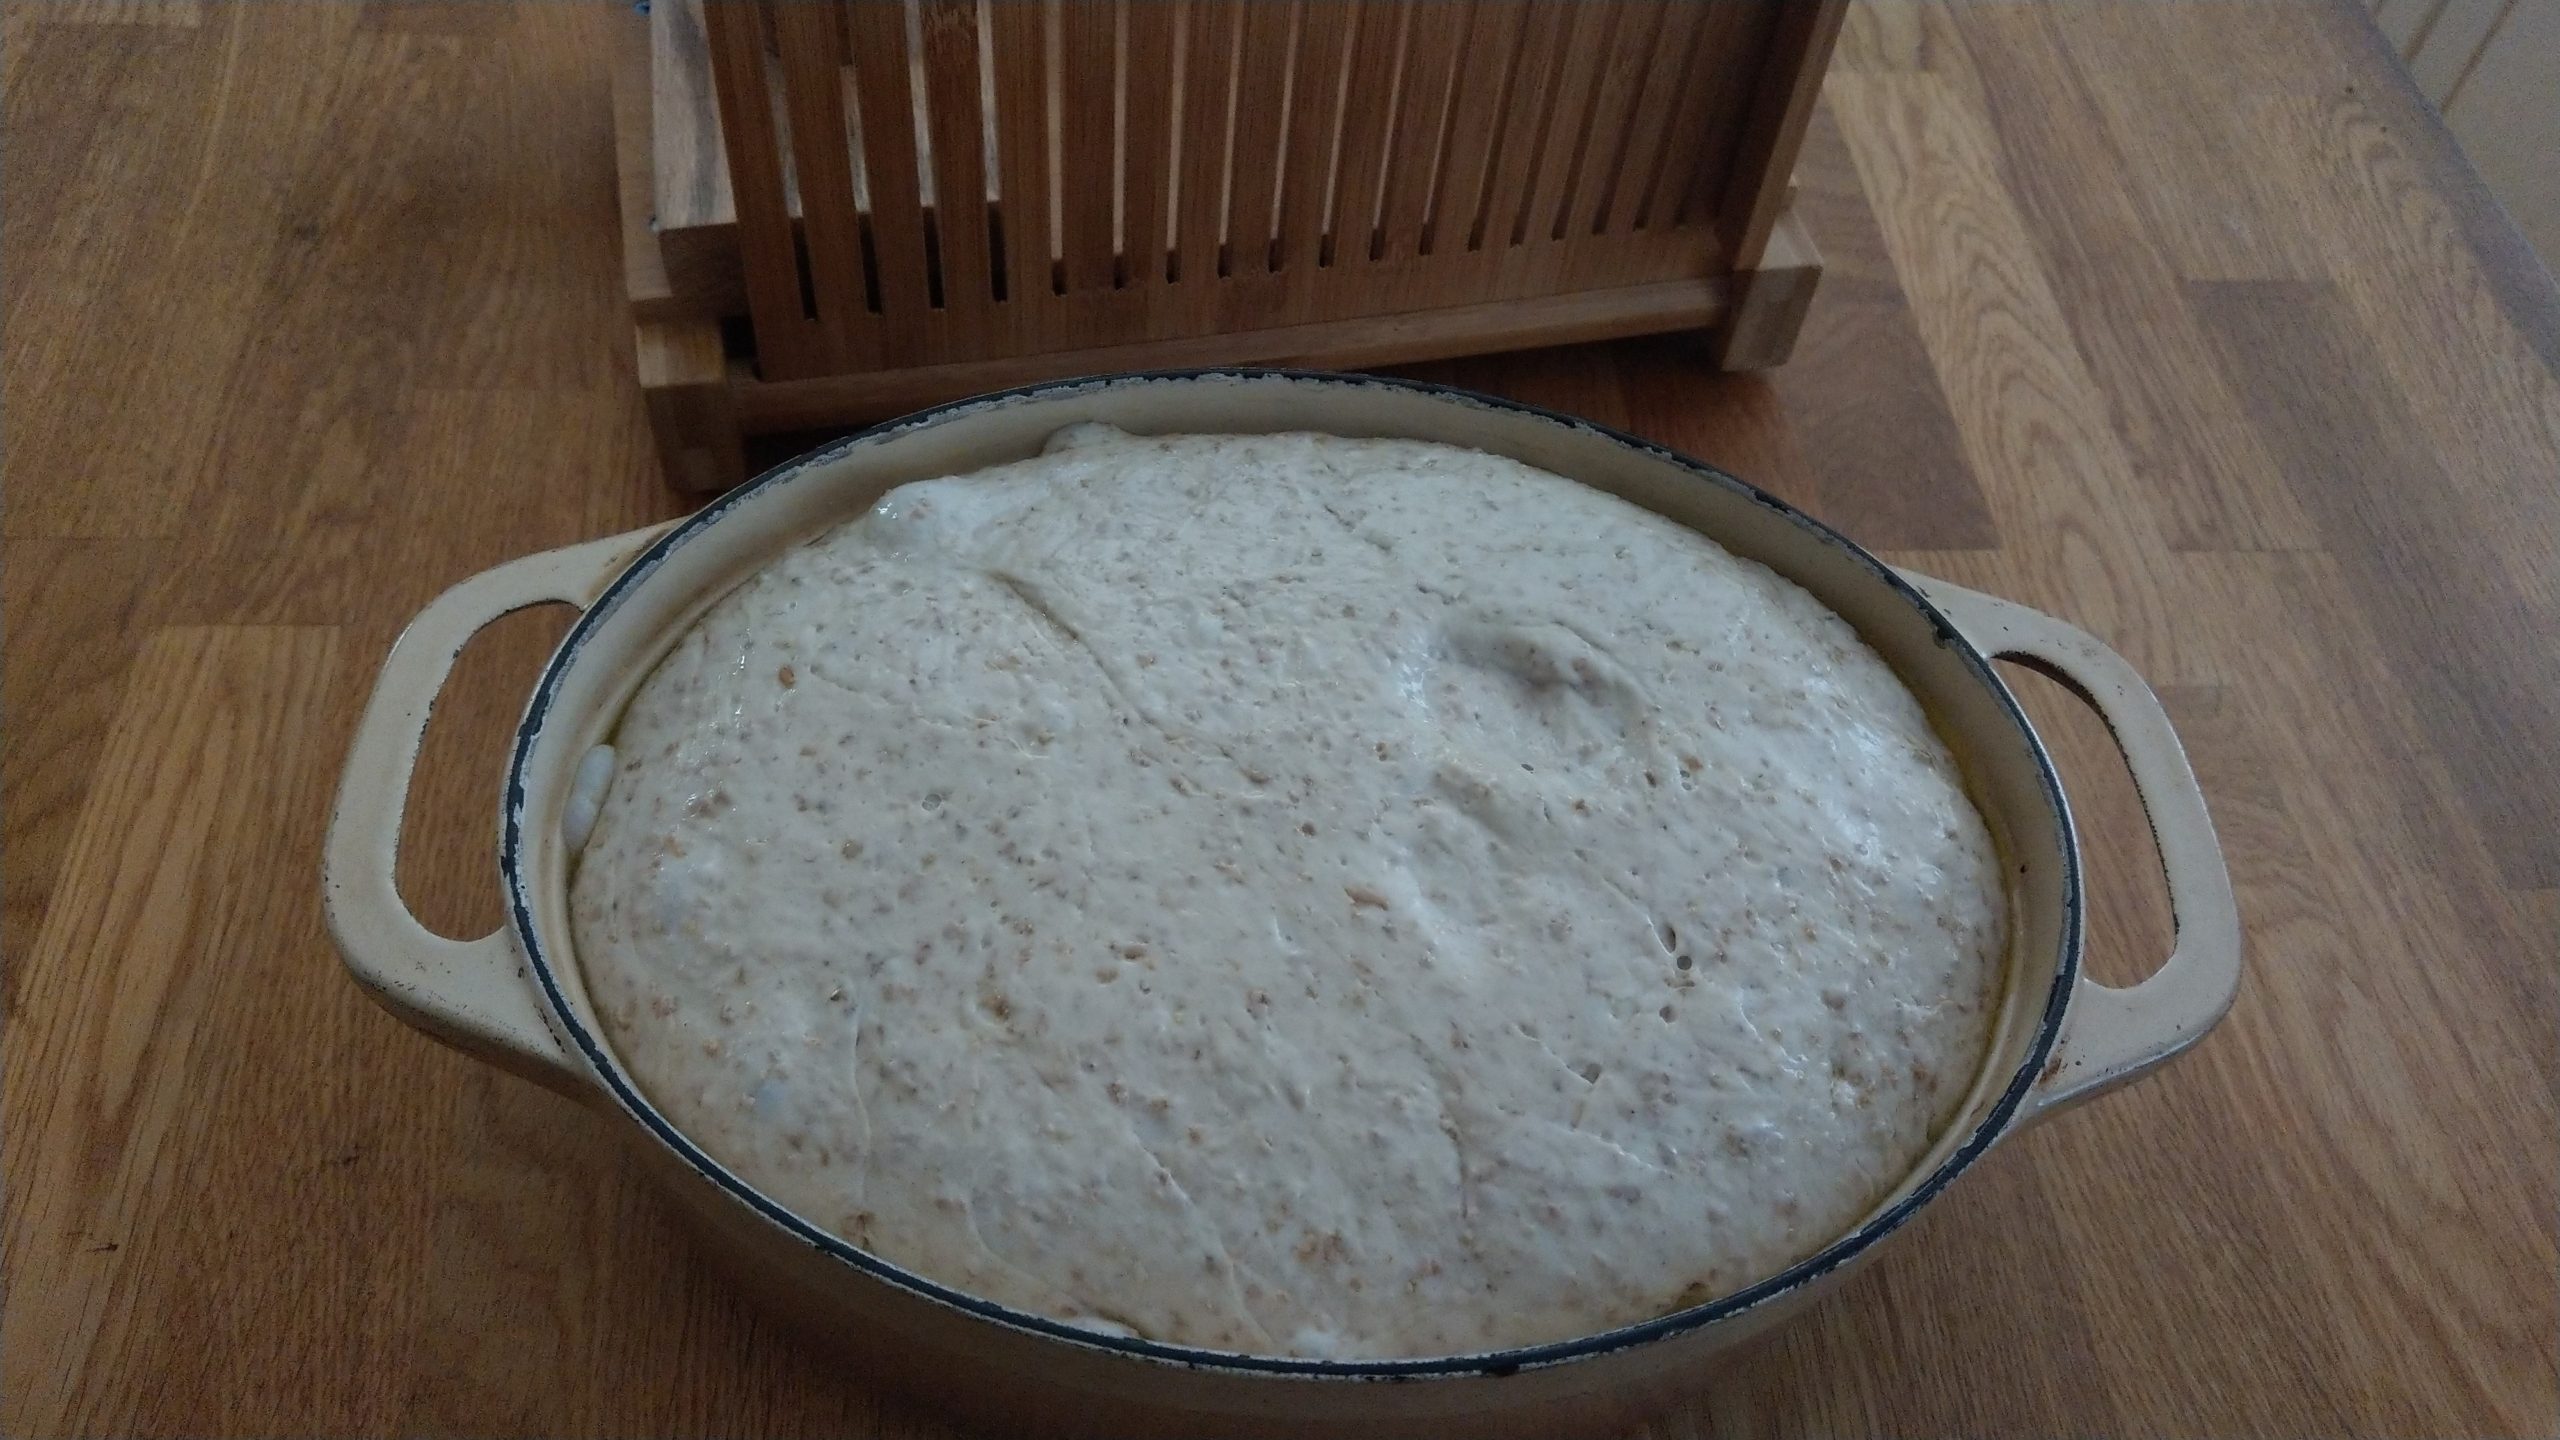
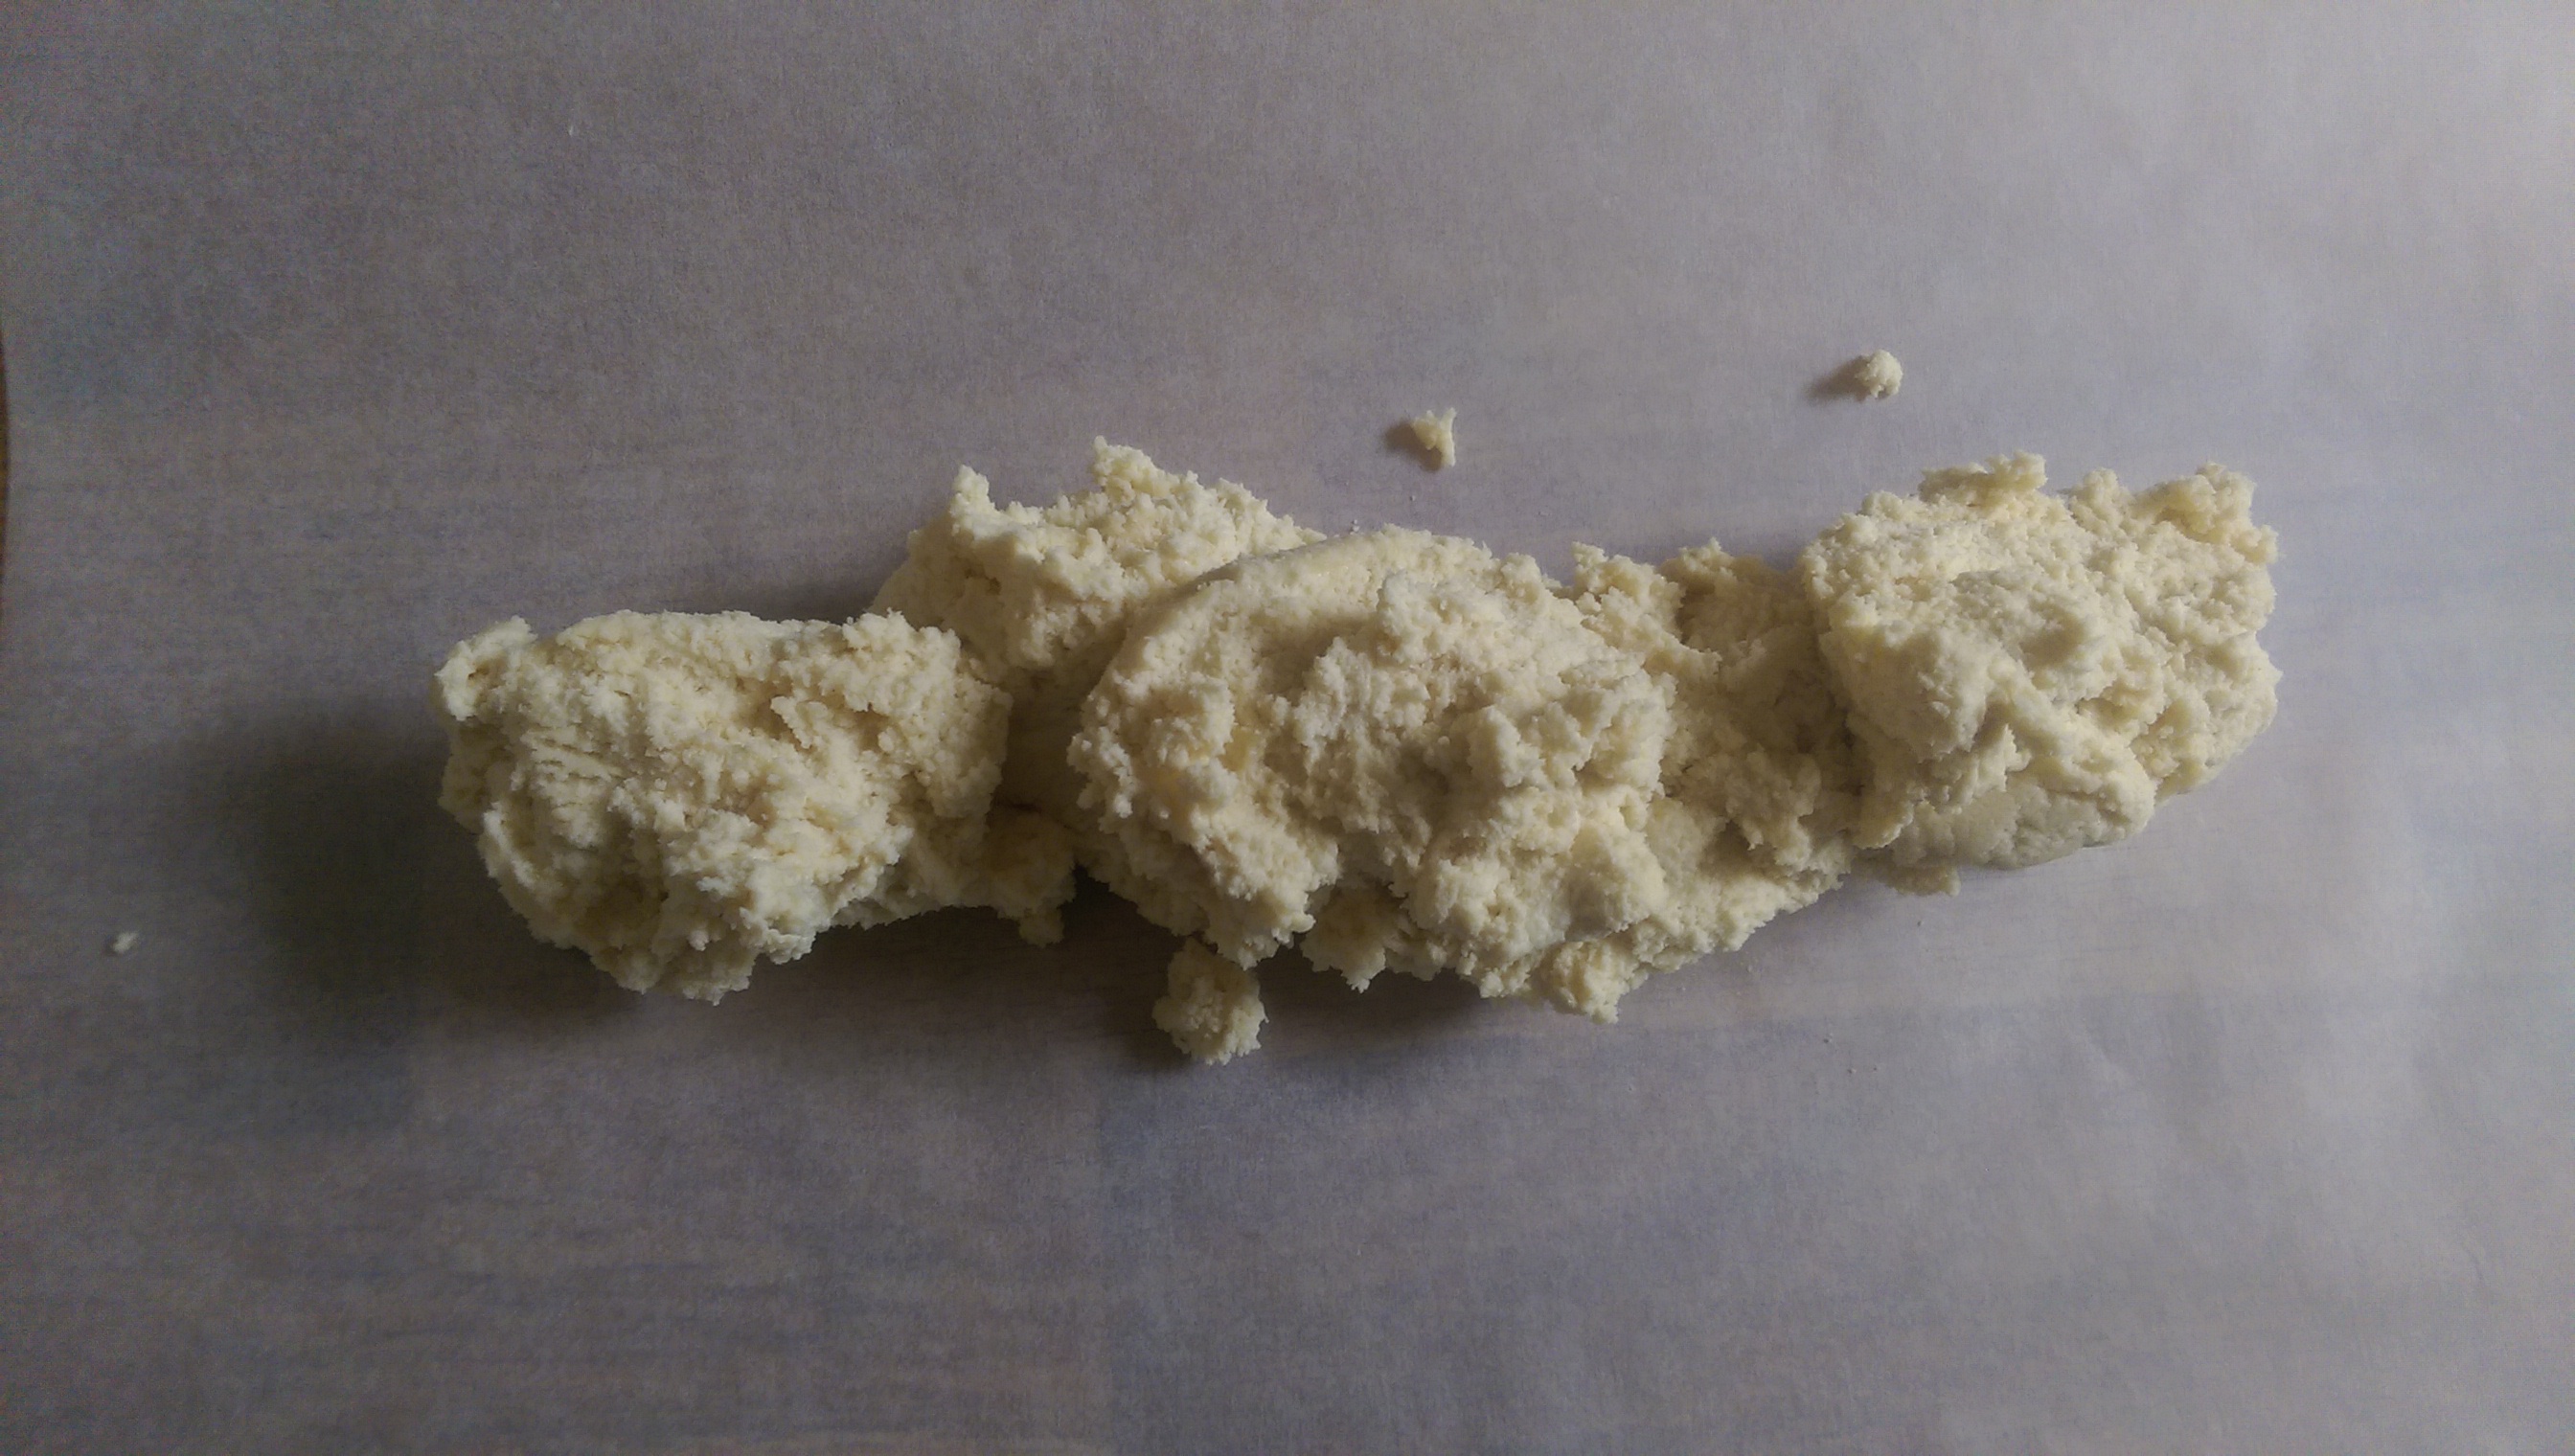
Right… starting in on this now. 3 large eggs for me = 200g; so, 200g each of flour, butter, sugar.
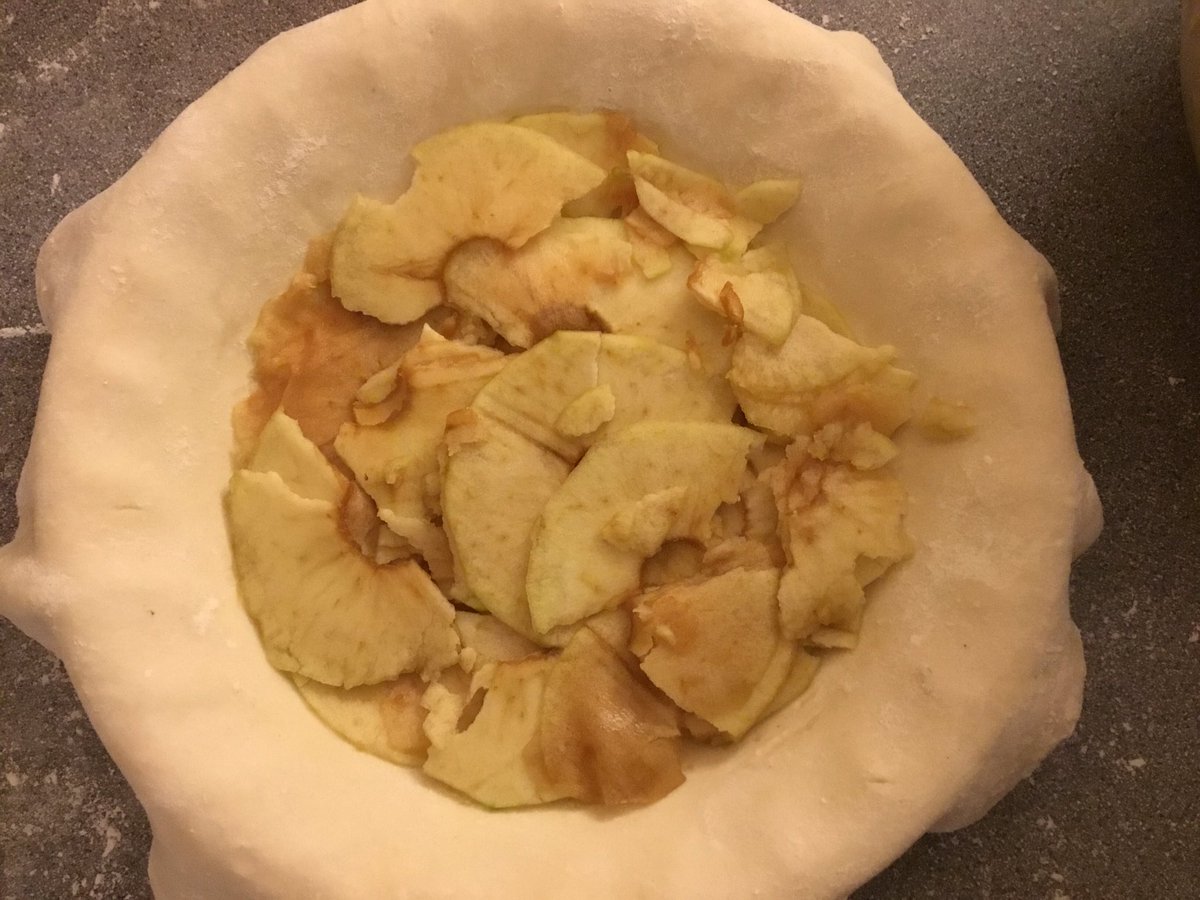
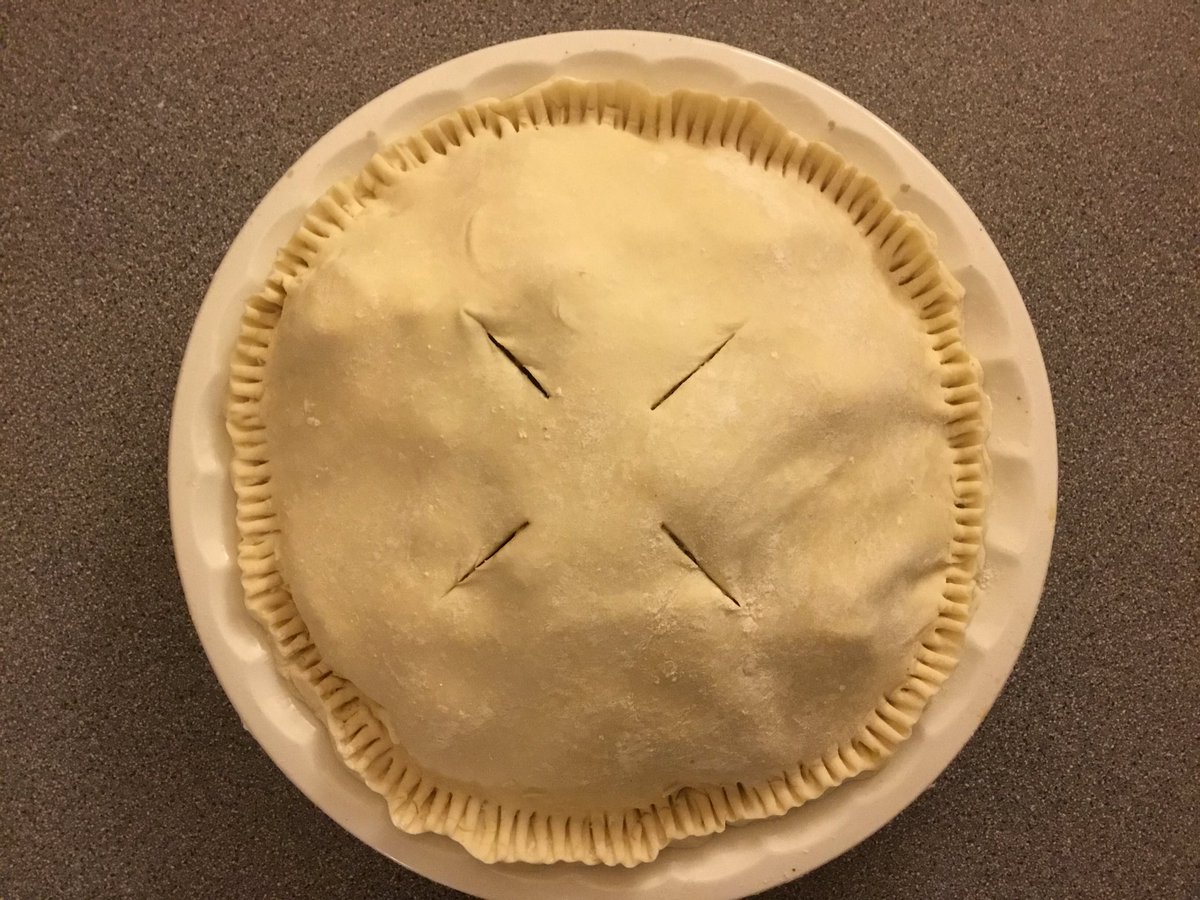
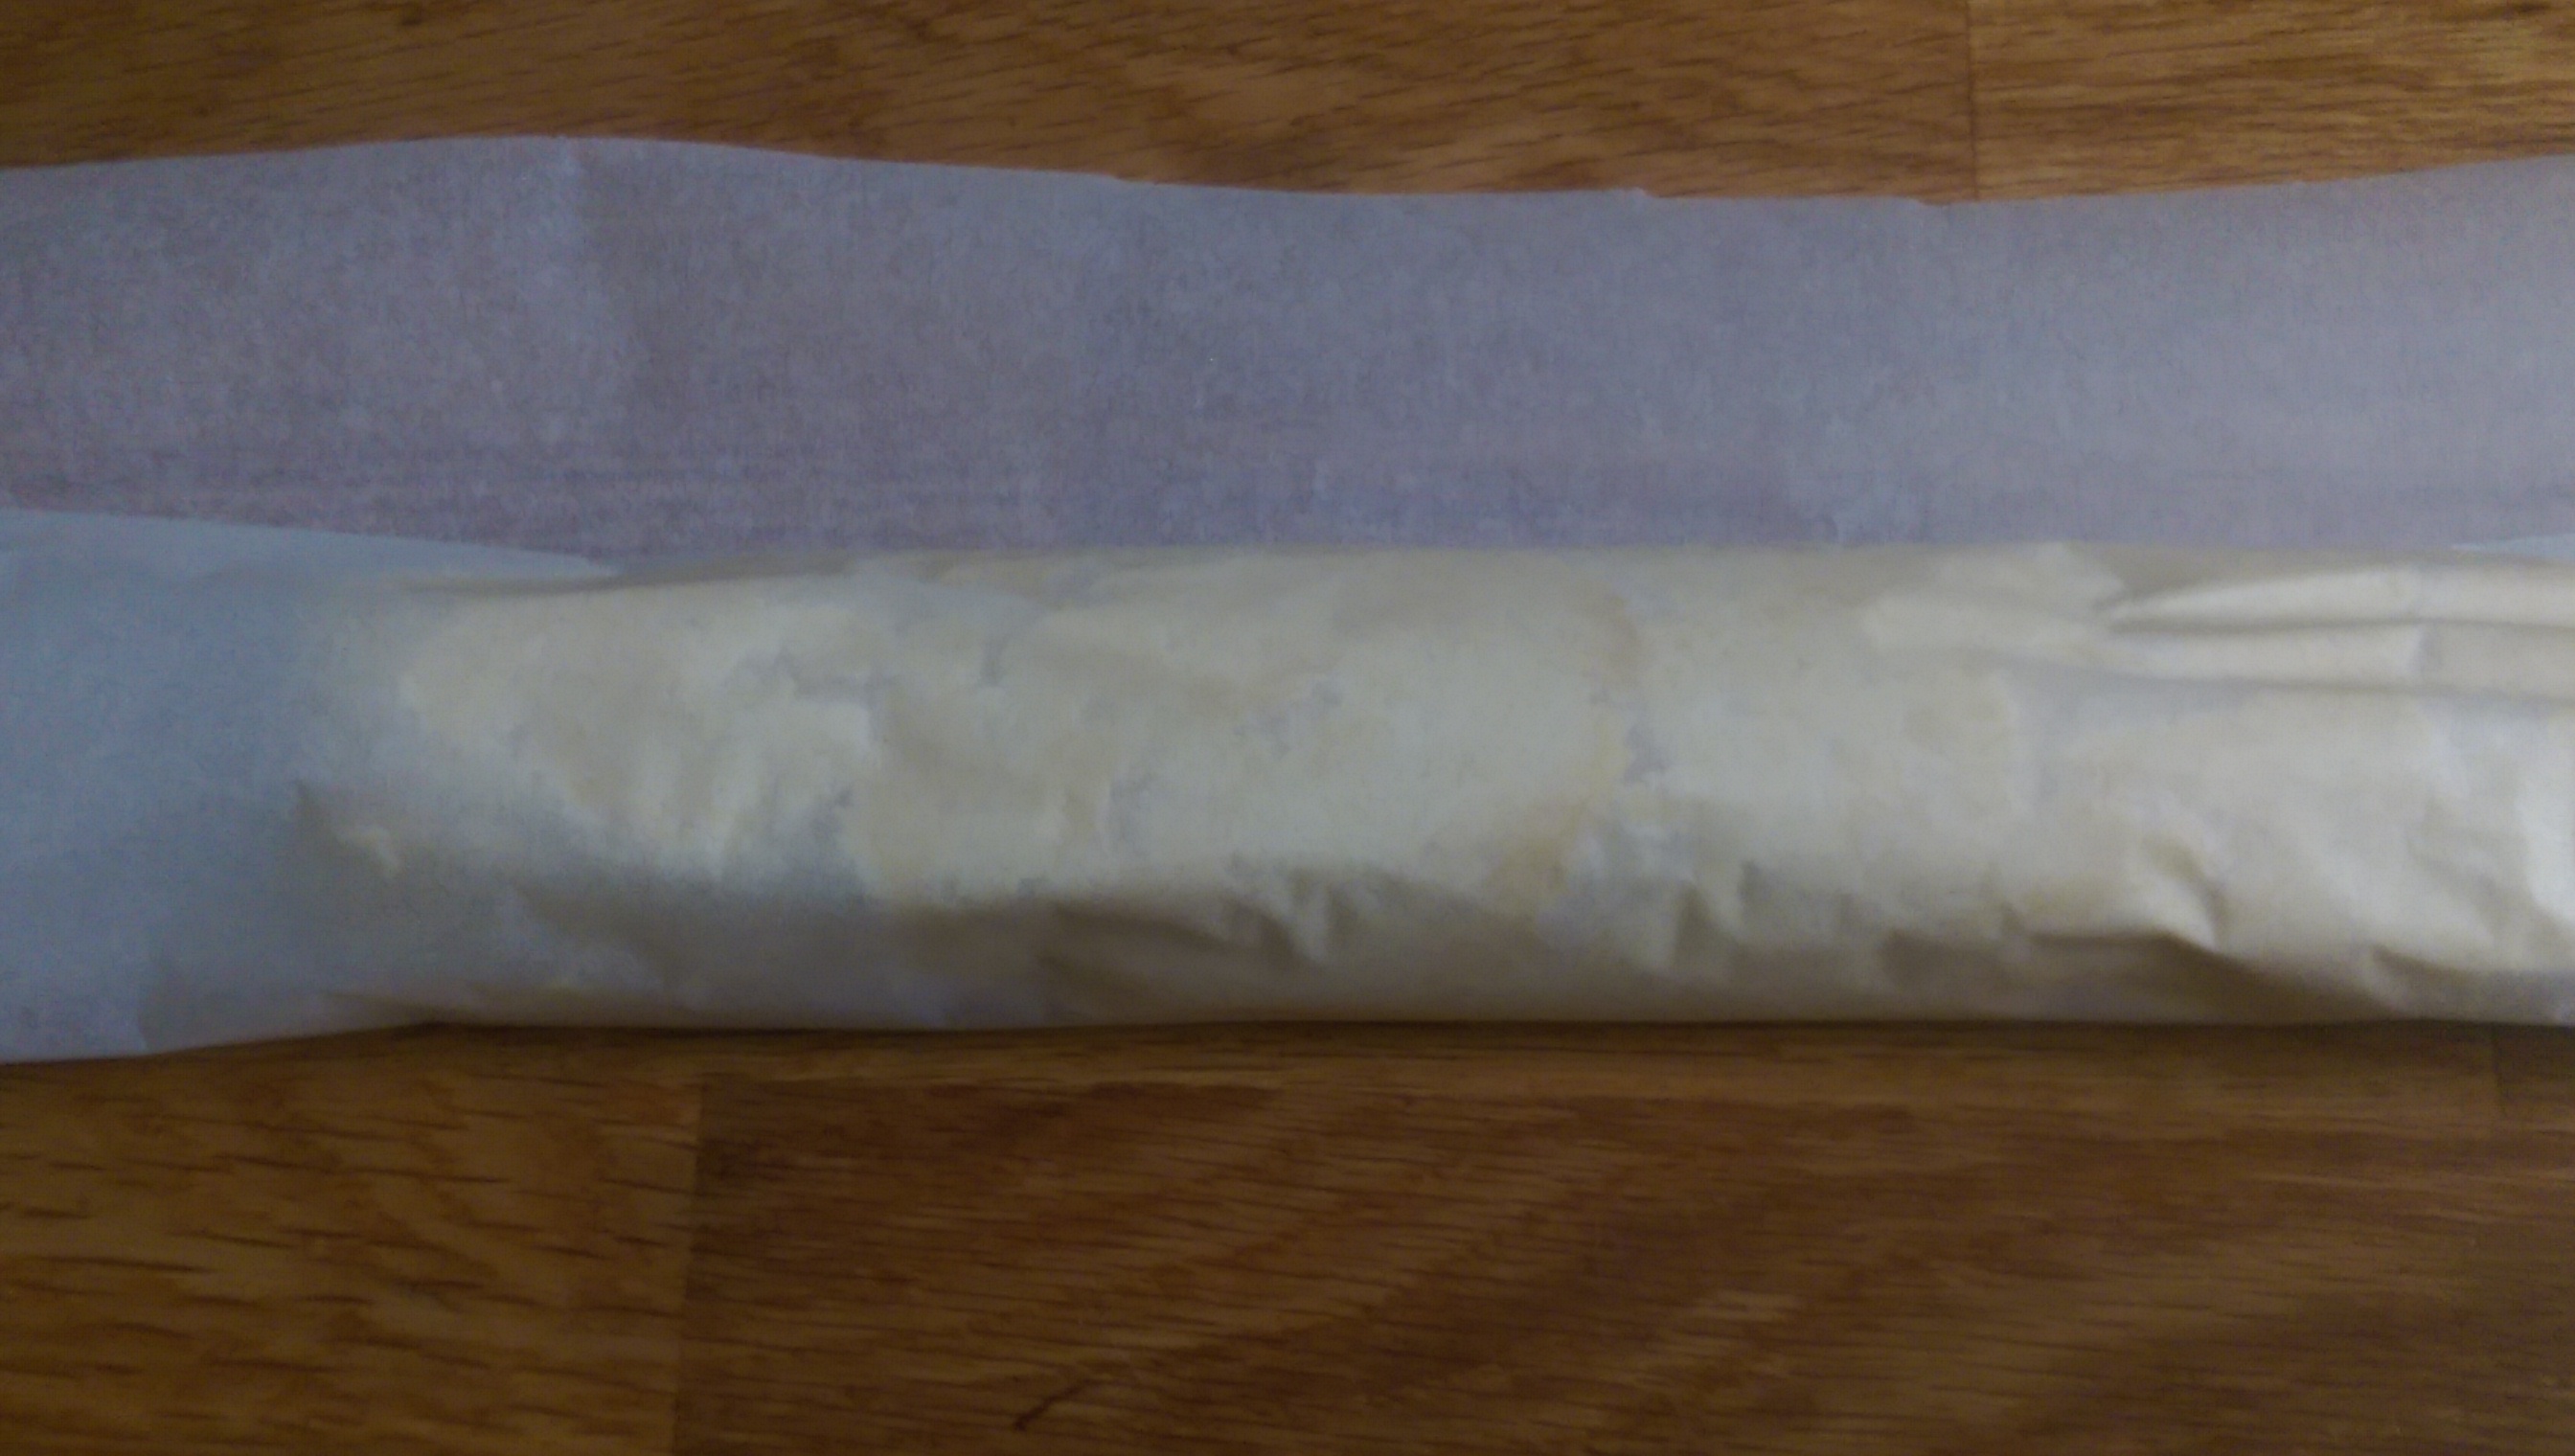
…Ready for the oven. (The bottom of the springform has some baking parchment clamped into it to [I hope…] keep this pan from leaking…)
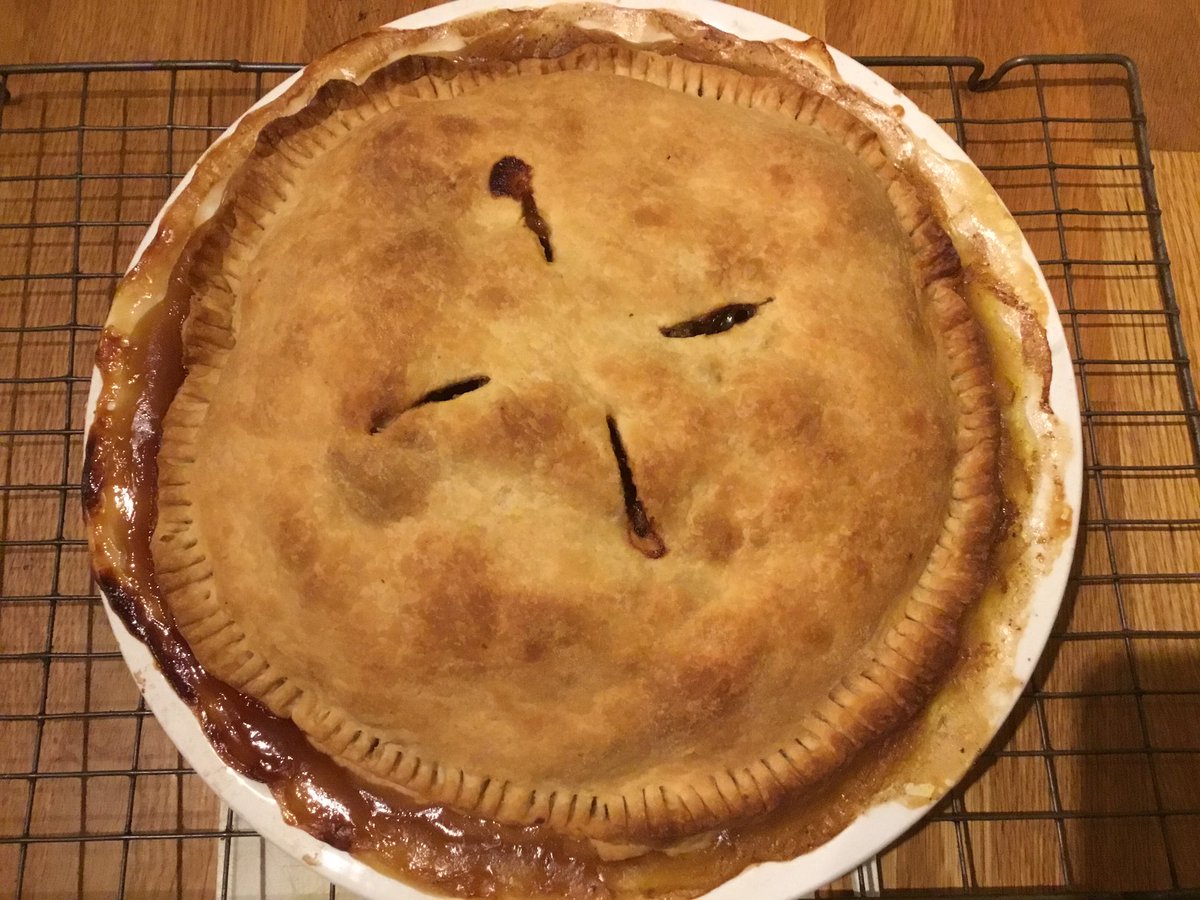
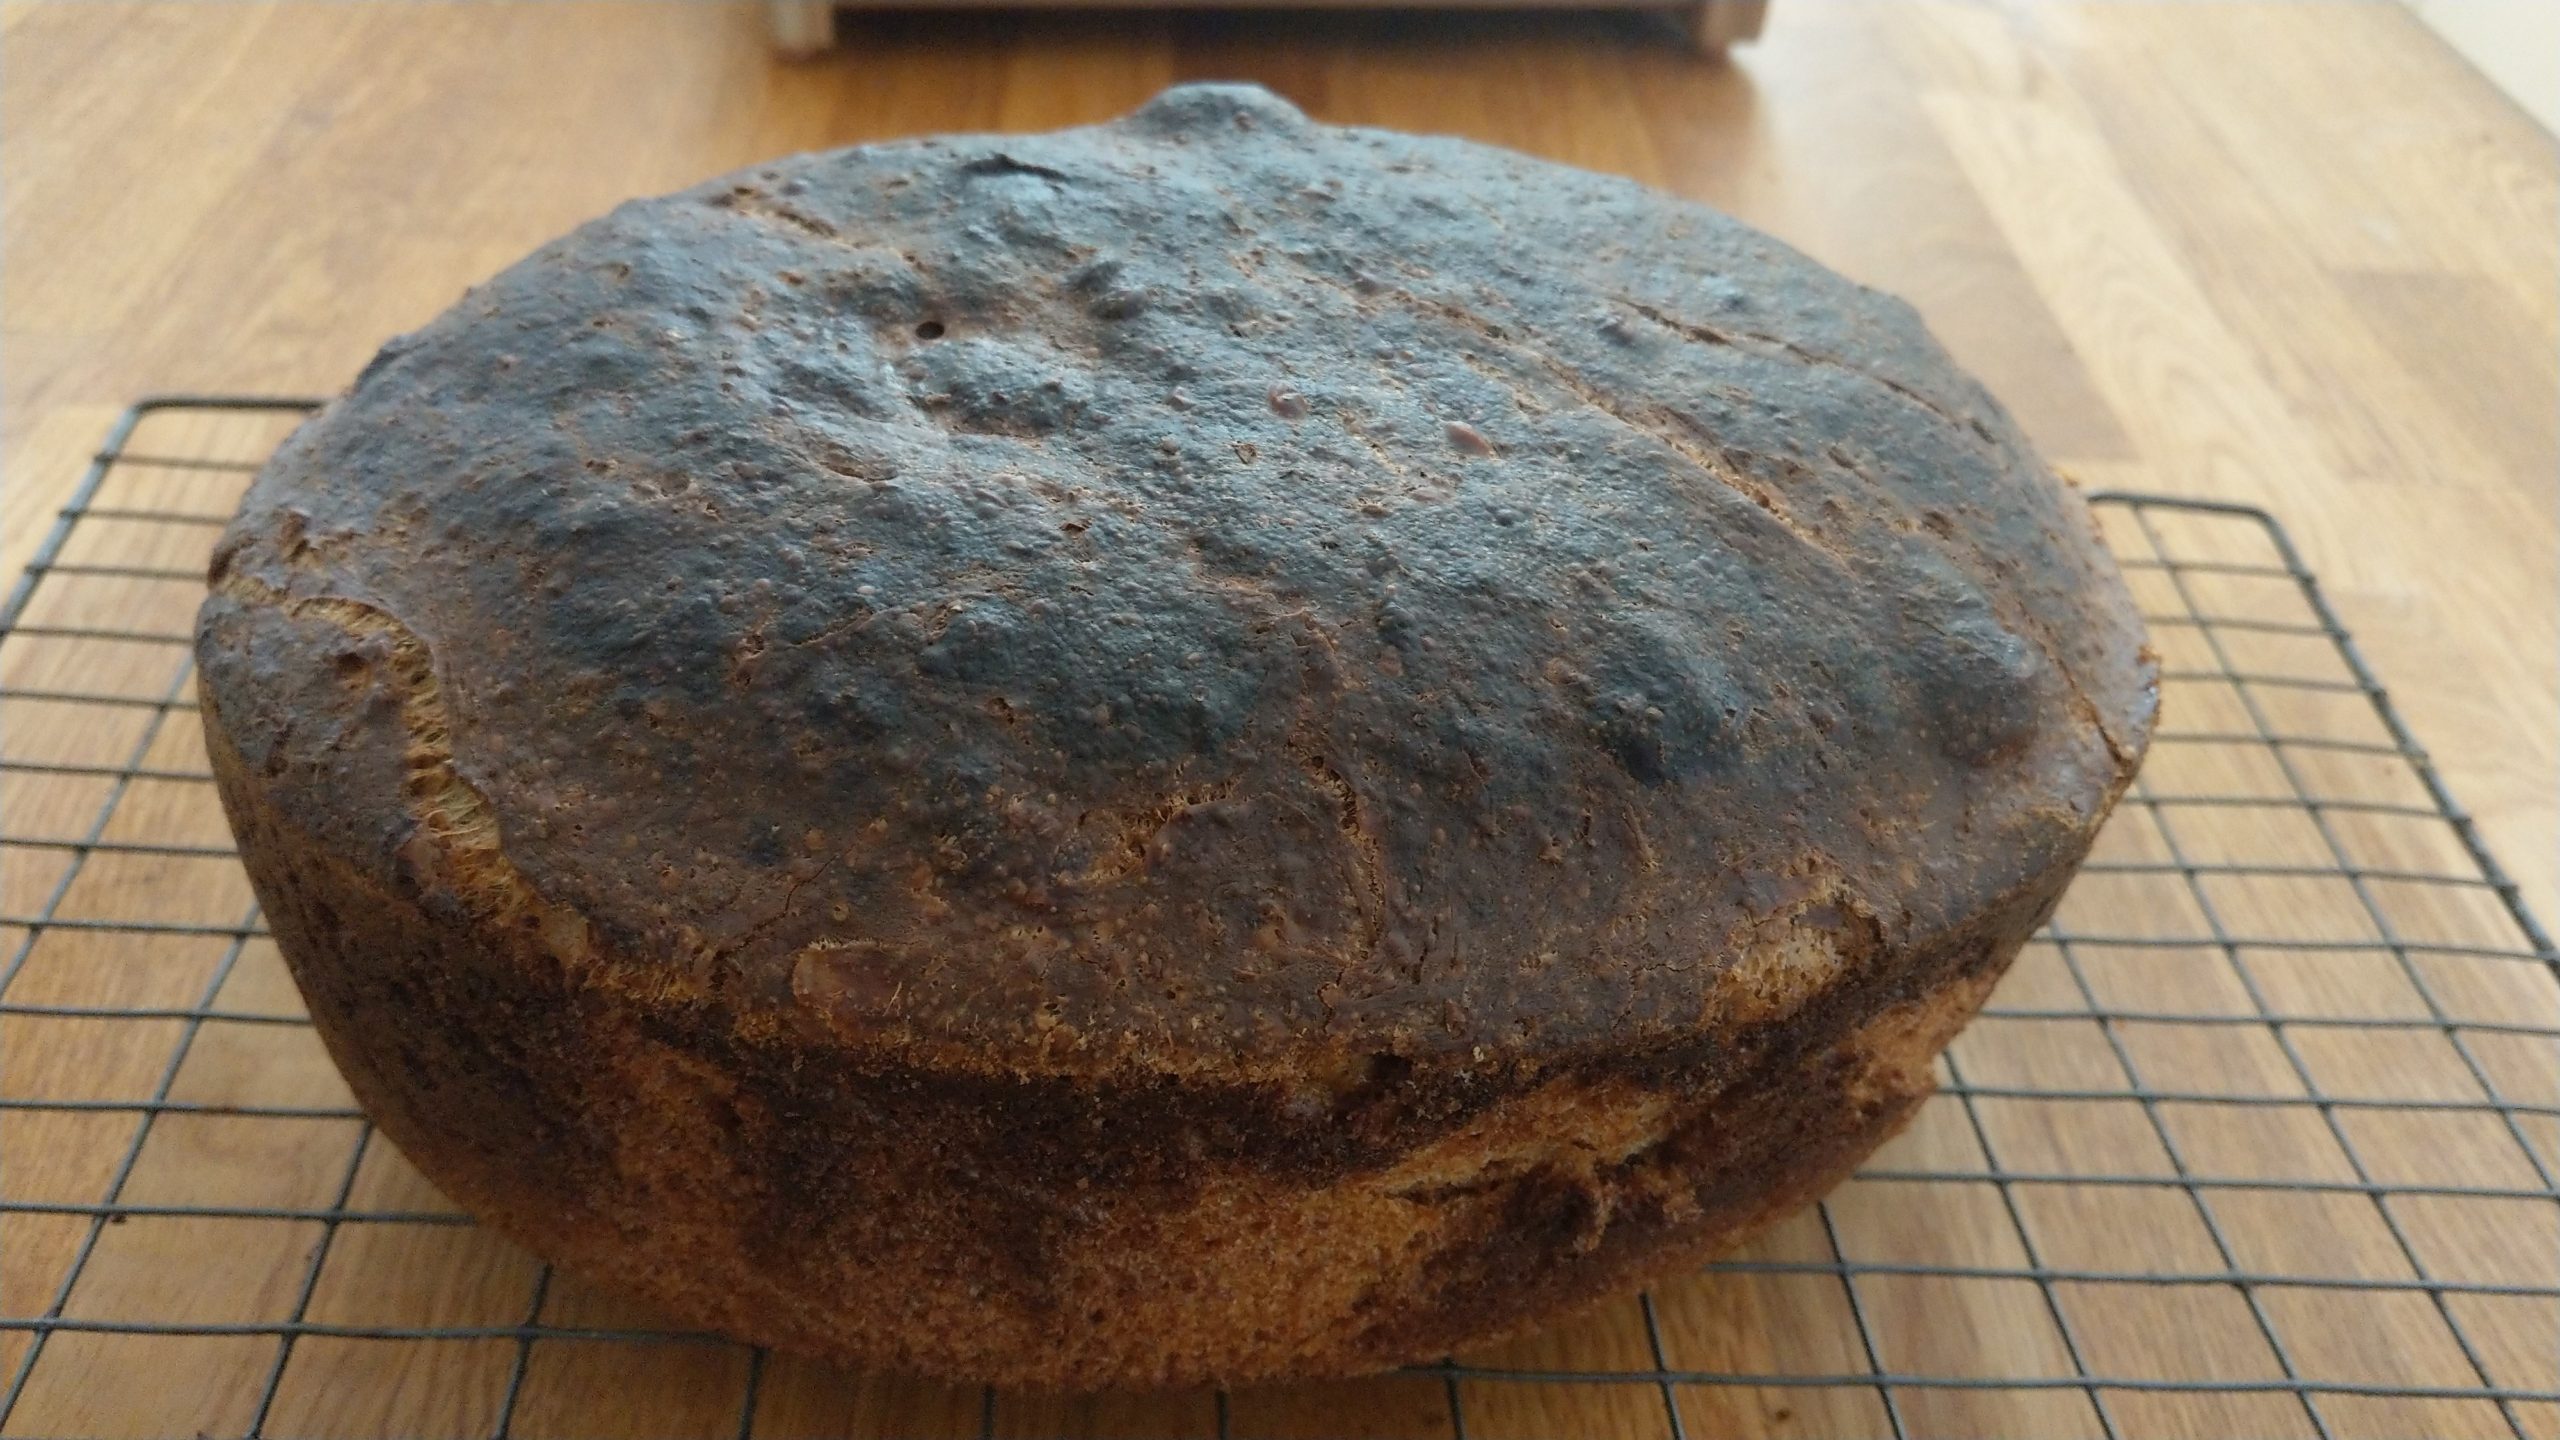
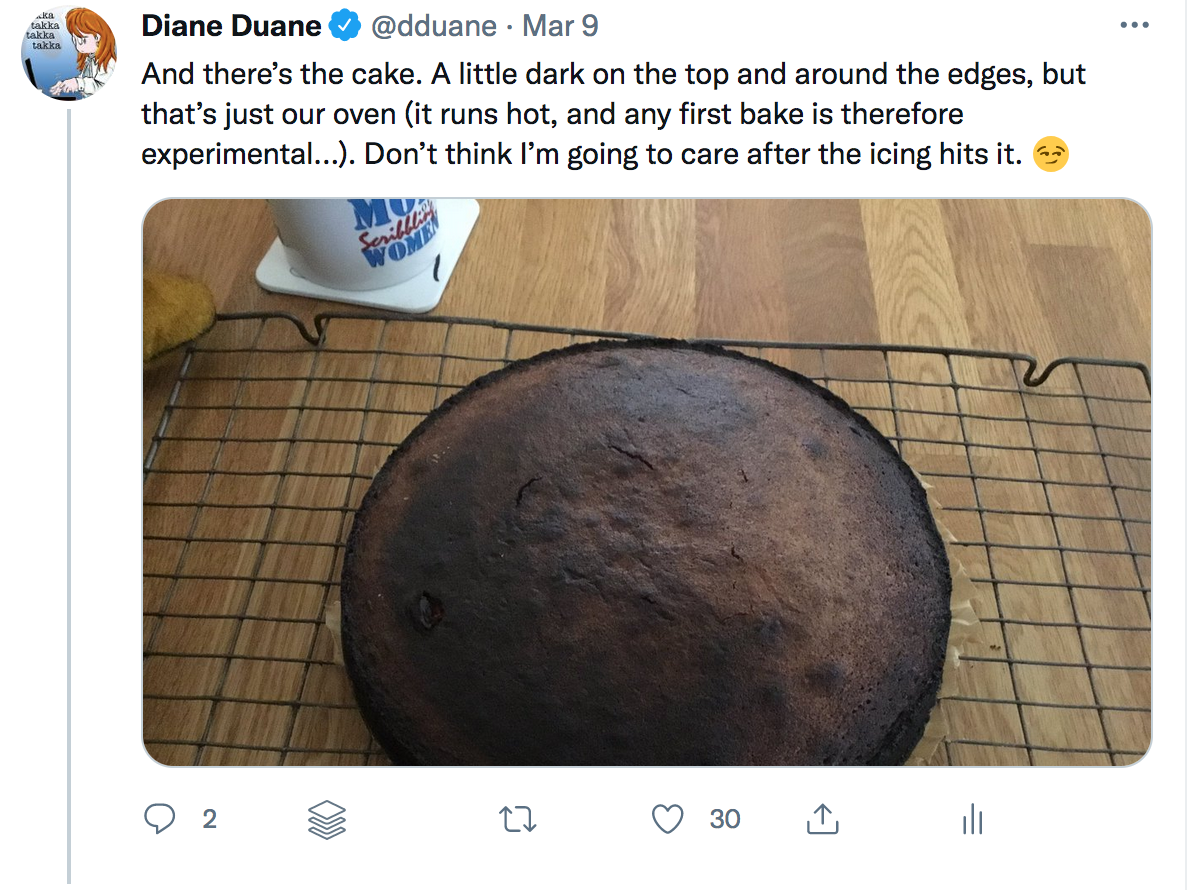
And there’s the cake. A little dark on the top and around the edges, but that’s just our oven (it runs hot, and any first bake is therefore experimental…). Don’t think I’m going to care after the icing hits it.
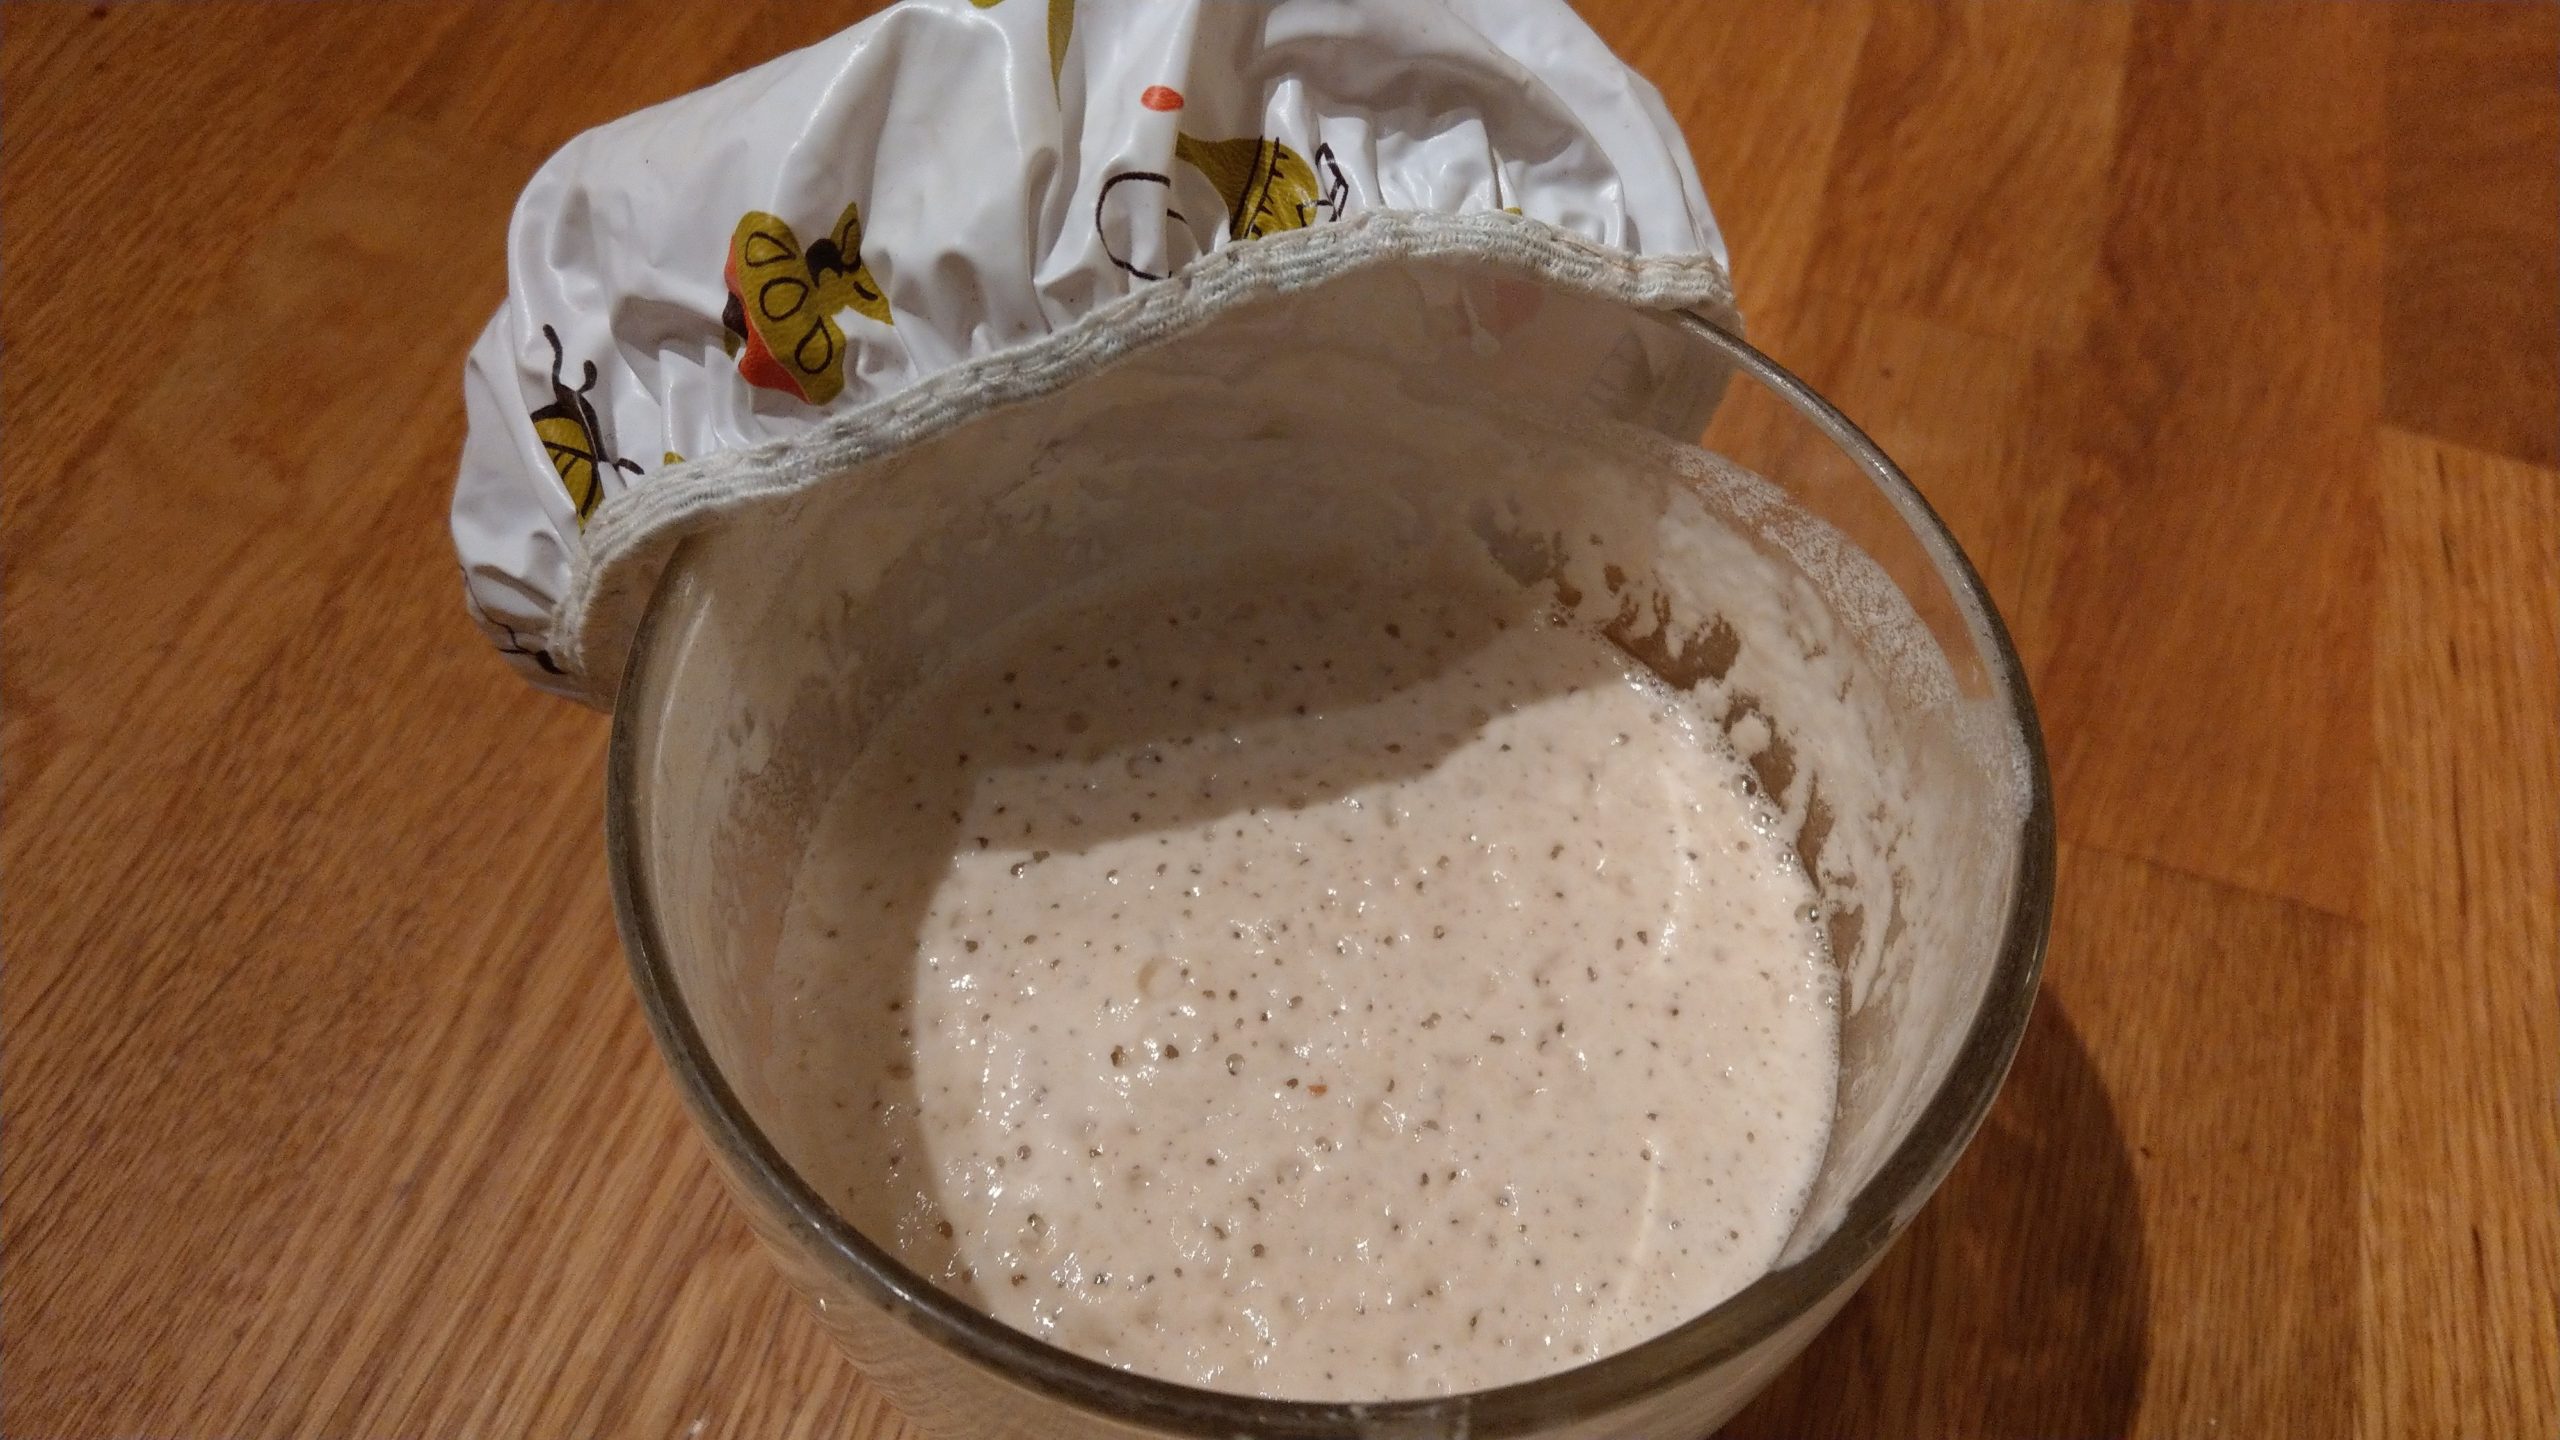
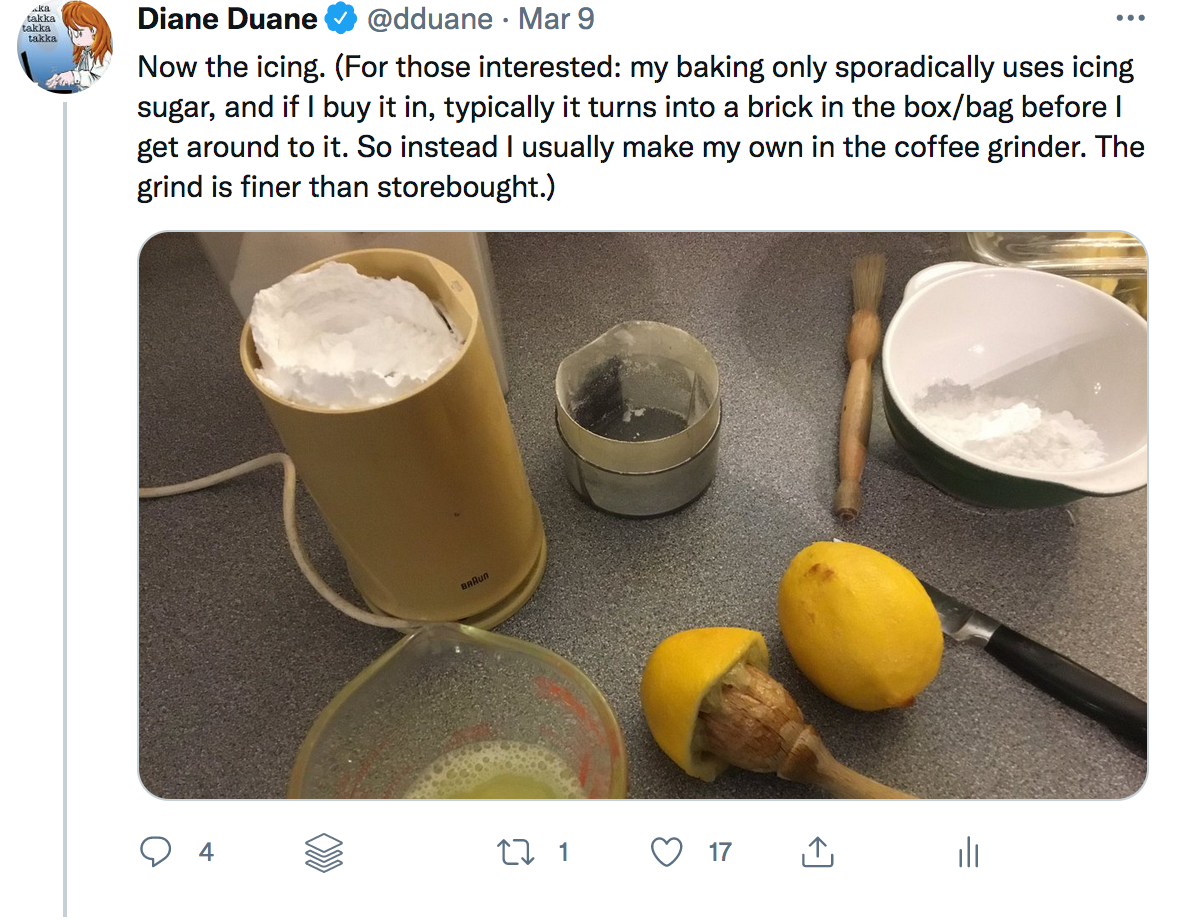
Now the icing. (For those interested: my baking only sporadically uses icing sugar, and if I buy it in, typically it turns into a brick in the box/bag before I get around to it. So instead I usually make my own in the coffee grinder. The grind is finer than storebought.)
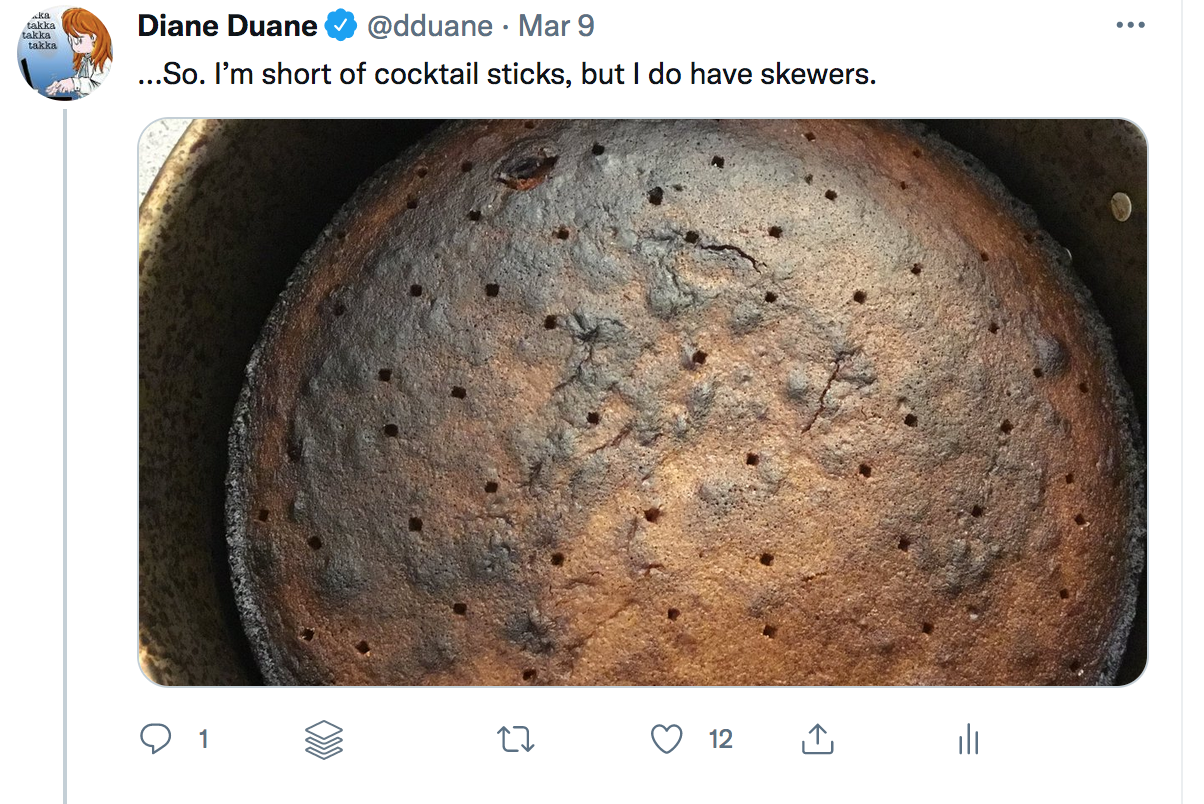
…So. I’m short of cocktail sticks, but I do have skewers.
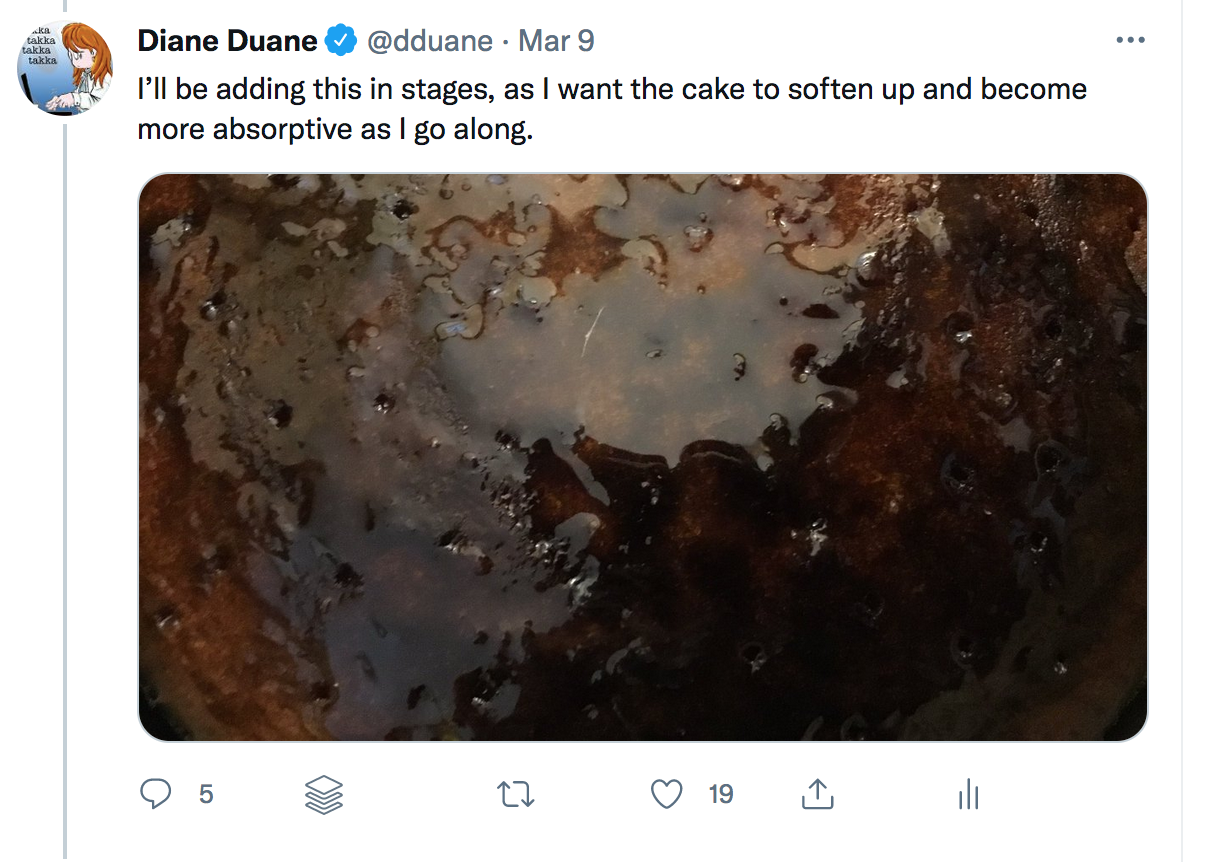
I’ll be adding this in stages, as I want the cake to soften up and become more absorptive as I go along.
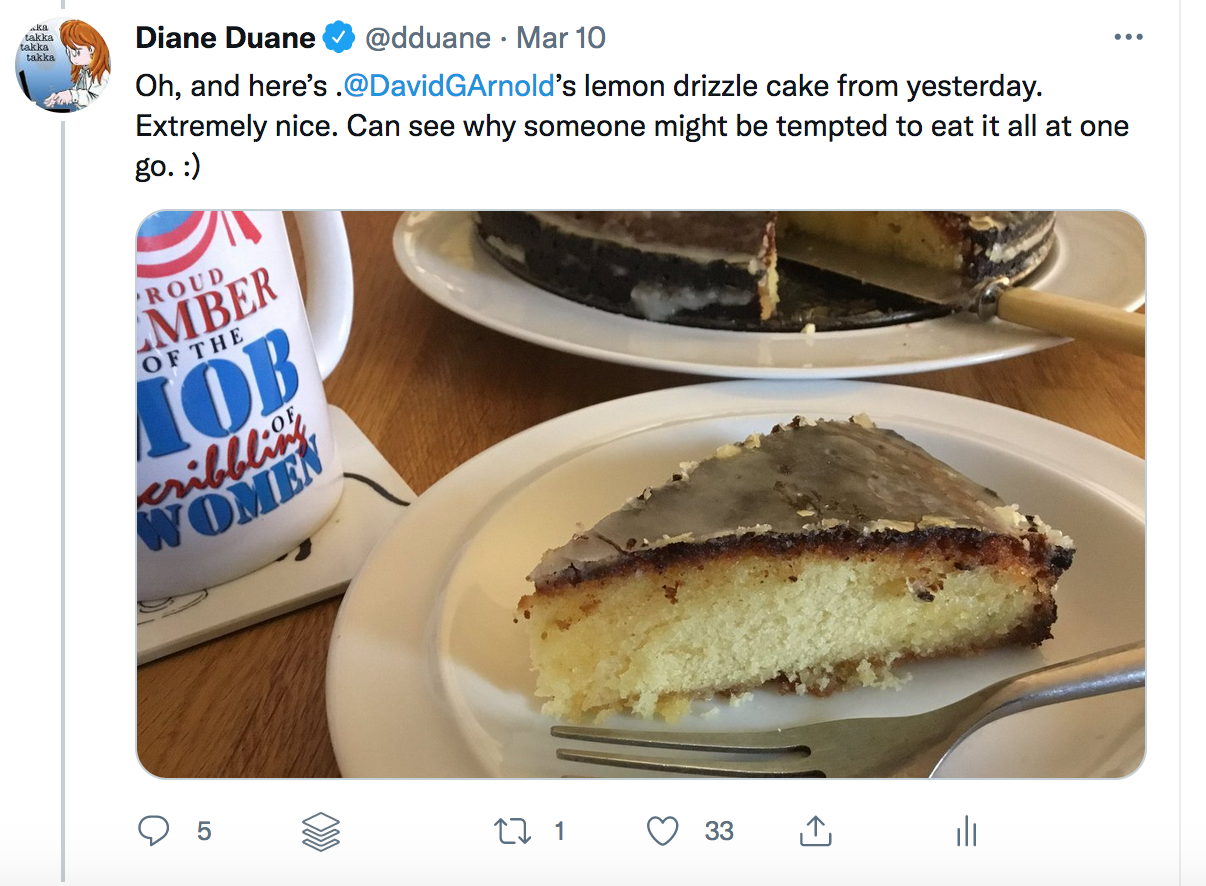
Unfortunately I don’t have an image of the icing stage. Apologies. But: here’s the finished cake.
Oh, and here’s @DavidGArnold‘s lemon drizzle cake from yesterday. Extremely nice. Can see why someone might be tempted to eat it all at one go. 🙂
The following recipe was improvised on the fly on the evening of October 16, 2020, and unfolded on Twitter. I don’t allow my tweets to be unrolled (because the companies that do that make money off my labor without giving me any). But I’m happy to share the recipe, and the process, here in my own web space, with anyone who’s interested.
***
Status report, Baking-While-You-Write dep’t: These three Bramleys weigh 1100g (that biggest one is nearly half a kilo all by itself. I FEEL AN APPLE PIE COMING ON.
Those of you who follow me on Twitter or Tumblr, or who dip in here from time to time, will know that cooking and cookbooks are issues of interest in our household. Particularly the cookbooks. There are a couple hundred of them in the living room at the moment (and that’s after we weeded out some unnecessary ones and sent them off to the library at the end of last year). They span all kinds of cuisines and approaches to cooking, and a nontrivial percentage of them are pre-20th century.
I have to confess that the older ones are some of my favorites (and not just for the recipes: often because of the advertising that appears in them, or because of other associations—regional, historical, linguistic. For example: a covey of cookbooks in (Sursilvan) Romansch, bought as much for the language/dialect or vocabulary as for the regional specialties). US and European “community” cookbooks of the 1800s and early 1900s are also favorites of ours. And some such cookbooks get added to the collection due to having come up on the local radar by other means, often obscure.
Right now, for example, I find myself looking at a project I wasn’t expecting to need to add to my TBW pile: a full-blown translation of a French cookbook. This one has a bit of a resemblance, in approach anyway, to one we’ve had available for download at EuropeanCuisines.com for a while: Mrs. de Salis’s fabulous Savouries a la Mode.
Savouries, like the many other guides and cookbooks Harriet de Salis wrote during the late 1800s/early 1900s, was aimed at the “New Woman”—the lady of the house whose circumstances, for whatever reason, rendered her unable to afford the staff / extra hired help that were in some classes taken for granted in an earlier time, and without whom it was thought impossible to “keep house properly”. So recipes that might have otherwise been lost to us (except by the former household staff themselves writing cookbooks, which fortunately also happened) are preserved, in full detail, in de Salis’s works. And old recipes of this kind—dishes or treats that one might have expected to be able to readily have at home, once—are always welcome.
Now let’s veer briefly sideways. While researching Belgian waffles for our page on that subject at EuropeanCuisines.com—and particularly the Liège waffle that often falls through the cracks somewhat for North Americans, since a (non-yeast-raised) version of the Brussels waffle tends to be more popular there—I went looking for French- and Vlaams-language online waffle resources, and came across the venerable website GaufresBelges.com and its recipe page. Their recipe for a beer-based waffle caught my eye, and I was pleased to see that they’d credited the cookbook.
Having tested the recipe—and finding it not at all bad—I started wondering what else might be in that cookbook that was worth knowing about. So I went looking for it, and soon enough found references to “La Patissière des Petites Menages” online: but the book itself turned out to be not that easy to find. As usual, this made me more interested in getting my hands on it, not less. Finally I found a copy available through a listing similar to this one at the French version of Rakuten, and sent off for it.
What arrived was a solid little paperback, old but very well made: the kind of thing you would have picked up from a kiosk or newsstand / newsagent of the time. The type is beautifully bitten into the page. The binding is sewn in signatures (and provoked immediate nostalgia for the long-ago days before paperback binding was universally done with glue). The 20-centime price tag translates, in modern buying power, to the equivalent of about a Euro. The book is 175 pages long: an introduction, a glossary, 140-odd pages of relatively brief and simple recipes for all kinds of baking that can be done in the home oven, a comprehensive index, an ad for other books from the publisher (A. -L. Guyot), and an ad for a company selling accordions and zithers.
…As you page through it, it becomes obvious that in this cookbook’s recipes the emphasis is on being able to make your own slightly-specialized goodies at home, without having to go down to the shops (or the baker’s) for them. (Which is perhaps why the lady on the cover isn’t wearing traditional baker’s togs, but bicycling bloomers.)
Peter, who has a university-level French course under his belt, kindly took a run at translating the introduction.
TO OUR READERS
As we announced, this “TREATISE ON PATISSERIE” completes our “COOKERY FOR SMALL
HOUSEHOLDS”, and we hope it will receive the same favorable reception.
Even in the most modest homes, wives and mothers will doubtless thank us for
providing means to treat their loved ones by enhancing the daily menu with
appealing delicacies to delight young and old.
At family reunions, or where groups of parents and friends are invited to a party for a wedding, a baptism, or other happy occasion, it will be a pleasure for any housewife to make by herself and inexpensively (without resorting to the baker’s oven), some tasty appetisers: PASTRIES, PIES, VOL-AU-VENTS, succulent SWEETS: DONUTS, CHARLOTTES, MERINGUES, TARTLETS, or fine DESSERT CAKES: BISCUITS, WAFERS, MACAROONS, FANCY COOKIES; even aristocratic ICE CREAMS, SORBETS etc. …
Finally, ladies, thanks to the recipes contained in this volume it will be easy to create
a domestic pantry abundantly supplied with LIQUEURS, SYRUPS, JAMS, FRUIT PRESERVES
and CANDIES, which will be all the more most appreciated when prepared by your
caring hands.
We have done our best to offer you a useful and pleasant manual in clear and
practical form: we hope we have succeeded!
The biscuits (cookies, a North American would say) and wafers particularly have my interest: but everything else looks good too. I look forward to getting to grips with the work of translation, a little at a time (because baking is one of the ways I get some of my writing work done. You’d be surprised how much character work you can deal with just while kneading bread…). When everything in the book has been translated, we’ll make it available in unadorned form for download at European Cuisines, and possibly bring it into e-print at Amazon as well. (And I’ll post about it here as well.)
So. Onward…
Well, a little weird.
Ireland is on COVID-19 lockdown (and will be for the next couple/few weeks, it looks like), and our next grocery delivery isn’t until nearly the middle of next week, and there’s no telling whether there’ll be baking yeast in it. And yesterday we were down to our next-to-last packet of it. So I sighed and got ready to start employing stopgap measures.
…And a quick note here: if you’re presently drawing breath to say “But I saw a post about how to make your own…” or “No one is ever really out of yeast, let me tell you how…!” — then please don’t, because there’s no need. I’ve been baking bread casually since my twenties and much more intensively over the last decade (Peter and I simply decided in unison that we’d had it with supermarket bread, and when we found the most dependable recipe imaginable, that was that). At one time or another I’ve built levains and starters from scratch, worked with sourdough starters more than a hundred years old, and have caught and cultured wild yeast on two continents. I’ve even written fiction about yeast, Thoth help me.
Anyway, right this minute—as a busy longtime-work-from-home small-businesswoman who is usually hip-deep in several universes at once while also doing website management—my preference for day-to-day baking is plain old active dry yeast of the Fleischmann’s, Red Star or SAF type. These have been genetically tailored for their work and suit my needs perfectly—being predictable, reliable, and in no need of coddling or extra attention. To be told “All you need to do is mix together some flour and water and let the natural yeasts…!”, etc etc, is for me (at the moment) too much like someone kindly offering to replace my missing Lotus Turbo Esprit with a Trabi. I will cope just fine, but I won’t sing paeans of praise about the alternative strategy. So let’s not go there, yeah? As KP says, “Please and thank you.”
Anyway. What was plain when I got the urge to bake yesterday afternoon was that I was going to have to throw together a preferment, because the thought of actually using up that last packet of yeast was giving me anxiety. Fortunately, when doing the last bake I’d used only 3/4 of the package of yeast, and had set aside the rest for this very purpose. So:
(Stage 1) Find favorite handled soup cup. Spoon in a tablespoon or two of flour and that yeast, and stir it about well to get combined. Add about a quarter-teaspoon of sugar just to let the yeast know that, momentarily anyway, Life Is Unexpectedly Good. Add a quarter cup of water, or a little more if necessary, to make a thick paste. Then cover the cup (or other vessel) and put this whole business aside somewhere warmish for a couple of hours. (Note that no salt is involved in this procedure until making the actual bread dough, because the salt acts as an inhibitor and the last thing you want to do with the yeast at this point is get it feeling inhibited.)
(Stage 2) In a couple of hours there should be some bubbling going on. Stir the bubbles down, add half a cup of lukewarm water, enough flour to make another thick paste, and another quarter- to half-teaspoon of sugar, because keeping the yeasts extra happy/active at this point is smart. Mix it all up until it’s smooth and put the whole business aside for another couple of hours.
(Stage 3) Repeat the above routine one more time with about twice the ingredients, except for another half-teaspoon of sugar for the yeasts. Then off you go and spend another hour or so doing something else. If the bubbles aren’t pretty active in the bowl or cup or whatever when you get back, give it another hour.
(Stage 4) And now we finally start actual breadmaking. Measure out about 200g of wholemeal/whole wheat bread flour and 400g of white bread flour. Stir in 10-12 g of salt (usually about a scant tablespoon). Add to this about 2/3 of the starter and about 350ml of water, and knead by hand or in a mixing bowl with a bread hook until it comes together and is smooth and silky-ish. 15 minutes or so by hand: in a mixer, six minutes on low speed and six minutes on high. Add more flour if necessary. Grease or oil a big bowl: put the dough in it and turn it so it’s evenly coated: cover it with plastic wrap and put it somewhere warm and comfy to rise. (I wrap mine up in a foam throw from Ikea. Works great.)
Because of the lowered raising capacity of this yeast—which is still getting up to speed—the rise takes significantly longer than usual. In this case it took something like four hours for the sponge to fill my raising bowl, which was fine, because I was binging The Rise of Phoenixes (while oblivious to the potential pun, don’t mind me, I catch on slow sometimes) and the plotting and backstabbing had seriously sped up from the previous ten episodes’ everybody-is-poisoning-everybody-else-with-slow-poisons-while-snarking-at-them arc.
At this point I hit pause long enough to punch the dough down… or actually, smoosh it down: it was very soft and sloppy. It was also larger than my normal loaf, because I’d had a put a fair amount of extra flour in to stabilize it. It became plain that (a) it was realistically too late to wait through a second rise and bake last night—which meant an overnight “cool rise” out on the sink in the boot room—and (b) if I put it in a regular loaf pan / tin to do that, it would overflow the thing in the middle of the night and make all kinds of mess. So I oiled a three-liter Les Cousances casserole, dumped the sponge in there, covered it with a tea towel, and left it to its own devices for the night. Then I went back to my binging, though not before adding more water and more flour to what was left of the preferment, and just a few pinches more of sugar, because so far at least the yeasts had been behaving Very Well and deserved a treat.
When I got up in the morning and came downstairs, here’s what the casserole looked like:
So it was plain that it was now time to bake, yay! Oven up to 200C, then (when preheated) slid the casserole in and for good measure threw about 150ml of water into the roasting pan at the bottom, to make some steam. Timer set for 50 minutes, and off to do some email and other stuff.
When the timer went off, this is what we wound up with:
It took another couple of hours for the loaf to cool and stabilize enough to slice safely. It’s a peculiar looking thing, but Peter came along and pronounced it one of the best bakes of this kind ever. (He’s fond of the pot-baking end of things: he’s quite good with the New York Times no-knead recipe.) Having had a couple of slices, I’m inclined to agree. Light: a delicate springy crumb, nice and open in the usual manner of slow-and-cool rises: definitely tasty. The crust’s a bit aggressive, but a night in a bread bag will sort that out.
…So that’s one way to do it. That said: I still want my damn active dry yeast. Meanwhile, the preferment is sitting in the office window, enjoying the warmth from the wood-burning stove, and it’s getting to be time to feed it a little again. (Because an online associate caused me to think of the torture-a-cinnamon-roll concept just now, and a yeast-raised cinnamon roll can be pretty good. We’ll see what tomorrow brings.)
…See, it’s even got a hat!
And for the moment, that’s all she wrote.
Using the vestigial English term “cracknel” to define this common snack food format of the Middle Kingdoms may at first seem a strange choice, considering the weird peripatetic course the word has charted across this world’s linguistic landscape over the last century or so. Having started out as a 1400s-period descriptor for a twice-baked savory-or-sweet biscuit, it then became gradually attached to all kinds of sweet and savory crunchy things, from pretzels (hard and soft) to commercially-produced crackers to (in southern US usage) the little bits of pork crackling left over after rendering lard. Various wafers, candy bars and nut-brittle-type sweets also use the term. (Check out this aggregation of Instagram posts including the hashtag #cracknel. Your head will spin at some of the things that turn up.) There’s even a Biblical reference, where “cracknel” turns up to render a Hebrew term suggesting biscuits that have been pricked with a fork before baking.
The connection seems, logically enough, to be the concept of crunchy things, which makes sense considering the term’s English etymology. According to the OED, it comes to us from the French craquelin, which is derived from croquer/”to crunch”. These days craquelin can mean (in general usage) a cracker, or (in more specialized usage) a pastry dough used to produce a crackly finish.
The cracknels that turn up in the earliest-preserved Tudor cookbooks, though, most closely match the Middle Kingdoms approach — a twice-baked biscuit, the first baking being of a long thin roll of seasoned dough, and the second baking of thin bits sliced off that roll. By the late Tudor period on our Earth, the second bake had been dropped out of the process, and the dough was simply rolled out very thin and cut out into rounds (see the recipes here reflecting this technique). But during the period being covered by the present Middle Kingdoms works, the preferred cracknel style closely matches the Tudor one… and is easily recognizable to a modern this-Earth baker as the normal method for making biscotti.
The words best used to render “cracknel” in the major languages of the Middle Kingdoms are surprisingly close (Arlene and N. Arlene kechte, Darthene chekech, Steldene emekch, even Ladhain kchhe). This, along with the words’ age — all of them are archaic — tempts one to think that they jointly preserve a common root word in what we may as well call the “late Medioregnic” dialect: the little-known common language/lingua franca spoken by human beings during the long terrible period when the phenomenon known as the Dark overshadowed the world. During this time much knowledge, even of languages of discourse, was lost in the near-extinction of humanity. So there’s an odd satisfaction in thinking that so small, homely and enjoyable a thing somehow persisted through the long disaster and (along with humanity) made it out the far side, back into the light.
The technique for making Middle Kingdoms-style cracknels is simple, and very close to the modern this-Earth biscotti method. Make a fairly firm dough with flour, a leavening agent (though some regions forego this), enough eggs to hold it all together, some honey if you like, and whatever herbs and seasonings (or in some cases cheeses) you favor. Roll this dough into “logs” and bake these until they color and firm up. Remove from the oven and allow to cool enough to cut them into small thin slices. Then return the sliced pieces to the oven at a lower temperature and bake them again, turning once during the process. The this-universe-Italianate cutting method of slicing on a sharp diagonal is sensible (in that it exposes the maximum amount of surface area to the gentle heat of the second baking) and attractive, but not mandatory. …Though there are regions of the Kingdoms where, if you had no other clue, you could tell where you were within thirty leagues or so by how the locals cut their cracknels.
Flavorings for Kingdoms cracknels are a matter of seasonal availability and the whim and affluence of the baker or cook. Steldenes favor putting chopped fresh or dried whitefruit in them (because of course they do: Steldenes are well known to put whitefruit in everything) and numerous other fruits as well, ideally dried; also fruit pickles and syrups, nuts and nut creams, especially almond and chestnut, and metahnë or weeproot, a close analogue to Armoracia rusticana, our common horseradish. Mid-latitude Arlenes tend to favor mellower spicery (yellow berry-pepper, capsicums, green onions and garlic, the various wild and tame parsleys) and grated hard cheeses, from the very mild to the very sharp. Western and “upper” Darthenes lean toward warm-country flavors: sweetbark, yellow citron (identical to our Citrus medica) and green citron (a local analogue to Citrus ichangensis, the Ichang papeda); anise, ginger, caraway, honey-rush (a relative of Saccharum officinarum, our sugar cane), and mint-grass. People from cooler, wetter climates (“lower” Darthen and Arlen, upper Steldin) prefer hotter or “darker” spicery in their cracknels: whitefruit again, dark berry-pepper (similar to our Piper nigrum), poppyseed, various nuts (walnut, chestnut) and smoked honey. But even inside these general areas of preference there’s endless variation, influenced by whatever local ingredients are felt to suit cracknels particularly well.
(There are also regional differences in preparation. The most extreme of these would possibly be native to North Arlen, where, as a substitute for the second baking, some people deep-fry their cracknels. Up south in the more conservative parts of mountain country, mentioning this behavior will inevitably start a discussion about the naughtiness and perversity of the decadent North. Brawls have occasionally started over this issue. Let the tourist beware…)
In the towns and cities of the Kingdoms, every bakery of any note makes cracknels to their own recipe and seeks to lure customers away from other bakers by unique combinations of flavors or superior baking technique. Competition (both informal and formal) is intense. In both Prydon and Darthis there are annual contests for the best cracknel in the city, and it’s not unknown for judges in these competitions to be bribed. In Prydon, for some years since the enthronement of the new King—when people started having time or inclination to be thinking about this kind of thing again—there has been a push to require competitors to formally swear in one or another of the Goddess’s City temples that they will not accept gratuities or otherwise seek to influence the contest outcomes. But so far no formal action has been taken… King Freelorn perhaps having wisely decided to keep his (and the Lion’s) nose out of it.
Fortunately one doesn’t need to have a Middle Kingdoms commercial bakery in the neighborhood to experience cracknels. They’re easy to make at home. Here are two representative recipes. One is in the Steldene style, with Jalapeño and chipotle chilies standing in for the inevitable whitefruit (and adding not only smoked paprika but Cheddar cheese, which the more hidebound Steldenes might look a bit askance at… but ask me if I care. They won’t be eating them). The other is more northern Darthene in its flavoring, using caraway as an aromatic and substituting lemon for the ubiquitous green or golden citron of the warm North.
Preheat the oven to 180C for a regular oven, 160C for a fan oven.
Because of the chilies in this dough, it makes sense to wear disposable gloves for this next stage of preparation. If you choose to work bare-handed, please be extra careful about washing your hands thoroughly before touching your eyes or any part of you that features mucous membrane. Jalapeños and chipotles may seem innocuous in your mouth, but getting capsaicin from them in your eye (or onto/into other sensitive area) is an experience better avoided.
Mix the flour and all the dry ingredients together. Beat the eggs well, add them to the dry ingredients, and mix and knead together until the ingredients start to come together into a dough. Add the chopped chilies and grated cheese and knead until well combined into the dough. (If you can do all the above in a mixer bowl using a dough hook, so much the better; it’ll be a lot less work for you.)
Prepare two cookie sheets by lining them with baking parchment. Lightly flour a work surface and tip the dough out onto it. Divide the dough into four pieces and roll each one into a log of dough about 30cm long. Place the logs on the prepared cookie sheets, two per sheet, well separated. (They may spread a lot, or they may not, but it’s wise to give them room.)
Put in the oven and bake for 25 to 30 minutes, until the dough has risen and spread a little, and the outsides of the dough logs are slightly browned and firm. Remove them from their cookie sheets to a rack, and allow them to cool for a few minutes. Meanwhile, lower the heat in the oven to 140C for a regular oven, 120C for a fan oven.
With a sharp knife, slice the dough logs on a sharp diagonal in slices about 1cm thick. Lay the slices out flat on one or more of the prepared baking sheets (you may only need one) and put them back in the oven for twenty minutes. At the end of this time, pull the baking sheet out and turn all the slices over: then return to the baking sheet for another twenty minutes.
Remove to a rack to cool completely. When cool, store them in a tin until ready to serve. They will keep well in the tin for up to a month… assuming you can stay away from them for that long. If you can, stay away from them the first day of baking as well: after a day or so the flavors intensify somewhat.
Preheat the oven to 180C for a regular oven, 160C for a fan oven. Prepare two cookie sheets as above.
In your mixer’s bowl (assuming you’re using a mixer), combine the flour, baking powder, salt, sugar, ground caraway seeds and lemon zest and mix well. Add the beaten eggs and knead well, using the mixer’s dough hook if you can. If the dough is reluctant to come together, add lemon juice teaspoonful by teaspoonful until it does.
This dough will be stickier than the previous one, and will probably have to be scraped out of the bowl onto your floured surface. Additionally, it may need some more flour added to it so that you’re able to work it into logs — once again, four of them, each about 30cm long. Place on the prepared baking sheets, well separated, and bake for 25 minutes. The top of each log should be firm and just slightly colored.
Remove the once-baked logs from the oven and place on a rack to cool for 15 minutes or so. Reduce the oven heat to 150C for a regular oven / 130C for a fan oven. Slice the logs up in 1cm-wide slices, on the diagonal, as previously. Lay the slices flat on one of the baking sheets and return to the oven for twenty minutes. Then as before, remove from the oven, turn all the slices over, and put back in the oven for a final twenty minutes. When finished remove to racks and cool completely.
Store in a tin or other tightly-closed container when completely cool. Like their spicier variant, these too will keep for a month in a tin.
A few process notes:
Make sure to have your knife very sharp before beginning work on the once-baked rolls.
When cutting, do not be tempted to press straight down with the knife: the cracknels will inevitably break in half (or smaller) and not be pretty. Slice each slice and take your time. Resharpen the knife if and when necessary.
As in most Earth-analogues inhabited by human beings, the broken or irregular ones are for the cook. Just which ones are irregular (and how many…) is the cook’s call.
Serving suggestion: With the cold drink, beer or wine of your choice. Disclosure: I haven’t yet tested these with beer. Results will be forthcoming on or around New Year’s.
One caution: Crunchy and delightful as these are, they can sometimes bake up very hard. If you have any concern about the strength of your teeth, please be careful about how you bite into these.
Enjoy!
(ETA: And now that it has its own online home, visit the cookbook-in-progress at https://foodandcooking.middlekingdoms.com.)
The recipe isn’t his, but I think of him whenever I make it (which is way too often. Not in terms of thinking about David Gemmell, but in terms of eating the brownies…).
This recipe closely parallels one I always used when Dave would come to visit us in the house on the hill that we were then renting (from Harry Harrison) in Avoca, further east in County Wicklow. Along with the memory of the visits (always delightful: long walks, late nights, a lot of laughing) and the brownies (the record for baking them was four times during one visit) comes the memory of how we “lost” Dave in the bathroom for an hour on one visit, because the household’s complete collection of Calvin & Hobbes books was in there and he’d never come across the characters before. Only the cry of “There are brownies, Dave!” was able to cut the session short.
The recipe is easy and quick to make — the phrase “thrown together” would suit it: just mix everything together, pour into a buttered pan, bake — and produces a result very much like the much-loved “brownies from the box” that the Betty Crocker people used to make in the US. (Maybe they still do? But [assuming they do] I haven’t had more modern ones and don’t know what they’re like these days.)
This recipe is similar to one from AllRecipes.com, but mine is a bit lighter on the flour, producing a brownie a bit on the “squidgy” side. (That’s my preference, and Peter’s. Like yours more cake-y? Add another 1/4 cup of flour to start with and see how that behaves.) Also: I add conversions to metric measurements-by-weight for those who like more predictably even results.
The ingredients:
First butter a 9-inch square baking pan and preheat the oven to 350F / 175 C.
Sift or stir together well the flour and salt…
Measure out the cocoa and baking powder and stir together.
Then combine them with the flour and salt and stir together until the dry mixture has gone a uniform color.
Put the dry ingredients aside for the moment, and measure out the sugar and oil. Beat well together; then add the vanilla and beat that in.
Add the eggs and beat them in too.
Then dump the dry ingredients into the egg / oil / sugar / vanilla business (or the other way around, if you prefer; it makes absolutely no difference as far as I can tell, I’ve done it both ways, both on purpose and by accident…) and mix mix mix mix mix…
…until it’s all gone pretty and glossy and shiny. It doesn’t have to be absolutely smooth; don’t beat it so much that the gluten in the flour starts to develop. You don’t want that.
Pour the whole business into the baking pan.
And that’s it! Shove it into the oven for 30 minutes and bake.
At the end of half an hour, test it for doneness if you believe in doing such things. (I’ve never bothered. If the brownies rise, they’re done enough for me.)
…And you can see what they look like in the picture at the top. Peter likes sour cream on them, so that’s what we’ve got a pic of. Me, I just cut them up and stuff them in my face.
So go thou and do likewise: and think of Dave Gemmell, perhaps, if you do so. A lovely, dry, funny, talented man. Lost to us too soon, dammit.
In 2010 or thereabouts, a tiny little cookbook came to us via Peter’s Mum and immediately became a household favorite.
It was published in 1903 for what was the first generation of middle-to-upper class British housewives who couldn’t afford to hire kitchen staff, but still wanted to serve food suitable to a high-class household. These cooks were also beginning to come into possession of the first generation of true labor-saving devices — the initial gas and electric ranges, the first refrigerators — and were looking for recipes to take advantage of them. So along came Harriet DeSalis, and with this group of readers in mind, wrote Savouries A La Mode.
The cookbook was a huge hit — no surprise, when the recipes worked so well. Dipping into it, one finds recipes that make the mouth water and make the chronic cook (at least this one) itch to get into the kitchen and see how they turn out. It became the first of a series that went on well into the early part of the 20th century and sold hundreds of thousands of copies over numerous editions.
They’re all in public domain now, those original editions of Savouries and its sequels, which is what moved me to scan that first book and make it available over here at EuropeanCuisines.com. But the other reason I scanned it was so I don’t have to hunt down the cookbook proper, when the urge strikes, but can just load the PDF onto the iPad and work from that in the kitchen.
The other evening I was feeling like having some kind of snack, and it occurred to me to pull out the DeSalis and see if we had the ingredients for anything that looked nice. Paging through it, I ran into the Cheese Straws recipe, and the bells went off and I salivated on cue.
Here’s the recipe.
“Take two ounces of flour, and mix with it a little salt and a cayenne-spoonful of red pepper. Then take three ounces of Parmesan cheese: grate it. Rub the cheese and two ounces of butter well into the flour, then mix all these ingredients, together with the yolk of an egg, into a smooth stiff paste. Roll the paste out into a strip one-eighth of an inch in thickness and five inches wide, which is to be the length of the cheese straws. Cut this strip into strips one-eighth of an inch wide, so that they will be five inches long and one-eighth of an inch in thickness. With the remainder of the paste, and with two round cutters, cut little rings of paste. Put the cheese straws and rings on a baking sheet and put them into a hot oven for ten minutes, the heat rising to 246 degrees. For serving, put the cheese straws through the ring like a bundle of sticks.”
So. My first thought: God that looks fiddly. But never mind. Also: Forget about the little rings, this isn’t going to be a dinner party. The second (okay, maybe the third) thought: We don’t have any Parmesan: only Cheddar.
…Like I’ve ever let that stop me. (An old allergy put me off Parmesan early, and these days, though no longer allergic, I avoid it.) So I went forward with the same amount of Cheddar, knowing that the mixture would be a little wetter due to the Cheddar’s extra moisture, and I’d need to compensate with slightly longer baking.
What I learned in the process of making these:
…And that’s all there is to it. The straws were incredibly delicate and buttery due to the very short pastry — but the cheese is great in them and the cayenne gives them a terrific kick. The whole bake lasted through about twenty minutes of the first Hobbit movie. Peter tells me they work as well with beer as mine did with that red wine.
Try them and see how they work out for you. And mind your baking times, as the Secretary and I will disavow any knowledge of your actions if the sneaky little creatures burn to a crisp between one minute and the next. (Like my first batch did.) Do a small batch first and watch them like a hawk.
My memory was jogged the other day when I was in the local grocery to pick up a couple of things and went down the baking-products aisle. In passing I noticed that all of a sudden there were a whole lot of bags of raisins and currants and chopped nuts and candied fruits piled up. And suddenly I realized that It’s That Time Of Year already — the time when you make fruitcakes and so forth for Christmas, and set them aside to mellow.
In some parts of Ireland Halloween is nothing compared to this event: the Baking of the Fruitcakes. People get very competitive about it. Some of this is less about the cakes themselves than about what you put in them to, uh, preserve them. Sometimes it’s stout: sometimes it’s whiskey. But you have to do this baking in October or the cake and the added ingredients won’t have time to get properly friendly with one another before the holidays.
For those of you who are into such things, this is just meant to serve as a reminder that this is the right time of year to get busy. There are a few good recipes at the European Cuisines website worth recommending here.
This Porter Cake recipe is one. (That’s it in the photo at the top of the post.) A good solid old recipe. This one you put into a cake tin when it’s finished and keep in the fridge until Christmas. (Look in on it occasionally to make sure it’s okay. You might want to add a little more stout as well if it shows any signs of drying. Also: there’s no rule that says you couldn’t add a good Irish whiskey if you felt so inclined.)
Also worthwhile is the Guinness cake here. This one won’t keep quite as long — it’s rated for a week — but it’s worth making closer to the holiday. (Toasted and buttered, it’s fabulous.)
Finally, check out this recipe for Black Bun, which isn’t Irish but is worth investigating for the holidays. “Black bun” isn’t a bun at all: it’s a Scots invention, a fruitcake that goes pretty heavy on the fruit and is held together by a pastry crust. Our recipe for it comes from a vintage 1950s grocers’ supplement that we also keep available as a PDF download for those who’d like the whole complement of seasonal recipes as seen from the Scottish angle. The recipe is laughably light on the whiskey side, but the source pamphlet was published just after rationing stopped in the UK, and almost certainly more modern recipes get a fair amount more whiskey syringed or turkey-bastered into them between baking and eating. Of the three cakes, this one is the champion in terms of keeping qualities: made now and kept properly sealed up, it would keep until well after Hogmanay.
Anyway, take a look at these and see if any of them sound like you’d enjoy them! (makes note to self: when next down at the SuperValu, buy more raisins…)
So on the way back from the interview (oh yeah, here’s the podcast link) at Dublin City FM the other day (hi Clare, hi Kitchen Table folks!) I stopped in at the local supermarket to pick up a few things and grabbed, along the way, some lemons. It was because this recipe had come up on my Facebook feed the day before, and it had started noodging at me because I hadn’t made a cake in ages.
So I made it, as much to give our vintage Bundt pan a workout as for any other reason. And wow, did this turn out well! Substantial without being too dense: a lovely firm crumb that is also beautifully moist. So while I’m copying the recipe here for my own purposes, I strongly suggest that you visit Carrie’s site at myrecipeconfessions.com and see what else she’s got there, as if this is anything to go by, the prognostications look good.
One note about this in passing, though. I’m not sure how to get to grips with her description of the cake’s lemon flavor as “mild”, as it’s no such thing unless you start eating the cake before it’s even fully cooled. (Guilty as charged. I was craving something sweet at that point, and it had smelled really good while baking.) The lemon fragrance and flavor intensify the longer you can force yourself to leave this cake alone.
Which is why I need a cake safe. 🙂 Peter and I have been muttering at each other for months that we need a cake carrier — you know the kind of thing, a Tupperware-or-similar business with a base that you sit a cake on and a plastic dome that goes on top and screws down a bit into flanges to close up, and a handle for carrying it. It’s a serious need, as we’re constantly baking things that we can’t finish ourselves (or that it would be bad for our waistlines to do that…) and then walking them down to the local pub to get the neighbors to eat them instead.
But for this cake you would need one where once you twisted that top down into place on the base, it would lock down and refuse to open for, say, twenty-four hours. Or forty-eight. And if you absolutely couldn’t bear being kept out of it before the expiration time, you would go into the app (of course there would be an app…) and be forced to pay yourself a non-insignificant amount of money to get the cake safe to open up early.
Just a thought. Who knows, in this Internet of Things we’re now living in, maybe someone’s invented such a thing already.
Meanwhile that damn cake is three-quarters gone, and the neighbors are never going to see any of it, and I’m going to have to make another…
(Who knows, it might actually be Italian…) A couple of notes: surprisingly, when I made this, we were out of buttermilk (not normal around here). I simply soured the milk with a couple of tablespoons of lemon juice, as there was plenty of that around. Also aolso: Regular salted butter works fine with this. Also also also (wik): I didn’t bother making the icing. I’ll try it the next time.
For the cake:
3 cups all-purpose flour
1 teaspoon baking powder
1/4 teaspoon salt
1 cup unsalted butter, softened
2 cups sugar
3 eggs
1/2 cup buttermilk
1/2 cup of sour cream
4 tablespoons lemon juice
Zest of 2 lemons ( about 2 tbsps.)
1 teaspoon of vanilla
Method:
Pre-heat oven to 300 degrees
1. Sift flour, baking powder, and salt and set aside. In another bowl, cream butter and sugar until light and fluffy. Beat in eggs, one at a time. Mix in the sour cream, lemon juice, vanilla, and lemon zest.
2. Mix half of the flour mixture into the butter mixture. Mix in the buttermilk and then add in the remaining flour mixture. Mix just until the flour disappears. Pour the cake batter into a bundt pan that has been generously sprayed with baking spray.
3. Bake for 60 to 70 minutes or until a knife inserted in the center of the cake comes out clean. Remove the cake from the oven and allow to cool for 5 minutes. Turn the cake over on a cake platter. Spread half of the lemon glaze over the warm cake so that the glaze can soak into the cake. Let the cake cool completely and drizzle the remaining glaze over the cake.
1/4 cup butter, softened
1 1/2 cup powdered sugar
3 tablespoon lemon juice, at room temperature
Cream the butter and slowly add powdered sugar and lemon juice. Beat well until the glaze is a creamy smooth consistency.