Out of Ambit
  • Home
  • Writing
  • Travel
  • Home life
  • Media
  • Obscure interests
  • Hobbyhorses and General Ranting
Borges and the Peryton
The Martini Rant
At the Young Wizards end of things: an...
2021 Hugo nomination eligibility: the Young Wizards series
Maluns
Owl Be Home For Christmas
Vintage Scots Christmas recipes: “Good Fare Christmas”
From the Young Wizards universe: an update
Irish life: The things you don’t discuss, Halloween...
Q&A: Why is my Malt-O-Meal lumpy and how...
From the Baking-While-You-Write Department: Spicy Apple Pie
Peter Morwood on Moroccan preserved lemons
Greek mythology, feminist reclamation of lost/ancient tradition, and...
Changes coming at YoungWizards.com: your opinion(s) solicited
Outlining: one writer’s approach
A project in progress: translating “La Patissière des...
  • Home
  • Writing
  • Travel
  • Home life
  • Media
  • Obscure interests
  • Hobbyhorses and General Ranting
Out of Ambit

Diane Duane's weblog

Category:

Food

Good Fare Christmas cover
Foodrecipes

Vintage Scots Christmas recipes: “Good Fare Christmas”

by Diane Duane November 23, 2020

It occurred to me that it’d be smart to import this post from EuropeanCuisines.com, it being the time of year to think about such things.

Some years back, EuroCuisineLady and EuroCuisineGuy went on a cookbook-buying visit to Hay-on-Wye, world-famous Town of Used Bookstores. The return trip nearly broke the suspension of our little Fiat Uno, whose rear end was stuffed full of old cookbooks of every description.


One great pleasure – as always, if you’re a used-book buyer – was finding the unsuspected treasures secreted among the pages:  old articles, notes, the scrawled notations of cooks of years gone by. Sometimes these additions were more unexpected than usual.


Out of one book of UK dairy recipes fell, without warning, a holiday brochure from the Scottish Federation of Grocers’ and Independent Provisioners’ Associations. Some study suggested that it dates back to about 1954 or a little later, that being the earliest postwar date when food rationing would have been over and enough goods would have gotten into the newly replenished stores to make an advertising campaign worthwhile.


The brochure features recipes (among others) for the traditional dense UK-ish Christmas Cake, as well as for the essentially Scots Hogmanay dessert Black Bun, and also has small sections discussing Scottish holiday customs, and some ads for locally available comestibles. There is also a useful check-offable shopping list, and a contest for young readers with a prize of a ten-shilling money order – which was serious money, back in the day.

 
A table of contents:


  • The Festival of Yule
  • Christmas Cake
  • Almond Paste
  • Royal Icing
  • Christmas Honey Biscuits (Polish)
  • Mrs. Black’s Plum Pudding
  • Brandy Butter (For Plum Pudding)
  • Foamy Sauce (For Plum Pudding)
  • Christmas Sundaes
  • Cranberry Sauce
  • Orange Salad (with Goose)
  • Christmas Salad (with Turkey)
  • Hogmanay Fare
  • Shortbread
  • Black Bun
  • Scotch Currant Loaf

As the holiday season approaches, we’ve scanned this brochure and saved it as an Adobe Acrobat .PDF file for download. To prevent strain on our own hosting provider’s servers, we’re hosting the file at our storage space at box.com.

Enjoy!

Hits: 0

November 23, 2020
1 FacebookTwitterTumblrEmail
Lumpy Malt-O-Meal
FoodQ&A

Q&A: Why is my Malt-O-Meal lumpy and how can I fix it?

by Diane Duane October 28, 2020

So, a little background here first. Though I was born and raised in the US, I live in Ireland. If there’s one thing about Ireland that you learn pretty quickly, it’s that if you like a hot breakfast cereal on a chilly morning, what’s available for you in the major grocery stores is going to be based on oats. The concept of hot cereals based on other grains (wheat, rice…) has not yet made any serious inroads here. If you know where to look — some specialty stores in big cities, some high-end groceries with imported foods sections — you may be able to score something (at a significant markup… enough to make your eyes bleed). But the odds are against you.

They’re worse if you like a cereal that’s at all specialized. For me, the cereal in question is Malt-O-Meal. For those of you not familiar with it, this is a wheat-based hot cereal with a malty flavor. I love it dearly, but as far as I can tell, it is nowhere available in Europe. So I normally wind up ordering it a few boxes at a time from the US on Ebay (while gritting my teeth at the postage costs, but that’s the price of admission).

I’d been without the stuff for the summer months, and as the weather started to cool down I ordered in some more. I received the package with joy, when it arrived after about three weeks (because no way was I going to pay the insane postage for faster shipping), and I had some for breakfast the next morning.

I have years of experience at making this stuff, and it never lumps. But the first potful of this batch came out studded with lumps the size of marbles. “Huh,” I said. I ate it anyway (after taking a potato masher to it) because I don’t waste Malt-O-Meal. But I was concerned.

Made another potful the next morning, and lo, it happened again. Lumps. Now I was more concerned. Was this whole three-box batch going to be defective? Most annoying.

Finally I put on my Science Hat and started considering what might be going wrong with this stuff, and what could be done about it. When I open a box of any dry hot cereal, normally I put it in a glass jar so that it’ll be easier to scoop out with a measuring cup. And as I turned the Malt-O-Meal jar over in my hands, I noted that the grains were sticking to each other a bit. Hmm, I thought. These things took the guts of a month getting here, and they weren’t that tightly wrapped. What if they picked up some moisture along the way?

So I did an experiment. I took a few servings’ worth of the Malt-O-Meal and spread it out evenly in a nonstick pizza pan.

The pizza pan

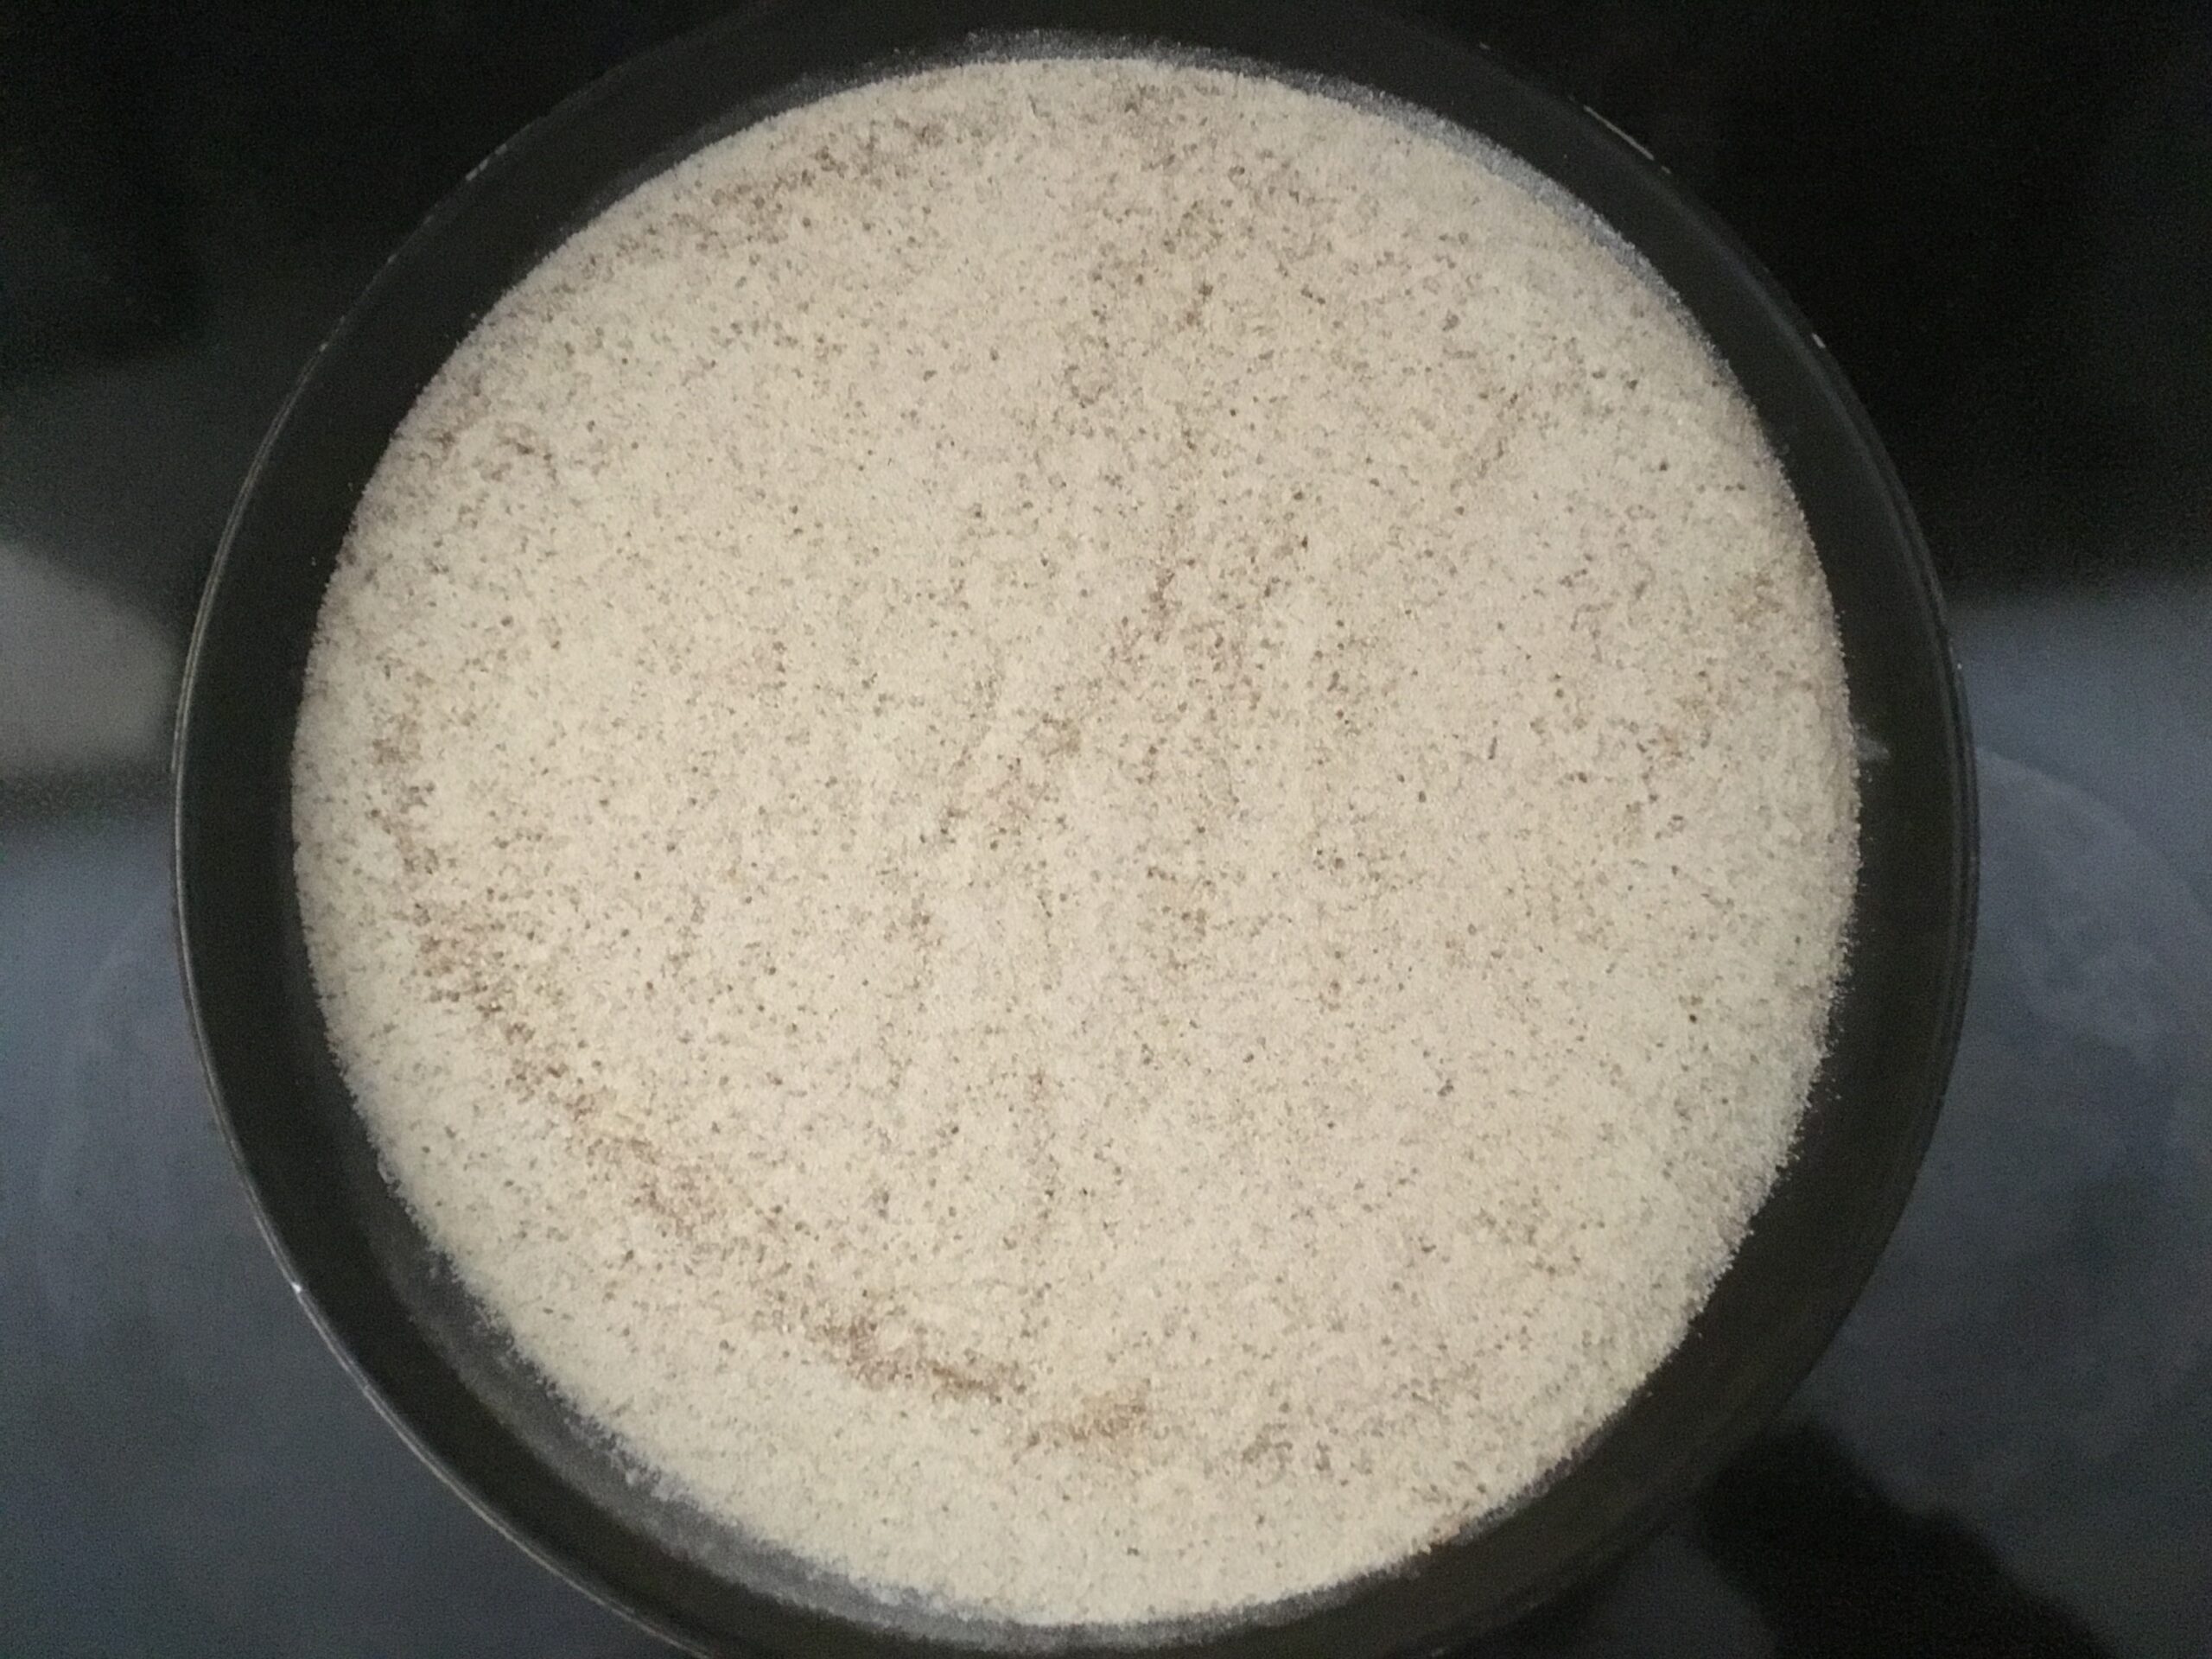
Then I turned the oven on very low (about 100 degrees F / 50 degrees C) and put the pizza pan in there. Left the oven on for about fifteen minutes, and then turned it off and left everything as it was overnight.

The next morning I took a serving’s worth of the stuff (1/3 cup) and made a pot of it for breakfast… and there was not a single lump.

So if you’re having a problem with your dry hot cereal, give this approach a shot. (I imagine it’d work with Cream of Wheat or Cream of Rice too, if that’s what you’re working with.) And if this advice is of help to you,  I’m delighted. Enjoy!


Hits: 0

October 28, 2020
1 FacebookTwitterTumblrEmail
Today's bread
BakingcookingFood

Weird bread

by Diane Duane April 9, 2020

Well, a little weird.

Ireland is on COVID-19 lockdown (and will be for the next couple/few weeks, it looks like), and our next grocery delivery isn’t until nearly the middle of next week, and there’s no telling whether there’ll be baking yeast in it. And yesterday we were down to our next-to-last packet of it. So I sighed and got ready to start employing stopgap measures. 

…And a quick note here: if you’re presently drawing breath to say “But I saw a post about how to make your own…” or “No one is ever really out of yeast, let me tell you how…!” — then please don’t, because there’s no need. I’ve been baking bread casually since my twenties and much more intensively over the last decade (Peter and I simply decided in unison that we’d had it with supermarket bread, and when we found the most dependable recipe imaginable, that was that). At one time or another I’ve built levains and starters from scratch, worked with sourdough starters more than a hundred years old, and have caught and cultured wild yeast on two continents. I’ve even written fiction about yeast, Thoth help me.

Anyway, right this minute—as a busy longtime-work-from-home small-businesswoman who is usually hip-deep in several universes at once while also doing website management—my preference for day-to-day baking is plain old active dry yeast of the Fleischmann’s, Red Star or SAF type. These have been genetically tailored for their work and suit my needs perfectly—being predictable, reliable, and in no need of coddling or extra attention. To be told “All you need to do is mix together some flour and water and let the natural yeasts…!”, etc etc, is for me (at the moment) too much like someone kindly offering to replace my missing Lotus Turbo Esprit with a Trabi. I will cope just fine, but I won’t sing paeans of praise about the alternative strategy. So let’s not go there, yeah? As KP says, “Please and thank you.”

Anyway. What was plain when I got the urge to bake yesterday afternoon was that I was going to have to throw together a preferment, because the thought of actually using up that last packet of yeast was giving me anxiety. Fortunately, when doing the last bake I’d used only 3/4 of the package of yeast, and had set aside the rest for this very purpose. So: 

(Stage 1) Find favorite handled soup cup. Spoon in a tablespoon or two of flour and that yeast, and stir it about well to get combined. Add about a quarter-teaspoon of sugar just to let the yeast know that, momentarily anyway, Life Is Unexpectedly Good. Add a quarter cup of water, or a little more if necessary, to make a thick paste. Then cover the cup (or other vessel) and put this whole business aside somewhere warmish for a couple of hours. (Note that no salt is involved in this procedure until making the actual bread dough, because the salt acts as an inhibitor and the last thing you want to do with the yeast at this point is get it feeling inhibited.)

(Stage 2) In a couple of hours there should be some bubbling going on. Stir the bubbles down, add half a cup of lukewarm water, enough flour to make another thick paste, and another quarter- to half-teaspoon of sugar, because keeping the yeasts extra happy/active at this point is smart. Mix it all up until it’s smooth and put the whole business aside for another couple of hours.

(Stage 3) Repeat the above routine one more time with about twice the ingredients, except for another half-teaspoon of sugar for the yeasts. Then off you go and spend another hour or so doing something else. If the bubbles aren’t pretty active in the bowl or cup or whatever when you get back, give it another hour. 

(Stage 4) And now we finally start actual breadmaking. Measure out about 200g of wholemeal/whole wheat bread flour and 400g of white bread flour. Stir in 10-12 g of salt (usually about a scant tablespoon). Add to this about 2/3 of the starter and about 350ml of water, and knead by hand or in a mixing bowl with a bread hook until it comes together and is smooth and silky-ish. 15 minutes or so by hand: in a mixer, six minutes on low speed and six minutes on high. Add more flour if necessary. Grease or oil a big bowl: put the dough in it and turn it so it’s evenly coated: cover it with plastic wrap and put it somewhere warm and comfy to rise. (I wrap mine up in a foam throw from Ikea. Works great.)

Because of the lowered raising capacity of this yeast—which is still getting up to speed—the rise takes significantly longer than usual. In this case it took something like four hours for the sponge to fill my raising bowl, which was fine, because I was binging The Rise of Phoenixes (while oblivious to the potential pun, don’t mind me, I catch on slow sometimes) and the plotting and backstabbing had seriously sped up from the previous ten episodes’ everybody-is-poisoning-everybody-else-with-slow-poisons-while-snarking-at-them arc.

At this point I hit pause long enough to punch the dough down… or actually, smoosh it down: it was very soft and sloppy. It was also larger than my normal loaf, because I’d had a put a fair amount of extra flour in to stabilize it. It became plain that (a) it was realistically too late to wait through a second rise and bake last night—which meant an overnight “cool rise” out on the sink in the boot room—and (b) if I put it in a regular loaf pan / tin to do that, it would overflow the thing in the middle of the night and make all kinds of mess. So I oiled a three-liter Les Cousances casserole, dumped the sponge in there, covered it with a tea towel, and left it to its own devices for the night. Then I went back to my binging, though not before adding more water and more flour to what was left of the preferment, and just a few pinches more of sugar, because so far at least the yeasts had been behaving Very Well and deserved a treat.

When I got up in the morning and came downstairs, here’s what the casserole looked like:

The risen bread splonge

So it was plain that it was now time to bake, yay! Oven up to 200C, then (when preheated) slid the casserole in and for good measure threw about 150ml of water into the roasting pan at the bottom, to make some steam. Timer set for 50 minutes, and off to do some email and other stuff.

When the timer went off, this is what we wound up with:

The finished loaf

It took another couple of hours for the loaf to cool and stabilize enough to slice safely. It’s a peculiar looking thing, but Peter came along and pronounced it one of the best bakes of this kind ever. (He’s fond of the pot-baking end of things: he’s quite good with the New York Times no-knead recipe.) Having had a couple of slices, I’m inclined to agree. Light: a delicate springy crumb, nice and open in the usual manner of slow-and-cool rises: definitely tasty. The crust’s a bit aggressive, but a night in a bread bag will sort that out.

…So that’s one way to do it. That said: I still want my damn active dry yeast. Meanwhile, the preferment is sitting in the office window, enjoying the warmth from the wood-burning stove, and it’s getting to be time to feed it a little again. (Because an online associate caused me to think of the torture-a-cinnamon-roll concept just now, and a yeast-raised cinnamon roll can be pretty good. We’ll see what tomorrow brings.)

…See, it’s even got a hat! 

The preferment and its hat

And for the moment, that’s all she wrote.

Hits: 746

April 9, 2020
4 FacebookTwitterTumblrEmail
booksFoodFood, restaurants and cookingrecipesWriting

Ludwig Bemelmans’ NY Oyster Bar Shellfish Pan Roast Recipe

by Diane Duane November 25, 2019

I love Ludwig Bemelmans for many reasons that usually have more to do with writing and his challenging career arc than with food (more details here). But this post’s about the food, and a specific favorite recipe.

In his collection of “slice-of-culinary-life” writings La Bonne Table,  Bemelmans passes on a bit of info that many New Yorkers, or visitors to the city, would be glad to have: the original recipe for one version of the famous shellfish pan roast served at Grand Central Terminal’s venerable Oyster Bar and Restaurant (a venue much appreciated by the cats in the Feline Wizardry series, as well as by the series’s author, who ate there as often as she could afford to while living and working in Manhattan).

So here’s the image of the page in La Bonne Table where the recipe/method appears, and a transcription of the method. Bemelmans gives the version for the clam pan roast. For an oyster panroast like the one in the header image, I just substitute canned oysters and enough fish stock or consommé to equal the amount of clam broth Bemelmans quotes. All kinds of shellfish work brilliantly in this (and if you’re actually in the Oyster Bar some time and feel inclined toward this dish, you might like to order the combination one, which has a little bit of everything). I’ve broken up the original block of his text for readability’s sake: may his kindly shade forgive me.


We went to rake for cockles, which are like our clams, except for their globular structure, and they taste like Little Necks. I gave the hostess a recipe, which I found in Grand Central Station’s sea-food bar, where a Greek chef who makes it wrote it down for me and showed me how it’s made. It is one of the best things to eat, simple to make– in fact, nobody can go wrong. It’s a meal in itself, and it costs very little.


You need paprika, chili sauce, sherry wine; also celery salt, Worcestershire sauce, butter according to your taste, and clams. I use cherrystones, which are washed and brushed, and then placed in a deep pan with their own liquid. For each portion of eight, add one pat of butter, a tablespoon of chili sauce, 1/2 teaspoon of Worcestershire sauce, a few drops of lemon juice and 1/2 cup of clam broth. Add a dash of celery salt and paprika.


Stir all this over a low fire for three minutes. Then add four ounces of light cream or heavy cream, according to your taste, and one ounce of sherry wine, and keep stirring. When it comes to the boiling point, pour it over dry toast in individual bowls. Add a pat of butter and a dash of paprika and it is ready to serve.


If you have made too much of it, put the remainder in a container in your refrigerator. It will be as good, warmed up, a week or a month* later. It’s called Clam Pan Roast, if you ever want to order it at Grand Central Station’s Oyster Bar. I understand the recipe originally came from Maine.

(This post originally appeared at the author’s Tumblr, and is reproduced here so people who [correctly] aren’t wild about their ToS as regards data sharing don’t have to go over there.)

*I love his enthusiasm here, but frankly I wouldn’t leave this in the fridge for any month. A few days maybe. (Though it must be said, I couldn’t leave it alone that long anyway. It’s really good.)

Hits: 321

November 25, 2019
1 FacebookTwitterTumblrEmail
Dave Gemmell's Brownies
Absent friendsBakingFood

Dave Gemmell’s Brownies

by Diane Duane November 14, 2017

The recipe isn’t his, but I think of him whenever I make it (which is way too often. Not in terms of thinking about David Gemmell, but in terms of eating the brownies…).

This recipe closely parallels one I always used when Dave would come to visit us in the house on the hill that we were then renting (from Harry Harrison) in Avoca, further east in County Wicklow. Along with the memory of the visits (always delightful: long walks, late nights, a lot of laughing) and the brownies (the record for baking them was four times during one visit) comes the memory of how we “lost” Dave in the bathroom for an hour on one visit, because the household’s complete collection of Calvin & Hobbes books was in there and he’d never come across the characters before. Only the cry of “There are brownies, Dave!” was able to cut the session short.

The recipe is easy and quick to make — the phrase “thrown together” would suit it: just mix everything together, pour into pan, bake —  and produces a result very much like the much-loved “brownies from the box” that the Betty Crocker people used to make in the US. (Maybe they still do? But [assuming they do] I haven’t had more modern ones and don’t know what they’re like these days.)

This recipe is similar to one from AllRecipes.com, but mine is heavier on the cocoa (which is as it should be, if you ask me) and a bit lighter on the flour, producing a brownie a bit on the “squidgy” side. (That’s my preference, and Peter’s. Like yours more cake-y? Add another 1/4 cup of flour to start with and see how that behaves.)  Also: I add conversions to metric  measurements-by-weight for those who like more predictably even results. 

The ingredients:

  • 3 eggs
  • 3/4 cup / 180 ml vegetable oil
  • 1 1/2 cups / 150g sugar
  • 1 tablespoon / 15ml vanilla extract
  • 3/4 cups / 120g flour
  • 1 cup / 60g cocoa
  • 1/2 tsp baking powder
  • 1/4 tsp salt

First butter a 9-inch square baking pan and preheat the oven to 350F / 175 C.

Sift or stir together well the flour and salt…

Measure out the cocoa and baking powder and stir together.

Then combine them with the flour and salt and stir together until the dry mixture has gone a uniform color.

Put the dry ingredients aside for the moment, and measure out the sugar and oil. Beat well together; then add the vanilla and beat that in.

Sugar, oil, vanilla

Add the eggs and beat them in too.

Then dump the dry ingredients into the egg / oil / sugar / vanilla business (or the other way around, if you prefer; it makes absolutely no difference as far as I can tell, I’ve done it both ways, both on purpose and by accident…) and mix mix mix mix mix…

…until it’s all gone pretty and glossy and shiny. It doesn’t have to be absolutely smooth; don’t beat it so much that the gluten in the flour starts to develop. You don’t want that.

Pour the whole business into the baking pan.

And that’s it! Shove it into the oven for 30 minutes and bake.

At the end of half an hour, test it for doneness if you believe in doing such things. (I’ve never bothered. If the brownies rise, they’re done enough for me.)

…And you can see what they look like in the picture at the top. Peter likes sour cream on them, so that’s what we’ve got a pic of. Me, I just cut them up and stuff them in my face.

So go thou and do likewise: and think of Dave Gemmell, perhaps, if you do so. A lovely, dry, funny, talented man. Lost to us too soon, dammit.

Hits: 507

November 14, 2017
7 FacebookTwitterTumblrEmail
Image from the front cover of the Big Nick's menu
FoodNostalgiaRestaurants

The Menu from Big Nick’s

by Diane Duane July 2, 2017

I posted about Big Nick’s a couple of weeks ago on Facebook, and having had some requests from people to see the full menu — here it is.

Looking at it now, I find it damn near impossible to understand how they produced all this food out of the tiny downstairs kitchen there. True, some of the cooking happened upstairs — the grill was on the ground floor, as was the pizza oven. Right there, by the door, was one of the snuggest spots in the place to sit, even in cold weather, and watch the world go by and the clientele come in.

To reprise a bit of that Facebook post:

Sighing as I came across the attached in some old paperwork. Big Nick’s on 77th and Broadway, the place where Peter and I would always wind up after flying into NY and collapsing jetlagged, and then waking up at 11PM or something needing food… This was the place: open 23 hours a day (officially: if you were quiet they would just close around you for that 24th hour and get on with the cleaning…).


They knew Peter and me as “Grey Fur Lady and Retsina Guy” because I had this fake chinchilla coat then; and one of the first times we came in late at night, Peter was delighted to discover that they had retsina — Nick is/was Greek, and all kinds of Greek influences were scattered about the menu. So we polished off 2 liters of retsina in short order (with the staff watching with mild concern until they saw we weren’t going to trash the joint or anything).


Big Nick’s is gone now… alas for the ravages of time: escalating rents and the economic crash killed it. But it was a wonder while it lasted. A genuine neighborhood dive, where there was always endless comfort food and always someone interesting to talk to at 3AM…


…Anyway, the menu. I’ve stored it here at our offsite storage at Box.com for those who’d like to have a look at it. It’s about 6 megabytes: 23 pages long. Enjoy!

(By the way: Big Nick’s Facebook page remains, with many images and memories from customers and friends of the house. And wow, who knew: the window into which a hungry Jon Voight stares in Midnight Cowboy is the front window of Big Nick’s, and Nick himself is there…)

Hits: 26

July 2, 2017
12 FacebookTwitterTumblrEmail
Home screen of Meal-Master, a recipe in Paprika
cookingFoodrecipesSoftware

Journey’s End: Moving From Meal-Master To Paprika

by Diane Duane May 3, 2017

I collect recipes. Lots of them. I used to use the venerable Meal-Master software for this, but over time it’s gotten a bit long in the tooth. As a result I’ve been looking for somewhere better to put those recipes… and now I’ve found it. Details follow.

I cook for pleasure, as well as necessity. When Peter and I got married, on merging our libraries we found that something like 20% of the books in both libraries were cookbooks. The living room bookshelves are full of them, despite numerous attempts to winnow them down over the last few years. The general rule has been, “If nobody’s touched the book in five years, send it to the library.”

Somehow we still have 300 cookbooks in the living room.

it will therefore probably come as a surprise to nobody that my recipe collecting has for a good while also extended into the digital realm. For many years I used Meal-Master, devised by Scott Welliver, which in the ancient days of DOS was the preeminent software for people who collected recipes. It was, by our present standard, clunky and idiosyncratic, but it worked (and had huge capacity…64,000 recipes+). And there were lots and lots of scattered treasure troves of recipes all over the web, in many languages, waiting to be found and saved.

Episoft Systems, Welliver’s (now apparently defunct) company responsible for the software, kept updating it for many years until finally, with version 8.05 (in 1999), the Meal-Master software was declared copyrighted freeware and turned loose into the wild. As operating systems and platforms changed, Meal-Master became less and less useful and / or usable, and a lot of people started looking for software that would accept imports from MM’s old-school database structure and leave the recipes looking at least something like they had to start with.

Until I got to the point where I stopped actively collecting Meal-Master-format recipes, I managed to gather about 40,000 of them (and I get a sense from having seen other Meal-Master enthusiasts’ posts that my collection was actually a little on the small side). A few years ago, it occurred to me that I really needed to get active about trying to find some software to export them to, before everything moved on so far that the import could no longer be done. So I exported all my stored recipes into a series of files in the MM export format (with the .MMF suffix) and started looking for a new recipe storage candidate.

The problem was that a lot of the software I found available at that point didn’t import the Meal-Master structure particularly well or flexibly.  Routinely, in the process of the import, something froze or crashed it — usually because of one or another of the workarounds that MM fans had constructed over time to get around some of the program’s more rigid features. As a result, the imports I attempted at that point were mostly disastrous, and in frustration I put the project aside for a while. I was still twitching, though, at the thought of all those recipes lying around in a format that did me no good anymore — Windows 7 flatly refused to run Meal Master, and while Windows XP ran it all right, XP was rapidly approaching its end-of-life. I’d gone to a lot of trouble to pull all those recipes together — many in foreign languages, many from online sources that were long gone — and the situation niggled at me constantly.

Recently, though, a change in local circumstances pushed the issue to the fore again. Peter and I had spent some time, over the last year or so, discussing the fact that our EuropeanCuisines.com food-hobbyist website hadn’t had a serious makeover in several years. Additionally, we’ve been considering a change in direction for the site:  more food blogging, and content pointed more toward those interested in doing something we have a fair amount of experience in — traveling to European destinations, renting small holiday places there, and cooking in them.

With that in mind, we were also looking at a complete restructure of our recipe section, with an eye to making it more structured and easy to find things in. Additionally, a whole lot of those 40,000 Meal-Master recipes of mine are European, and I wanted a way to restructure them for use on the EC.com website. Specifically I wanted a way to make them easy for people to download with a tap or click — and most especially, I wanted to make them easy for people to get at on mobile devices. After all, when you’re a tourist standing in the middle of a busy grocery in Munich or Bratislava or Oslo, you don’t want to have to be tearing your hair over the thought of that terrific recipe that you saw on whatever-that-website-was and not be able to get at it quickly, so that you can buy the ingredients, go to your holiday flat, and cook the damn thing.

So. With all this on my mind, last week I started searching again for something that would both import my Meal-Master recipes smoothly, and (eventually) work well in cooperation with the website. And what the hell? I found it. It’s Paprika.

(BTW, as a sometimes-food blogger I need to state here clearly for the record — and the usual legal reasons — that the only money to change hands here was me giving them my money. Not the other way around.)

Paprika has been around for a while, and that it took me this long to find it is probably just a function of my not having looked in the right places at the right times — or, alternately, that when I was looking most actively, I did not yet have my iPad. Which is where I found Paprika, in its app form. The software exists in both iOS and Android forms, and as a Windows desktop version. There is also a Mac version, which, not having a Mac, I haven’t tested (and there’s a Kindle Fire version too, which surprised me a bit). But the iOS version for the iPad is, not to put too fine a point on it, as slick as snot.

It is beautiful and glossy and well-set up, and does everything I could’ve hoped for and a great deal more. It is friendly to all the major online food and recipe sources; it’s compatible with a lot of the bigger food blogging sites, and also with the hRecipe microformat. (Which will matter when I start wrangling the converted recipes into the main EC.com website.) And best of all, from my point of view, one of the numerous recipe export format types it accepts is the .MMF file export type of Meal-Master.

When I saw this, my heart began to sing a little song — but I still needed to run some tests: I’d been disappointed too often before. I was willing enough, though, to venture €4.99 on the app for the iPad. And frankly that was one of the best just-shy-of-a-fivers I’ve ever laid down. Half an hour of working with the app told me that I wanted the desktop version of the program right now, whether it imported MMF recipes well or not.  I went immediately to their website and bought the Windows desktop version.

I should say here that one thing I attempted with the iOS version before purchasing the Windows desktop program didn’t work terribly well. I very much wanted to test the app’s import ability on a small .mmf file that I had handy. But once I’d  moved a copy of the .MMF file up into the Paprika app’s cloud, the app nonetheless seemed to have trouble seeing it. However, I was already so impressed by the way the app looked and handled that at that point I didn’t much care. I was more than willing to handle the Meal-Master imports from the desktop end. (Please note also that I’m not entirely certain that the failure to “see” the file in the cloud on the Pad didn’t have something to do with our famously dodgy rural / cellular broadband, which starts cutting up cranky when it rains, ffs. In Ireland this is not an advantage.)

As soon as I opened the Windows desktop version of the app, however, my hopes were raised again, as the import requirements looked extremely simple. It took about three mouse clicks and five minutes for Paprika to import a test .MMF file of 2000 recipes. They imported with all their categories intact — which had been one of my major concerns; tagging is everything in a recipe database — and perfectly formatted. None of them had any photos associated with them, obviously — Meal-Master had never been capable of anything of the kind — but Paprika will allow you to add images to recipes as you like. Having checked the imported recipes over in the big desktop machine, I sync’d them to Paprika’s cloud, and then sync’d the iPad to them. The sync went without any problems, and everything crossed over perfectly. (I have yet to do this for my HTC One as well, but I still have to get the Android version of the app for that. Later today perhaps.)

So I happily got to work on importing the rest of the recipes. It took me about an hour to pull in the 40,000-odd of them. At the end of the hour, I was left with a big, fat, beautiful-looking recipe collection that was ready for the next stage: reorganization. No surprise that it was going to need some of that, as some of the Meal-Master categories were a bit idiosyncratic, or just plain silly. And numerous categories needed to be spelled differently or rationalized for one preferred spelling (for example, I had recipes with about six different formats and spellings of the term “chile heads” for recipes that go back to the fabled Chile-Heads mailing list / newsgroup). Others needed to be eliminated entirely and their entries moved into other categories. But that was just going to be some organizational work that could be done in bits and pieces over time. At the end of that hour, I was one very happy cook.

One of the great strengths of Paprika is the way it syncs across devices. It’ll be a while yet before I sync my main collection up to the iPad and my phone, as I want to make sure that I’ve first thrown out any duplicates that may have crossed over, and finish the category reorganization. Then begins a slower project of curation, as one thing Peter and I want to do for our EuropeanCuisines.com visitors is make Paprika-friendly recipe collections available for easy download. That’s a project for future months, as we proceed with EC.com’s reorganization.

In the meantime, though, I can now with a light heart go about the house deleting the various installations of Meal-Master that had been tucked away in the guts of various of the machines, waiting for the day when I would finally find a way to make those squirreled-away recipes both available to other people and safe in a new format. My long search is finally over. (And now I’m also free to range around the web collecting more Meal-Master recipes, and making them both safe and available to others, before their format becomes lost entirely in the mists of time.)

So, to sum up: if you are a longtime Meal-Master user, or know one, I unreservedly commend Paprika to you as a way to go forward.

And now, if you’ll excuse me, I have to go kill some obsolete categories. 🙂

Hits: 690

May 3, 2017
14 FacebookTwitterTumblrEmail
Mycroft's Delight
BakingFoodrecipesSherlock Holmes

Mycroft’s Delight: the cake

by Diane Duane January 28, 2017

There’s a widespread headcanon among the writers of Sherlock fanfic (and others in the fandom) that Mycroft Holmes — possibly as an associated phenomenon of an old or longstanding weight problem — is very fond of cake. For some reason, chocolate cake is the favored candidate in these theories. So in 2012 or so, when without warning I  turned up the notes I’d made on this cake when I ran across it in Switzerland in the very late 1990s, my thoughts turned to Mycroft, and the idea that he’d have really liked this one.

I got busy recreating the cake as accurately as I could. In the neighborhood of Sedrun — the tiny town near the Oberalppass where I ran into it — it was referred to simply as an Urner brenntweintorte, suggesting that its ancestor-cake originally came from over the border. (Andermatt is in Canton Uri: Sedrun is in the Graubunden.) I had no luck in getting the recipe from the little confiserie where it was one of the star items, and with reason: I think they suspected me of being a spy for another bakery.

But over time I’ve learned how to pretty accurately analyze what I’m eating, and my notes from my two visits to the little confiserie were pretty detailed… so I don’t have too many qualms about sharing it here. (It’s kind of overdue for that, anyway: it’s been up in a couple of different versions on Tumblr since 2012, but not at my main blog until now.)

I’d say it’s a cake worthy of a Mycroft’s attention. It’s nowhere near as pretty as the original, for which apologies. (I can still see that lovely cake in my mind’s eye. The glaze on top was smooth enough to skate on, and their version had six significantly skinnier layers. It was a beautiful thing.)

So here’s the recipe. I add one caveat in passing. Others who’ve baked the cake have sometimes found the initial batter overly thick / dry. There’s a more extensive note about this here, but the problem seems to have been something to do with egg size. In  particular, Irish eggs run larger than US ones: so get the biggest “extra large” eggs you can find.)


The recipe:

Double Chocolate Courvoisier Torte with Brandied Buttercream Filling and Two Icings (Brandied Nutella Frosting and Cream Cheese & White Chocolate Ganache Glaze) ...otherwise known as Mycroft’s Delight

Note please: this cake will take the guts of an afternoon to make. Don’t attempt it as a last-minute thing. In particular, there’s no harm in baking the layers, soaking them in the syrup, and then refrigerating them overnight – you can then pick up where you left off with the fillings and icings.

Ingredients come first: directions after.

Also note: this recipe is set up for three 8-inch layers. You can, of course, if you like, do what I did here – bake two 9-inch layers in a springform, then cut them in half crossways and stack them.

Ingredients:

For the cake proper:

  • 6 large eggs
  • 1 cup superfine granulated sugar or fine caster sugar
  • 1 teaspoon vanilla extract or essence
  • 4 ounces unsweetened baking chocolate, melted and slightly cooled
  • ½ cup good quality cocoa
  • 1 cup flour, sifted
  • ½ teaspoon baking powder
  • ½ teaspoon powdered cinnamon
  • ¼ teaspoon mace
  • ½ teaspoon orange extract and 1 teaspoon orange zest, crushed as smooth as possible in a mortar (or if you’re lucky enough to have access to it, a half teaspoon of orange zest puree)
  • A few grinds of fresh nutmeg (about 1/8 teaspoon if we’re being picky about it)

For the soaking syrup:

  • ¼ cup sugar
  • 1/3 cup water
  • 2 tablespoons Courvoisier cognac (alternately, you can substitute a good brandy: Hennessey, etc)

For the buttercream frosting base / filling:

  • 3 cups confectioners’ sugar / icing sugar
  • 2/3 cup unsalted butter
  • 2 large egg yolks
  • 4 tablespoons Courvoisier or brandy (whichever you used above)

(A note in passing: you will be dividing this in half. Half goes in between the layers; the other half gets Nutella mixed into it and goes on the sides of the cake.)

For the brandied Nutella side-frosting:

  • 4 ounces Nutella, warmed
  • 2 ounces melted milk or dark chocolate
  • 1 tablespoon Courvoisier or brandy, as above
  • 2 teaspoons cocoa powder

For the ganache / cream cheese glaze:

  • 1 recipe white chocolate ganache (see below)
  • 3-4 ounces Philadelphia or similar cream cheese (plain Neufchatel will also work)

The white chocolate ganache proper:

  • 4 ounces premium-quality white chocolate, finely chopped
  • 1/3 cup heavy cream
  • ¾ tablespoon unsalted butter, at room temperature and cut into 3 pieces

…So let’s take this one thing at a time.

First of all, make the cake layers.

Butter and flour three 8-inch cake pans/tins, even if they’re nonstick. (To prevent the cake acquiring pale patches during baking, you can mix a teaspoon of cocoa with each couple of teaspoons of the flour you use to prep the pans.)

In a mixer with the whisk attachment, beat together the eggs, sugar, vanilla, orange extract and orange zest, until this business is light and fluffy – usually ten to twenty minutes. At the end of this process, slow the speed down and add the dry spices.

When these have been combined, stop the mixer and alternately fold in by hand the combined, remaining dry ingredients and the melted chocolate.

Preheat the oven to 350F / 175C. Bake the layers for about fifteen minutes until done (check for doneness with a skewer if you have any doubts). Remove the layers from the oven and allow to cool for at least 15-20 minutes: then bang the pans on the worktop to loosen things up, and turn the layers out onto a rack to cool completely (usually 30-45 minutes).

When completely cool, use a skewer to poke twenty or so little holes in the top of each layer. Do your best not to go all the way through the bottom of the layer. Put the layers on a cookie sheet or other waterproof surface to prepare for the next stage.

Now make the soaking syrup:

Boil the sugar and water together for five minutes. Remove from heat and allow to cool. When cool, stir in the cognac or brandy (whichever you used) and set aside until the layers are ready.

When they are, pour the syrup carefully over the tops of the layers so that it soaks in through the holes. Use a pastry brush to paint any excess syrup evenly over the tops of the cake layers.

Now set the layers aside while you work on the filling and icings.

Make the buttercream filling:

In the mixer bowl, using the “normal” beater or paddle, combine the butter, icing sugar, egg yolks and brandy, and beat like crazy for about ten minutes until perfectly smooth (beat longer if you need to).

Scoop out half the buttercream and use it to “butter” the bottom and middle layers of the cake: then stack them. Press down evenly and gently on them (I usually use a cookie sheet for this) to even out the layers and the filling.

Now make the Nutella-and-buttercream side frosting

Add the cocoa, melted chocolate, brandy and Nutella to the remaining buttercream mixture, and beat very well. Since the goal is for this mixture to stick to the sides of the cake and not run straight off onto the serving plate, check the texture and beat in some extra cocoa if necessary to thicken the frosting until it’s tractable.

Smooth the sides of the cake with the flat of a knife if necessary to deal with any buttercream that’s oozed out the sides. Use the Nutella frosting mixture to coat the sides of the cake. Also frost the upper edge and a little ways up onto the top surface of the cake with the Nutella mixture if you can. If you have enough to frost the whole top without the side frosting being too thin, that’s great: it’ll look better.

Finally, make the white chocolate ganache and cream cheese glaze

Prepare a large bowl with some cold water and ice cubes in it. Then break up the white chocolate into as many pieces as possible, and put them in a heatproof bowl that will fit comfortably in the bigger bowl that contains the cold water and the ice cubes.

Bring the heavy cream to a boil. Then pour it over the white chocolate. Working with a whisk or spatula, gently stir the chocolate and cream together until the white chocolate is completely melted. When the ganache is smooth, stir in the butter.

Now cool the ganache by putting the its bowl into the larger one and stirring constantly so that it doesn’t harden. After about five minutes of this, start beating in the cream cheese by forkfuls. You’ll probably need to whisk it at the end of this process to get rid of the last few lumps. Finally, add a tablespoon or so of brandy to make it easier to work with. (You can correct the thickness of the ganache back and forth by beating in more cream cheese or a little more brandy until it reaches the consistency you’re after.) Spread and/or drizzle this mixture over the top of the cake until it’s evenly covered.

Once all this craziness is finished, you may want to refrigerate the cake for half an hour to stabilize everything a little.

Serve in thin slices. A shot of brandy on the side (to cut the incredible richness) and a double espresso wouldn’t hurt, either.

Enjoy!

And by the way: there’s fanfic to go with the cake.

Hits: 73

January 28, 2017
4 FacebookTwitterTumblrEmail
Cheese straws from Mrs. De Salis's 1903 recipe
BakingcookingFoodHome life

The Cheese Straw Recipe

by Diane Duane December 28, 2016

In 2010 or thereabouts, a tiny little cookbook came to us via Peter’s Mum and immediately became a household favorite.

It was published in 1903 for what was the first generation of middle-to-upper class British housewives who couldn’t afford to hire kitchen staff, but still wanted to serve food suitable to a high-class household. These cooks were also beginning to come into possession of the first generation of true labor-saving devices — the initial gas and electric ranges, the first refrigerators — and were looking for recipes to take advantage of them. So along came Harriet DeSalis, and with this group of readers in mind, wrote Savouries A La Mode.

The cookbook was a huge hit — no surprise, when the recipes worked so well. Dipping into it, one finds recipes that make the mouth water and make the chronic cook (at least this one) itch to get into the kitchen and see how they turn out.  It became the first of a series that went on well into the early part of the 20th century and sold hundreds of thousands of copies over numerous editions.

They’re all in public domain now, those original editions of Savouries and its sequels, which is what moved me to scan that first book and make it available over here at EuropeanCuisines.com. But the other reason I scanned it was so I don’t have to hunt down the cookbook proper, when the urge strikes, but can just load the PDF onto the iPad and work from that in the kitchen.

The other evening I was feeling like having some kind of snack, and it occurred to me to pull out the DeSalis and see if we had the ingredients for anything that looked nice. Paging through it, I ran into the Cheese Straws recipe, and the bells went off and I salivated on cue.

Here’s the recipe.

“Take two ounces of flour, and mix with it a little salt and a cayenne-spoonful of red pepper. Then take three ounces of Parmesan cheese: grate it. Rub the cheese and two ounces of butter well into the flour, then mix all these ingredients, together with the yolk of an egg, into a smooth stiff paste. Roll the paste out into a strip one-eighth of an inch in thickness and five inches wide, which is to be the length of the cheese straws. Cut this strip into strips one-eighth of an inch wide, so that they will be five inches long and one-eighth of an inch in thickness. With the remainder of the paste, and with two round cutters, cut little rings of paste. Put the cheese straws and rings on a baking sheet and put them into a hot oven for ten minutes, the heat rising to 246 degrees. For serving, put the cheese straws through the ring like a bundle of sticks.”

So. My first thought: God that looks fiddly. But never mind. Also: Forget about the little rings, this isn’t going to be a dinner party. The second (okay, maybe the third) thought: We don’t have any Parmesan: only Cheddar.

…Like I’ve ever let that stop me. (An old allergy put me off Parmesan early, and these days, though no longer allergic, I avoid it.) So I went forward with the same amount of Cheddar, knowing that the mixture would be a little wetter due to the Cheddar’s extra moisture, and I’d need to compensate with slightly longer baking.

What I learned in the process of making these:

  • The whole thing can be done in the Cuisinart / Magimix, which simplifies matters considerably. I grated the cheese separately on a microplane grater, then buzzed the flour/cayenne mixture together using the steel blade in the small bowl of the Cuisinart; then dumped its contents into the big bowl, whizzed everything together with the cheese, added the two egg yolks and pulsed until the whole business gathered together. If you’re going this route, don’t overdo the pulsing, as you don’t want the mixture to toughen up.
  • 1 egg yolk wasn’t enough for our local flour to cohere: I wound up using two.
  • I’d never heard of a “cayenne spoon” until I saw this recipe. There are pictures of them at Google (click here), and you know what? They’re all too small for me. We like our cayenne around here. I put in a teaspoonful. (Peter noted that you could probably get away with using chili powder if you were of a sensitive disposition.)
  • 1/8 inch is indeed very fiddly. I wound up cutting my straws / sticks to more like 1/6 or sometimes 1/4 inch, and that worked out fine.
  • I put baking parchment under these to make sure they wouldn’t stick. It turns out to be a good idea, as melting butter bubbles out of them at the edges when they’re baking.
  • Ten minutes was way too long a baking time, and the oven temperature takes some fiddling with as well. I have no idea what Mrs. De S. means by “rising to…”. I wound up putting these in the oven at 170 C / 350F for about 5 to 7 minutes (as our oven retains heat during multiple bakes, so they needed less time as I went on). Your mileage will almost certainly vary. Experiment with a small batch to see how you get on.

…And that’s all there is to it. The straws were incredibly delicate and buttery due to the very short pastry — but the cheese is great in them and the cayenne gives them a terrific kick. The whole bake lasted through about twenty minutes of the first Hobbit movie. Peter tells me they work as well with beer as mine did with that red wine.

Try them and see how they work out for you. And mind your baking times, as the Secretary and I will disavow any knowledge of your actions if the sneaky little creatures burn to a crisp between one minute and the next. (Like my first batch did.) Do a small batch first and watch them like a hawk.

Hits: 71

December 28, 2016
5 FacebookTwitterTumblrEmail
cookingFoodHome liferecipes

Peter’s Dhal

by Diane Duane September 13, 2016

A bunch of you were asking for his recipe for this: so here it is. Believe it or not, I didn’t know he could do this kind of thing when I married him. Hidden talents…!

The problem with informal food photography like this, of course, is that (like so many other one pot dishes of a peasant-y nature) it tends to just look kind of beige. (Or, as Himself Upstairs puts it, “Like savory mud.”) I couldn’t be bothered to go get parsley or whatever for it. Trust me: it was extremely good. Below, Peter frames it as a possible side dish, but we ate it happily as a main course, believe me.

(PS: sorry for the slightly blurry photo. I was more intent on getting the image’s subject inside me than on the focus…)

Peter says:

Improvised store-cupboard dhal, for when you can’t be bothered with a cookbook.


1 cup vegetable oil

2 large onions, chopped fine

4-6 cloves garlic, chopped fine

1 tbsp. each of ground cumin, ground coriander

½ tbsp. each of ground turmeric, ground chilli, ground black pepper

½ tbsp. each of mild curry powder, hot curry powder

1 tsp. salt

2 cups red lentils

½ cup green lentils

½ cup brown lentils

Boiling water

1 tbsp. lemon juice


Heat the oil, fry the onions & garlic until soft and glossy. Add all the spices. Fry for a few minutes. Add all the lentils*. Stir everything together. Add enough boiling water to cover by ½ an inch. Stir everything together, reduce heat, cover and simmer for about ½ an hour. Check occasionally. Add more water if required a bit at a time, then stir. (Don’t overdo it. Preferred texture is like stew, not soup.) Add lemon juice, stir, and serve with rice and/or flatbreads.


Makes a good side with shop-bought tandoori chicken.


*Alternately add lightly fried chicken or lamb cubes and 2 x cans of chopped tomatoes along with the lentils. Reduce water accordingly. Simmer for ¾ hour, serve when meat is cooked, and call it a dhansak. (It isn’t really. But it tastes good anyway.)

Hits: 50

September 13, 2016
6 FacebookTwitterTumblrEmail
A slice of gingerbread
BakingFood

The Owl Springs Gingerbread Recipe

by Diane Duane August 9, 2016

This recipe is kind of a favorite around here, so this morning I thought I’d put a copy of it on the blog for others who might like it. (Though the plan regarding “this morning” got a bit derailed by the video card software in the desktop machine suddenly deciding it didn’t want to acknowledge the monitor’s screen resolution. Anyway, it seems to have sorted itself out after a driver reinstall… I hope.)

Anyway. Gingerbread!

The original recipe came from this page at southernfood.about.com.  The basic recipe was okay, but always struck me as too sweet, and over time it got tweaked. Now we’ve got a version of it that Peter and I both really like, so you might want to take a look at this and see if you’d like it too.

There are two ways to make it – with butter and without. The with-butter version produces a more cake-y result. The without-butter one is squidgier. Both versions seriously benefit from being served with sour cream, crème fraiche, or plain unsweetened whipped cream.

The ingredients:

  • 1 cup all purpose flour
  • 1 rounded teaspoon baking soda (It seems wise to specify how full that teaspoon is, as measuring-spoon amounts in Irish cookbooks are routinely heaped / rounded rather than leveled, and those of you who’ve seen recipes here before might be wondering.)
  • ¼ tsp salt
  • 1 teaspoon cinnamon (Less than in the original. More distracts from the ginger.)
  • 3 teaspoons ground ginger (Because the original single teaspoon produces a genuinely underwhelming result.)
  • 4 tablespoons sugar (Brown sugar is preferable, but white is OK.)
  • Optional: 1-2 teaspoons espresso powder (i.e. Azera or similar)
  • 1 egg, lightly beaten (It’s going to go all sludgy when you mix it with the buttermilk. Don’t panic.)
  • ½ cup dark molasses or treacle (Blackstrap molasses if you can get it. On this side of the water, plain old Lyons Treacle from the can works fine.)
  • ½ cup buttermilk (You can do this recipe with milk, but it’s not as good. If you can’t get buttermilk, use the same amount of regular milk and substitute 1 teaspoon of baking powder for the soda.)
  • ¼ cup melted butter (Include it or omit it as you please. The first time you do the recipe, probably it’s better to do it with the butter.)

…So. First thing: butter and flour whatever you’re going to bake this in. (I usually use a springform pan.) Preheat the oven to 350F / 175C.

Mix the dry ingredients together. You can sift them together if you like, but in my experience it doesn’t make a big difference. Re that “optional” espresso powder: I strongly recommend it. It really makes a difference to the flavor of the gingerbread, though magically it doesn’t jump out at you as coffee-ish. Think of it as a flavor enhancer.

As regards the liquid ingredients: Though we take buttermilk for granted in Ireland, it’s so weirdly regional in the US and Canada that it makes sense to offer an alternative strategy.  If you’re feeling enthusiastic about the buttermilk but have trouble finding it locally, we’ve got a page over at EuropeanCuisines.com on how to make buttermilk from scratch, and also one on how to make (and keep) fake buttermilk.  Check those out and exploit whichever method you prefer.

In a small bowl, beat the egg. Add the buttermilk. Beat some more. The egg will go sludgy because of the acid in the buttermilk. Don’t be bothered. Add the molasses and the butter and beat some more. The sludginess will recede a bit.

Add the liquid mixture to the dry ingredients. Stir them together, then beat them a bit more, just until the batter is fairly smooth. Pour it into the buttered and floured tin. Fire that directly into the oven (because when you’re baking something raised solely with baking soda, the raising period is limited and begins as soon as liquid hits the mixture).

Bake for 30 minutes at 350F / 175C. When baked, put the pan on a rack and let it cool thoroughly before removing the gingerbread. (Just as a side note: the butter-free version of this tends to drop a little in the middle after baking. This is normal.)

Serve plain or with a nice dollop of whipped cream / crème fraiche / sour cream.

…And now to go discuss matters with the video card again. AMD, gonif! (I swear, I’m changing over to an Nvidia card as soon as it’s practicable…)

Hits: 25

August 9, 2016
3 FacebookTwitterTumblrEmail
FoodHome lifeMediaObscure interestsOnline life

“For Science!”: Eating Doritos Roulette

by Diane Duane August 2, 2015

(First of all: is there some specific reason they used the Classic Star Trek font [or one very like it] for the warning panel on the bag? Is it somehow seen as “futuristic” to be afraid of chili heat? Just asking. But if so, I weep for my species.)

… It’s funny the things that can get your attention sometimes. At some point in the last couple of weeks, this post regarding someone who’d had a bad reaction to Doritos Roulette made its way across my Tumblr dashboard. I looked at the post and blinked a couple of times, said a couple of things under my breath about some of the more insensitive comments, and then went on with whatever I’d been doing.

But then, over the week that followed, it happened that I saw a couple of ads on TV for these chips, and I thought to myself, “Okay, now I’m curious. I’m a white girl; let’s see how I do with these.”

As background information for this experiment, it needs to be stated that we have two different kinds of “hot food people” in this house. As a New Yorker raised in the Metropolitan Area during a time when hot and spicy food was (for a suburban girl) harder to lay hands on for a good while, I got rapidly clued in in the 1970s, and developed a fair tolerance for heat in my food. Not huge, but fair. Six years in LA much improved this situation.

The other participant in this study is someone who, for a Belfast boy, stands out in having had a taste for the hot stuff that long precedes its now-widespread popularity in British mainstream culture. This is a man who has a whole shelf of hot sauces, and whose idea of what’s nice to put into a newly opened bag of crisps is one or more of the following:

image

(The two on the right are typical favorites that came from Oriental Emporium in Dublin until they stopped carrying it a few months back. The one on the left is something we picked up in passing in Austria in June, and originates apparently from a native Austrian company; causing Peter to remark, “Yet another reason to go back to Bregenz.”)

So your baseline here is two people one of whom has a significant tolerance for chili heat*, and one who has a mild tolerance but at the very least can be guaranteed not to faint dead away from shock at the taste of something spicy.

So, onward to the experiment.

We dumped about the third of the bag out onto a plate, as you see above. We were interested in doing visual examination first to see if there was any way to tell the doctored chips from the non-doctored ones. The company has been careful: visually, they are indistinguishable. Our guess is that all the chips are originally identical until a given number of them are separated out into a separate assembly line to be sprayed with chili extract.

PR stories about these chips indicate (per the company’s advisory) that the doctored ones have been sprayed with chili extract approaching the strength of a (mild) Scotch Bonnet / habanero chili at around 73,000 to 75,000 Scoville units (the not-mild ones can be double this, and they vary without warning). This is not exactly an entry-level strength. The average Jalapeño pepper clocks in at somewhere between 4000 and 7000 Scoville. To that end, I made sure that there was a tub of crème fraîche handy. This was for me and not for Peter. Habaneros generally are at the far upper end of my heat-tolerance ability, and I wanted to make sure that I had a fire extinguisher ready if it was needed. (As for Peter, even he has his limits. We have some Moruga Scorpions in the freezer in the moment, and he’s spent the last couple of months wondering what he can use them on/in that they won’t ruin. Too much heat is simply a waste of time.)

We proceeded by breaking chips in half and nibbling until we found hot ones, then exchanging them to see how hot they were—admittedly, a very subjective business—and how their heat persisted and built. There are some chili heats, after all, that flare quickly and die away quickly (like Tabasco), whereas others linger in your mouth and on your lips and tongue, and build—a cumulative heat. The hot chips in the Roulette bag have a cumulative heat, though not one that even by my standards would be tremendously strong. Both of us have over our time here had far hotter curries or chilies, and have drunk a lot of wine or eaten a lot of raita to to wrestle them down, but otherwise have suffered no ill effects.

Two interesting things immediately became apparent: (a) The heat is not consistent across the hot chips. Some, probably due to quirks in the manufacturing process, have been dosed harder than others. (b) There is some transference of the hot chili flavoring to non-hot chips. Peter and I both felt sure we were able to detect a difference in flavor between the ones that had been purposefully dosed with chili extract and the ones that had not. (Flavor is always an issue for us both in situations like this: we both like the heat, and sometimes both like it quite strong, but neither of us has any time for the witless application of pure extract-based heat without flavor.)  Some of you will recall the old packaged-food warning, “Contents may have settled during transport”. My guess is that during the production and shipping process for these chips, there’s a lot of rubbing and jostling, and some of the hot coating on the dosed chips rubs off and gets on some of the others.

With this in mind, it does bear pointing out that there was a fair amount of the usual colored dust in the bag that one gets used to seeing in brightly colored junk foods. One wants to consider how easy it would be to inhale some of that dust… and what the results might be if the stuff got down into your bronchi. Even when just chewing and swallowing the hot chips in the normal way, both of us were caught at the back of our throats by the heat of the chili extract, and there was some discreet coughing from each of us (significantly more from me) until we swallowed once or twice. That dust struck me as an immediate possible cause for the problems experienced by the unfortunate girl in the Sun news story. And seriously—mock an asthmatic for having trouble with that? And for possibly having a reaction on top of it, secondary to inhaled dust contaminated with straight chili extract? “Judge not lest ye too be judged.”

Anyway. Our conclusions: if you are a person comfortable with fairly spicy food, you can safely eat these, but you may still be surprised — so take precautions. If you are not able to handle capsaicin-based heat, you might want to steer clear of these: the hot chips may cause you trouble.

Hope this helps anyone who might have had questions. Me, I’m going to finish off my share of the bag now and leave the rest for Peter. But I’ve got the crème fraîche ready…

*It’s interesting to note in passing here that while Peter has very significant tolerance for chili heat, he has almost no tolerance for (or patience with)  the upward-rising horseradish-style heat of the kind you get with wasabi, hot English or Chinese mustard, or a good Jewish horseradish. When ingesting such, it is my pleasure to sit there and happily enjoy the sensation of my sinuses getting blasted clear while he runs around flailing and shrieking. Okay, maybe not shrieking so much. But flailing, yeah; and he turns all pink.

Save

Hits: 107

August 2, 2015
2 FacebookTwitterTumblrEmail
Newer Posts
Older Posts

The blogger


40 years in print, 50+ novels, assorted TV/movies, NYT Bestseller List a few times, blah blah blah. Young Wizards series, 1983-2020 and beyond; Middle Kingdoms series, 1979-2019. And now, also: Proud past Guest of Honour at Dublin2019, the World Science Fiction Convention in Dublin, Ireland.

Archive

On sale at Ebooks Direct

Recent comments

  • Women in SF&F Month: Diane Duane | Fantasy Cafe on From the (theoretically) forthcoming CUISINES AND FOODS OF THE MIDDLE KINGDOMS: Whitefruit
  • At the Young Wizards end of things: an update report - Out of Ambit on From the Young Wizards universe: an update
  • From the Young Wizards universe: an update - Out of Ambit on Changes coming at YoungWizards.com: your opinion(s) solicited
  • Review: <em>A Wizard Alone</em> by Diane Duane – Disability in Kidlit on Young Wizards New Millennium Editions: a little more info
  • Top Ten Tuesday ~ Books that Make Me Hungry – BookWyrm Knits on Seed cake: a recipe

Now at Ebooks Direct


Feel like buying the writer a coffee?


That's kind of you! Just click here.

Popular Posts

  • 1

    What part of the cow does corned beef come from

    March 16, 2006
  • 2

    Lahey No-Knead Bread recipe: one baker’s experiences so far

    December 9, 2006
  • 3

    Seed cake: a recipe

    January 1, 2013
  • 4

    Young Wizards New Millennium Editions: a little more info

    May 30, 2011
  • 5

    The Affair of the Black Armbands (or, The Death of Sherlock Holmes and How The World Took It)

    January 17, 2012

Associated websites


...all divisions of the
Owl Springs Partnership

Previously on “Out Of Ambit”…

Borges and the Peryton

The Martini Rant

At the Young Wizards end of things: an...

2021 Hugo nomination eligibility: the Young Wizards series

Maluns

Owl Be Home For Christmas

Vintage Scots Christmas recipes: “Good Fare Christmas”

  • Facebook
  • Twitter
  • Instagram
  • Flickr
  • Tumblr
  • RSS
Footer Logo

(c) 2020 Diane Duane | all rights reserved | WP theme: PenciDesign's "Soledad"


Back To Top